New
Creative idea
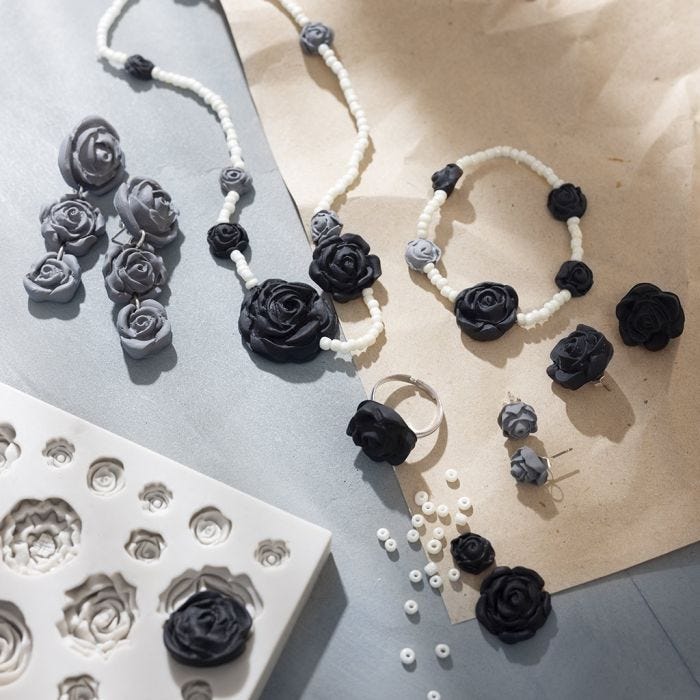
Rose smykker i smykkeler
#v16993
Create this gorgeous rose jewellery set. The roses are made from jewellery clay that is shaped in silicone moulds and baked in the oven. It’s super easy – and the result is a handmade necklace, bracelet, earrings and ring.
#v16993
How to do it
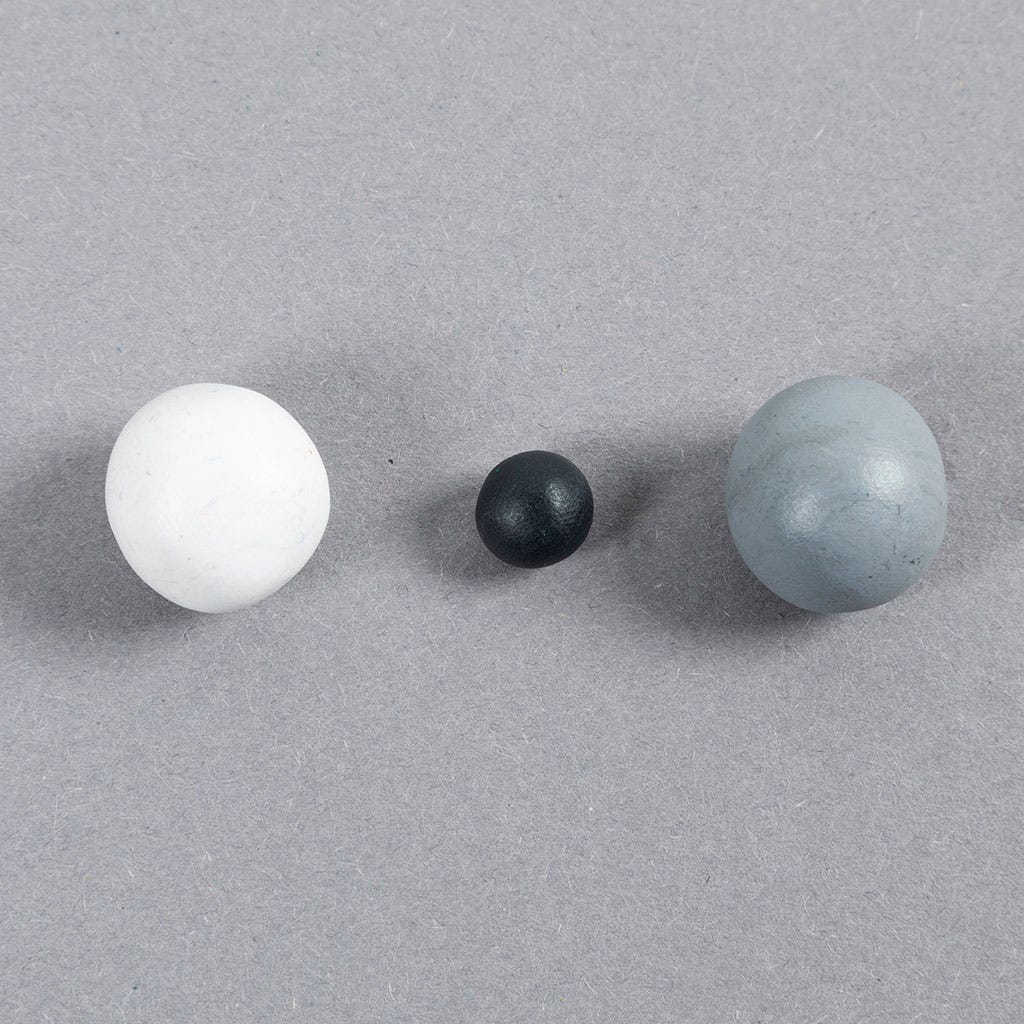
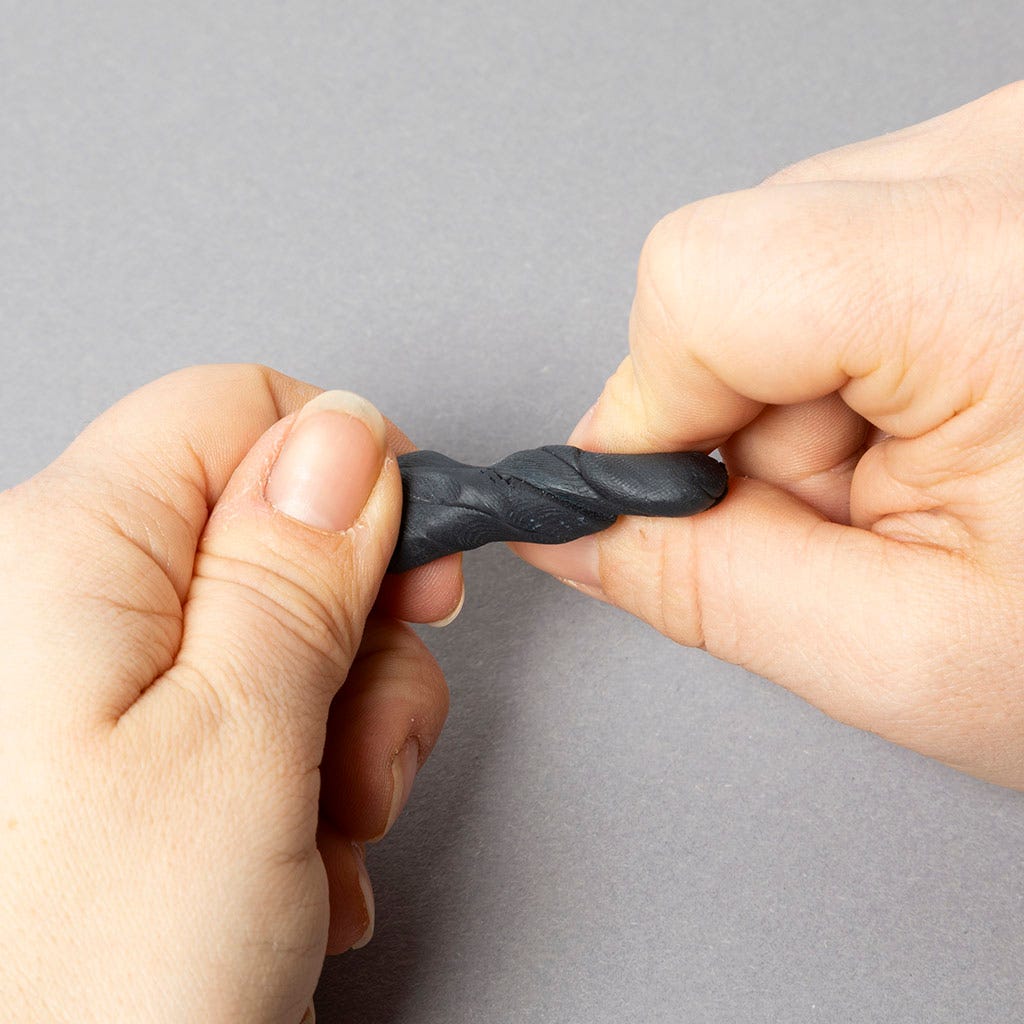
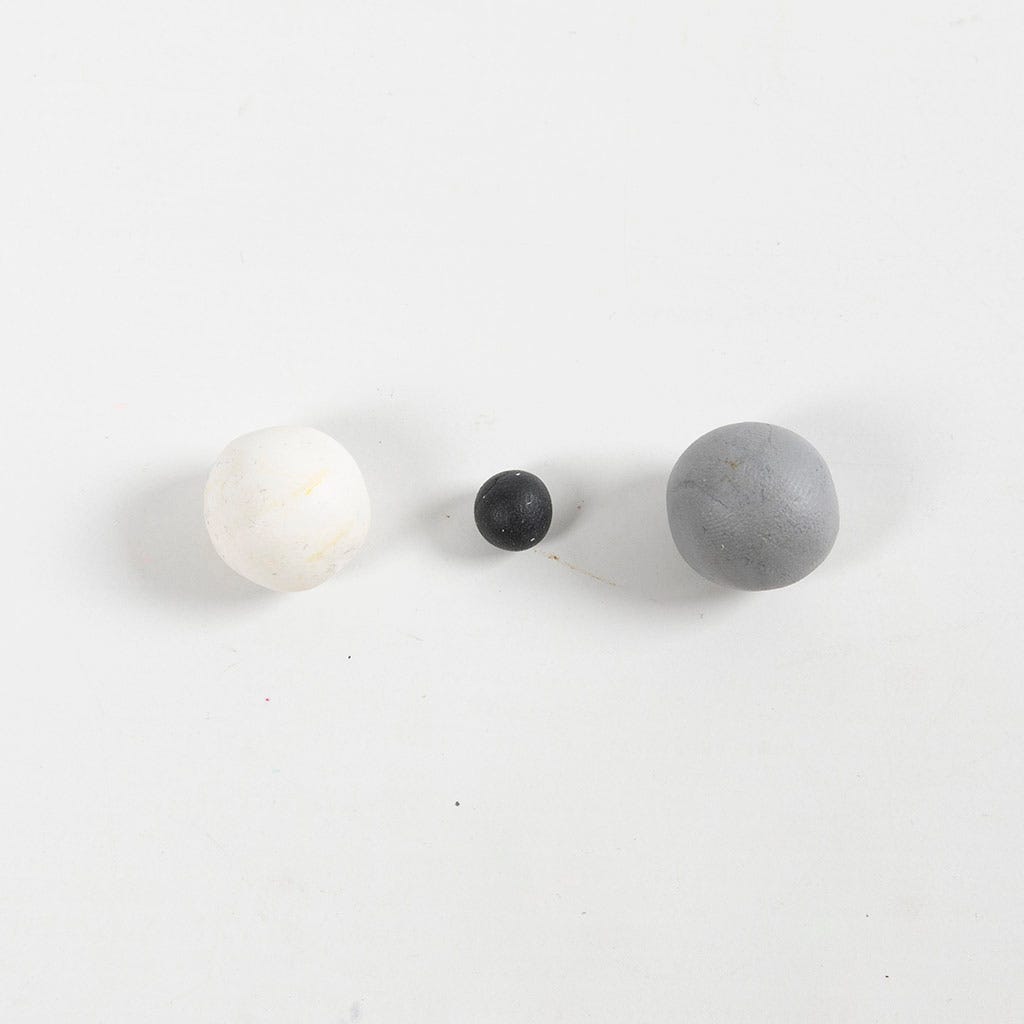
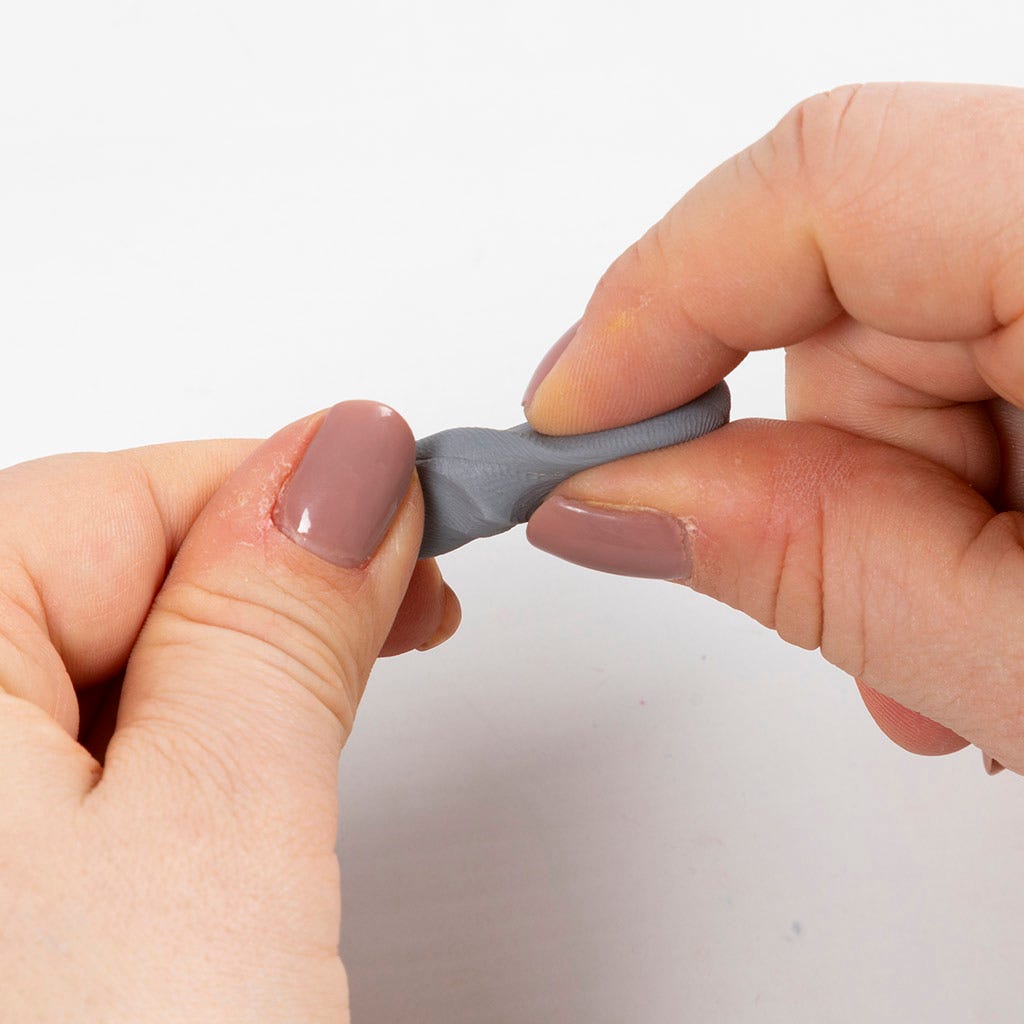
1 Start by mixing the colours to create grey jewellery clay. Roll a white ball with a diameter of around 1.3 cm and a black ball with a diameter of around 5 mm. Mix the colours together and knead until they become an even grey colour.
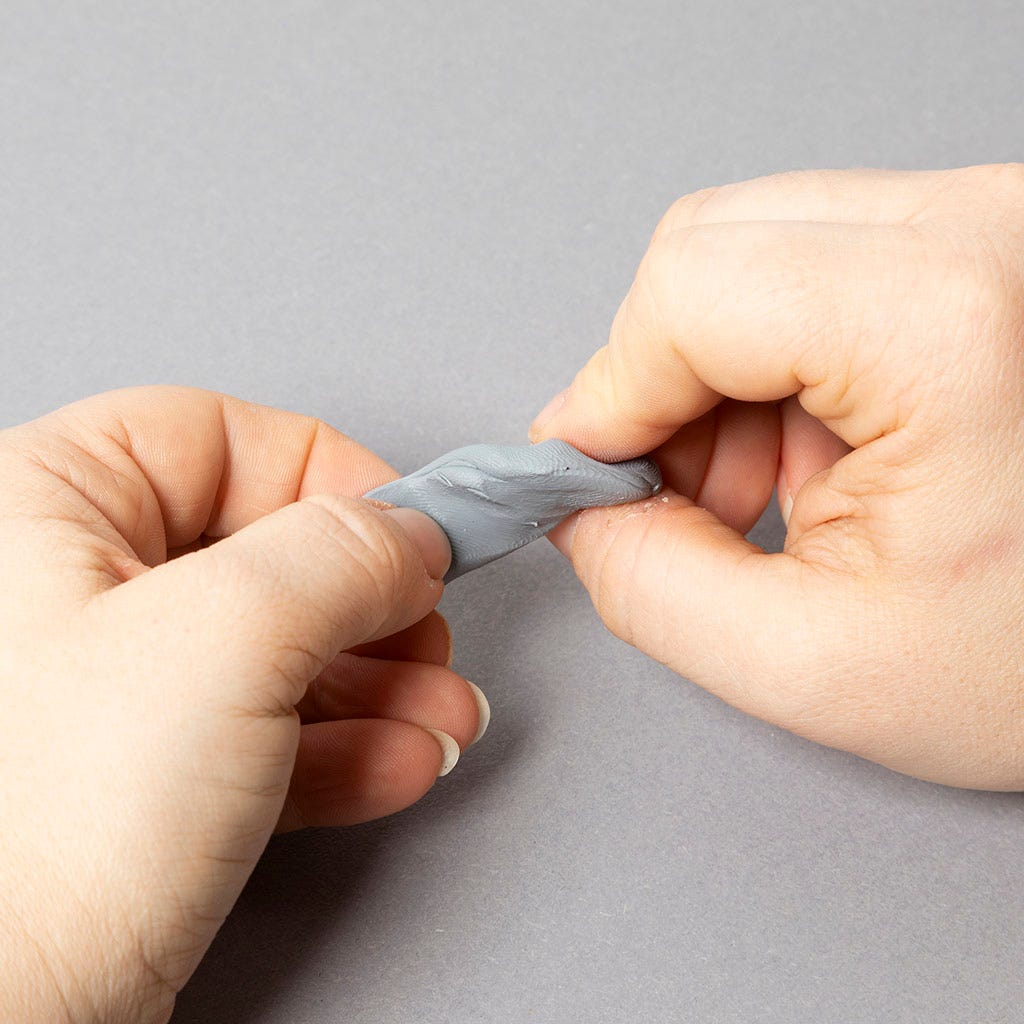
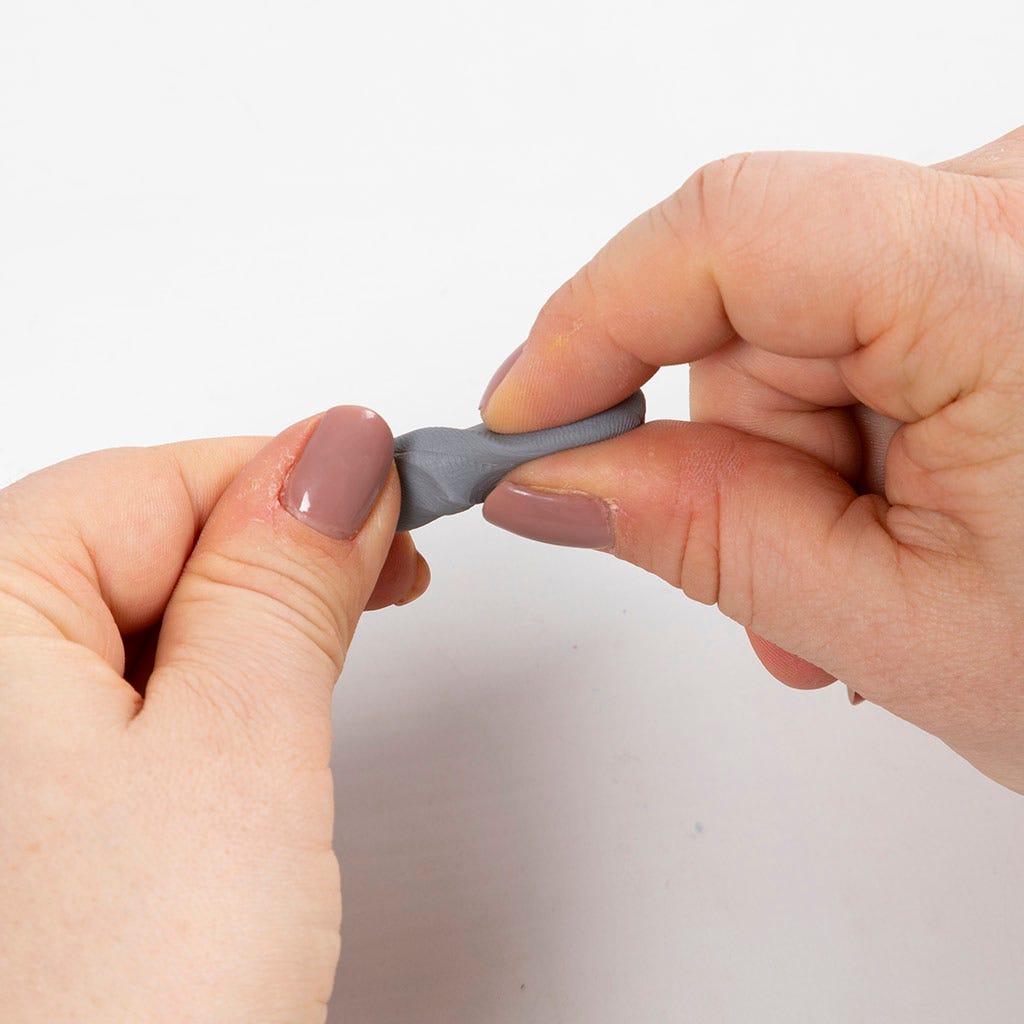
2 Knead the grey clay for 4 minutes.
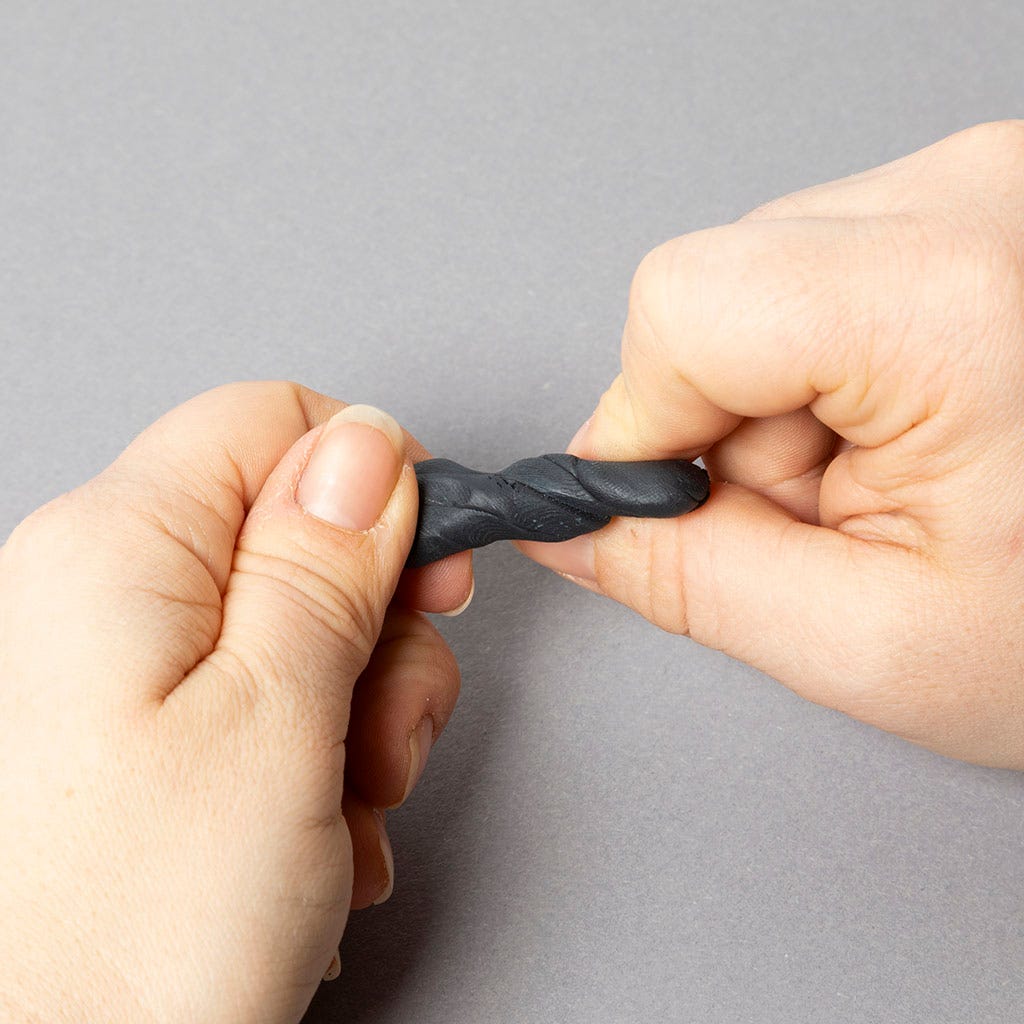
3 Knead the black clay for 4 minutes to prevent air bubbles from forming when baking the jewellery clay.
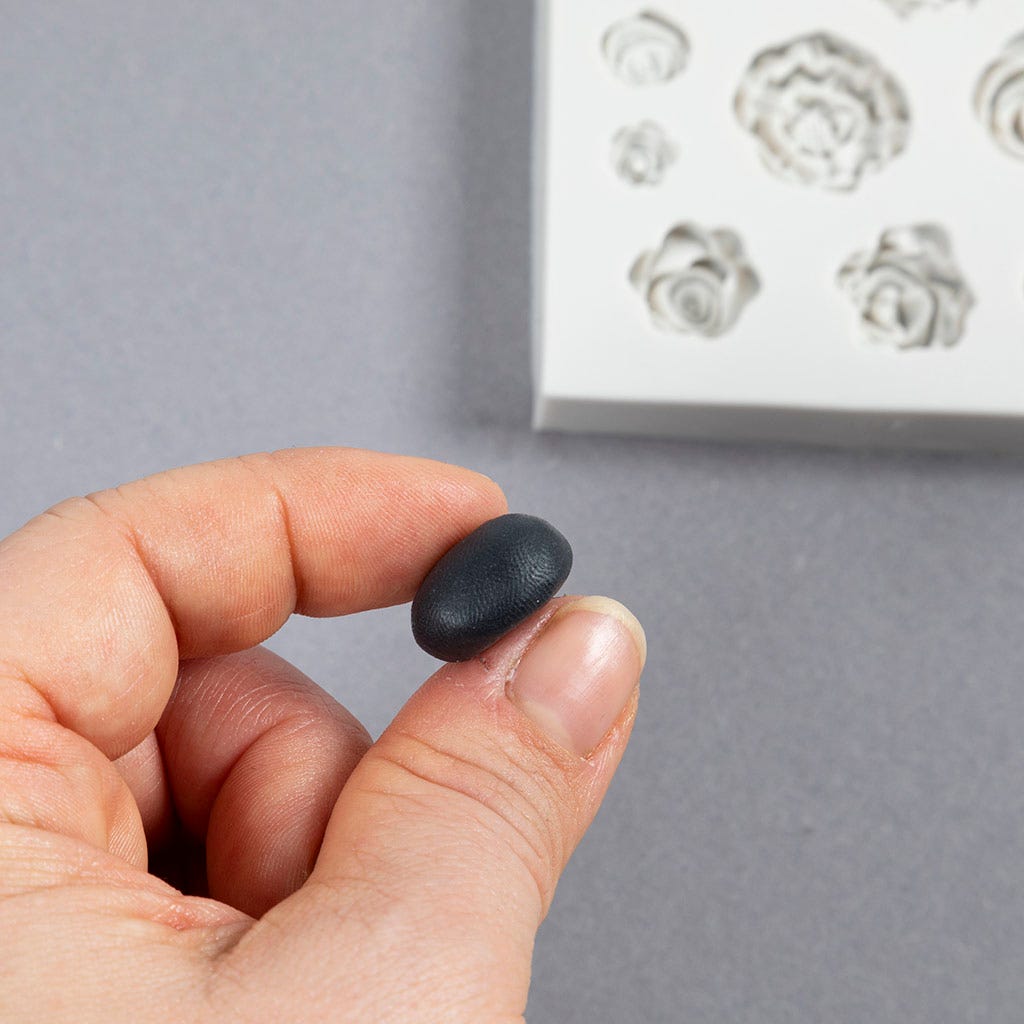
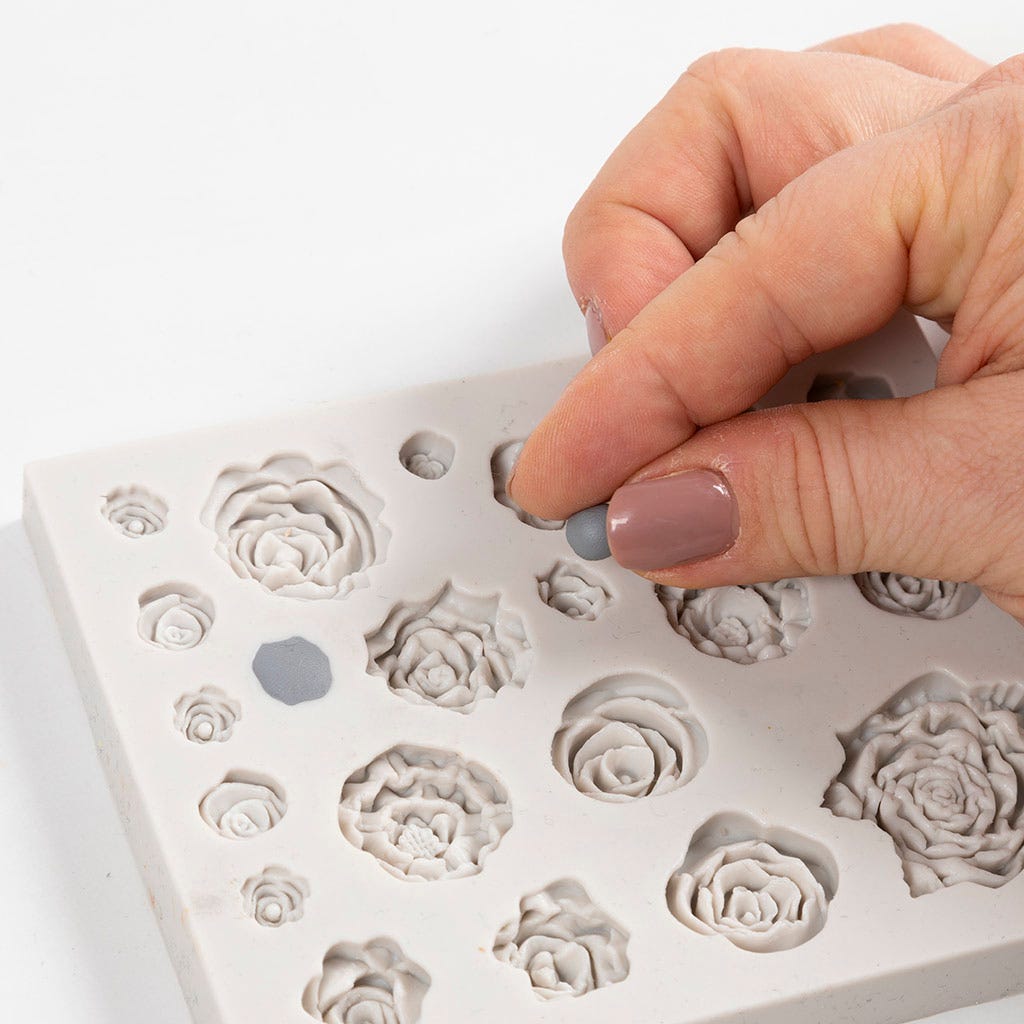
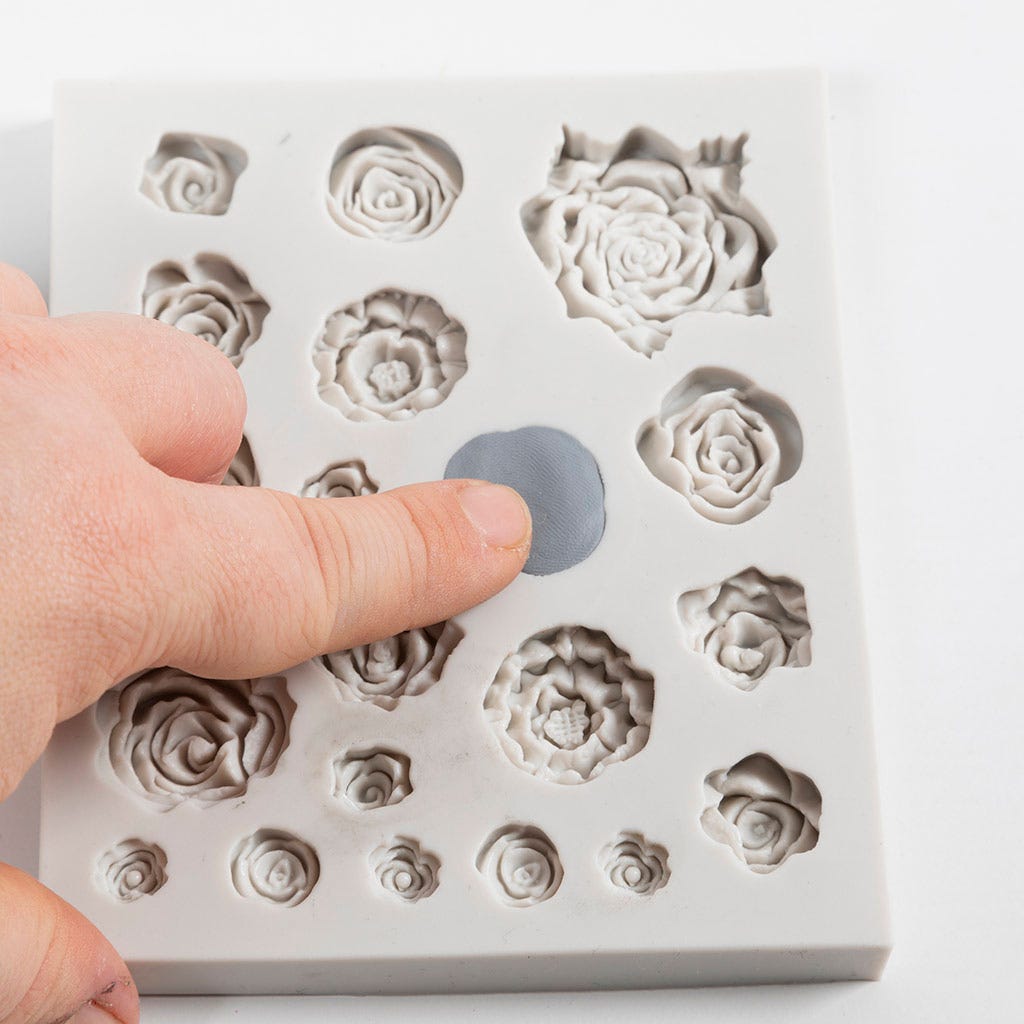
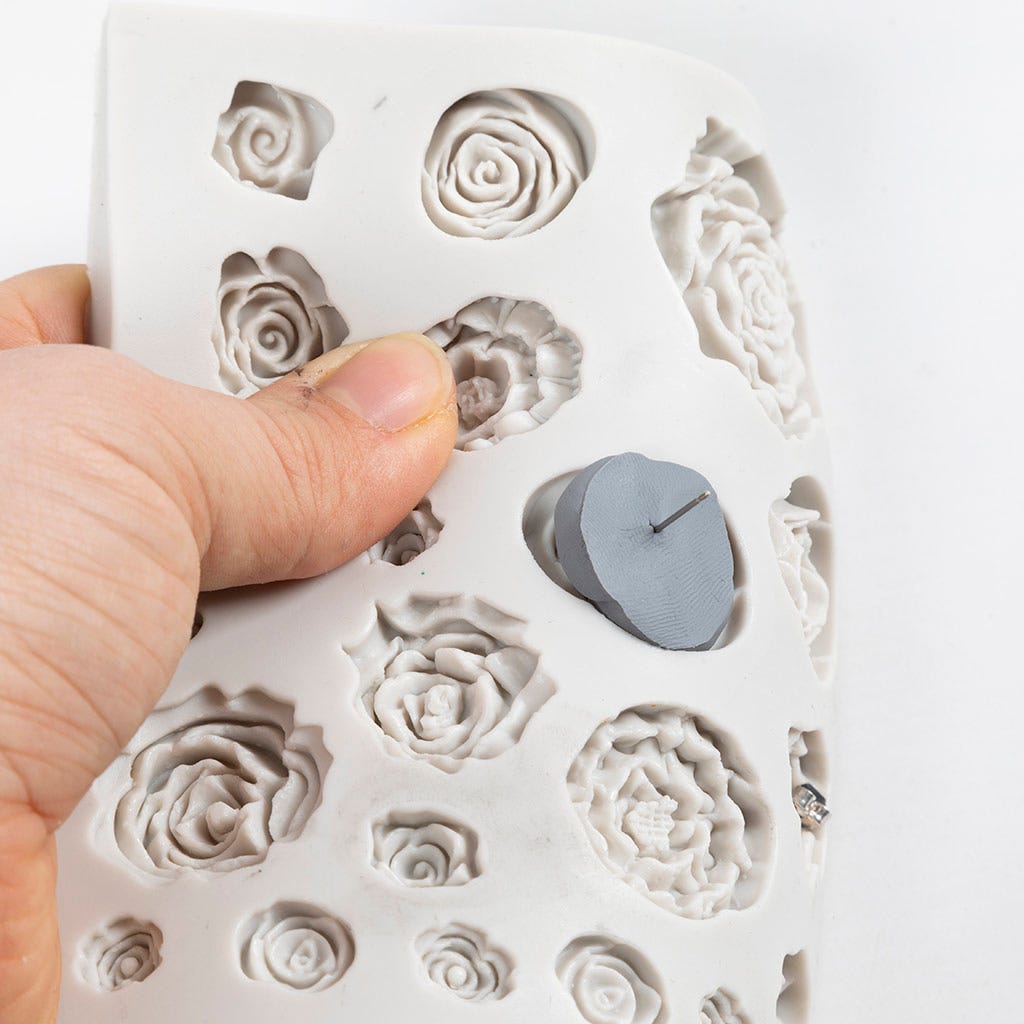
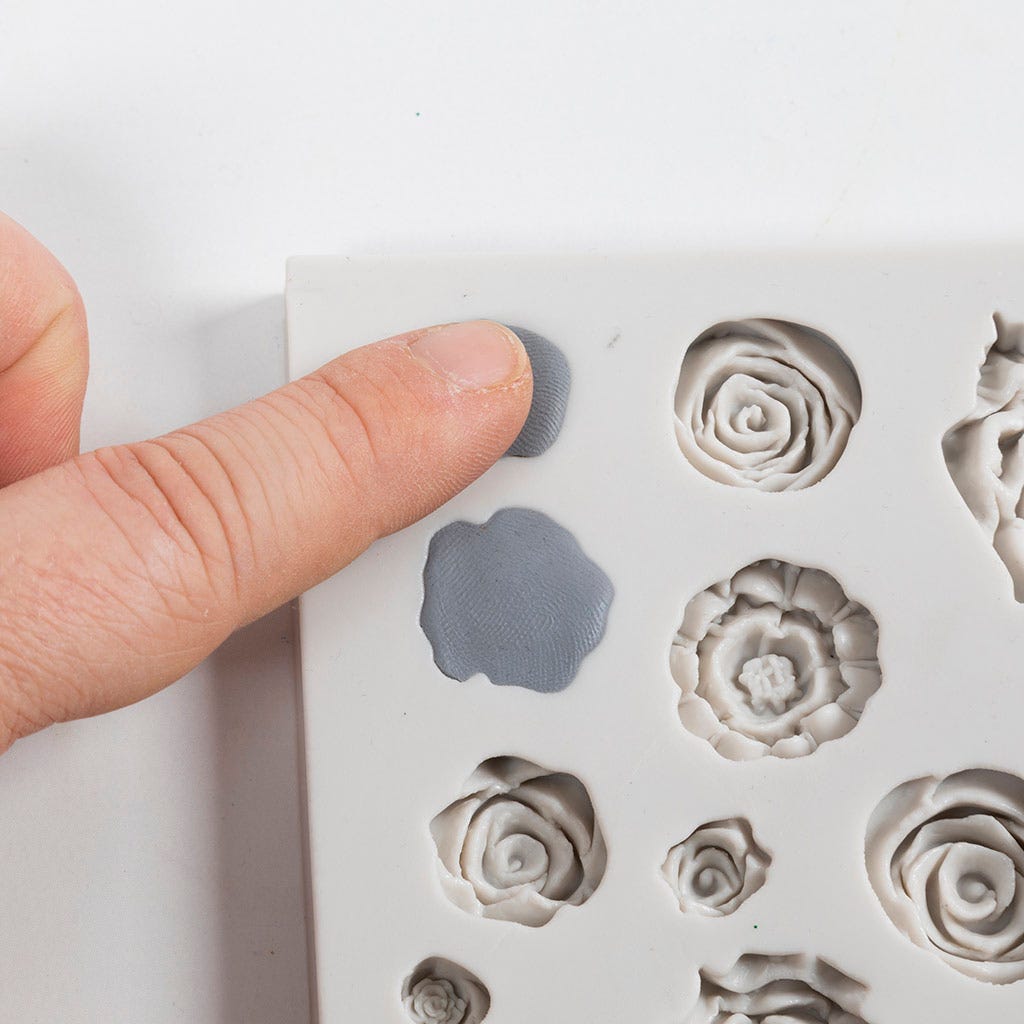
4 Use a small amount of jewellery clay for the rose mould for your first bead.
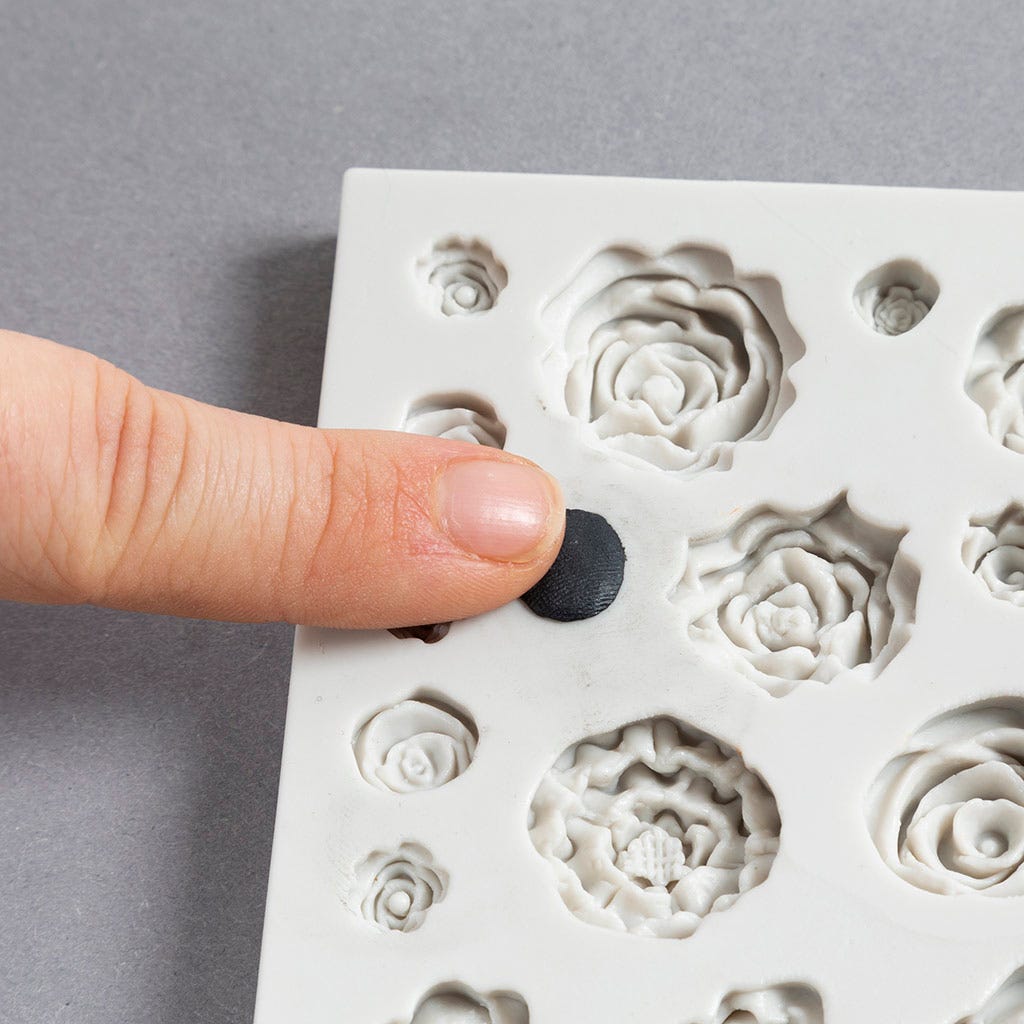
5 Press the clay firmly into the mould with your finger.
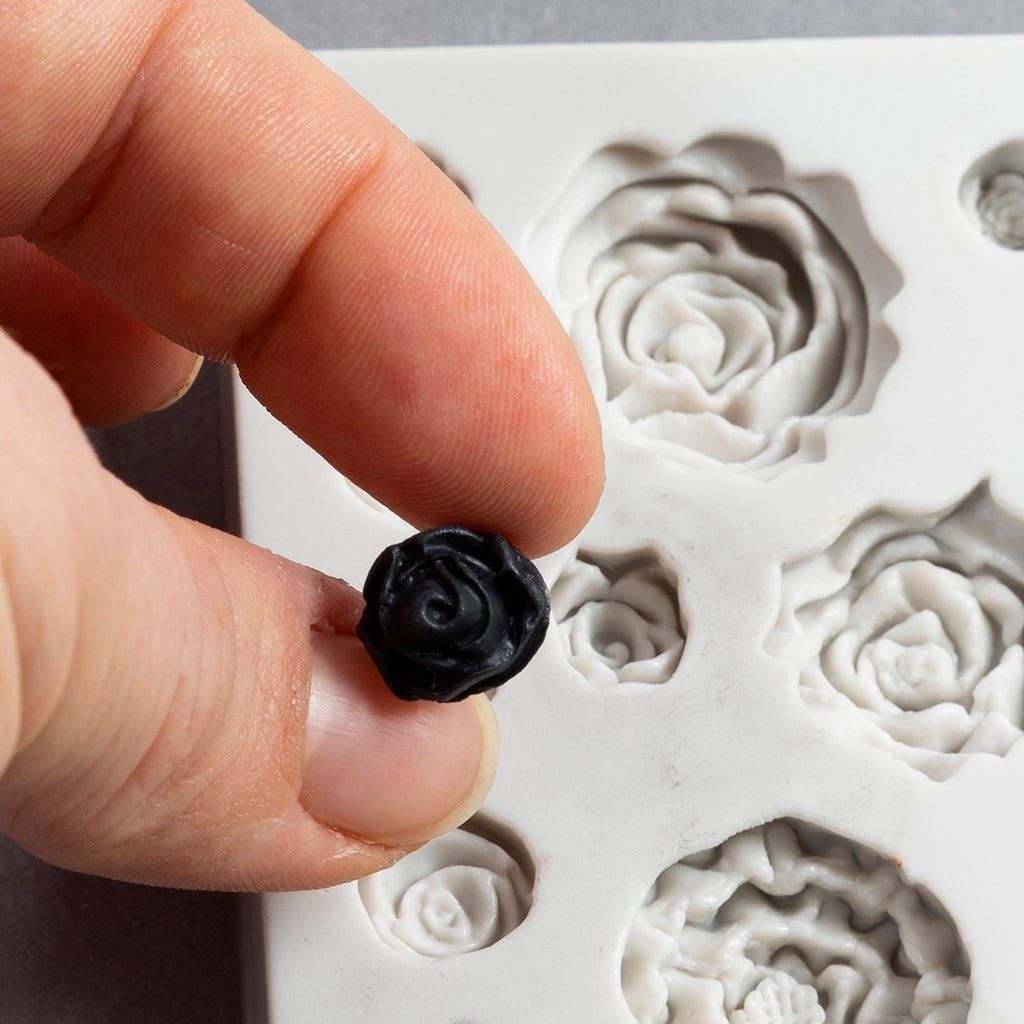
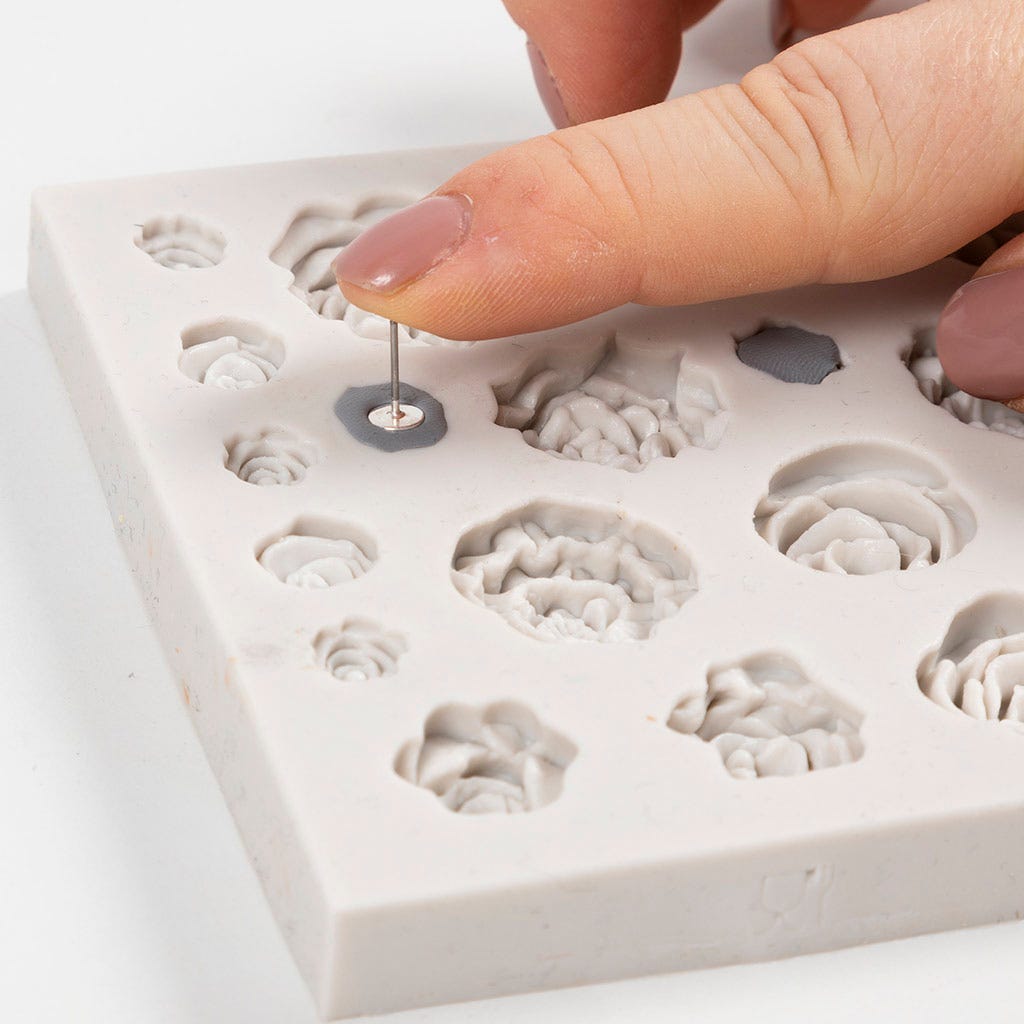
6 Remove the rose (bead).
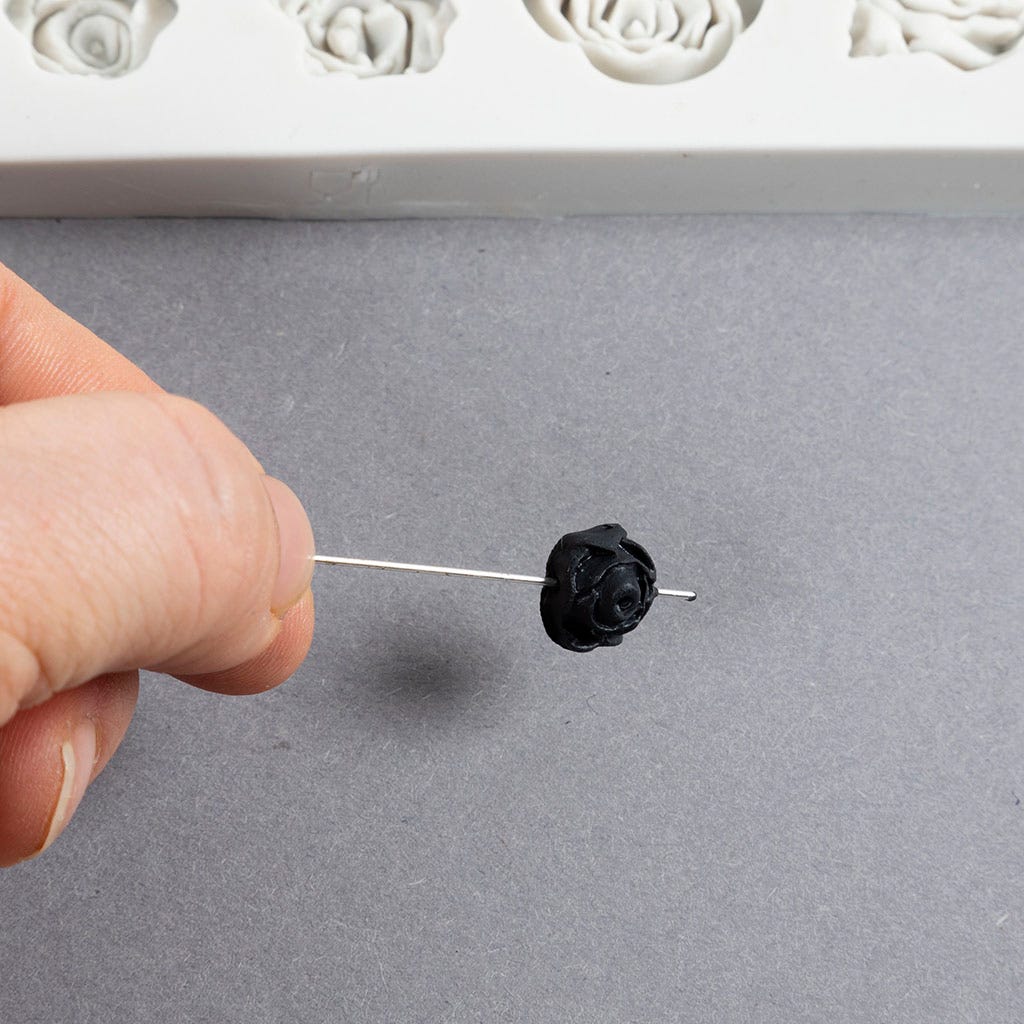
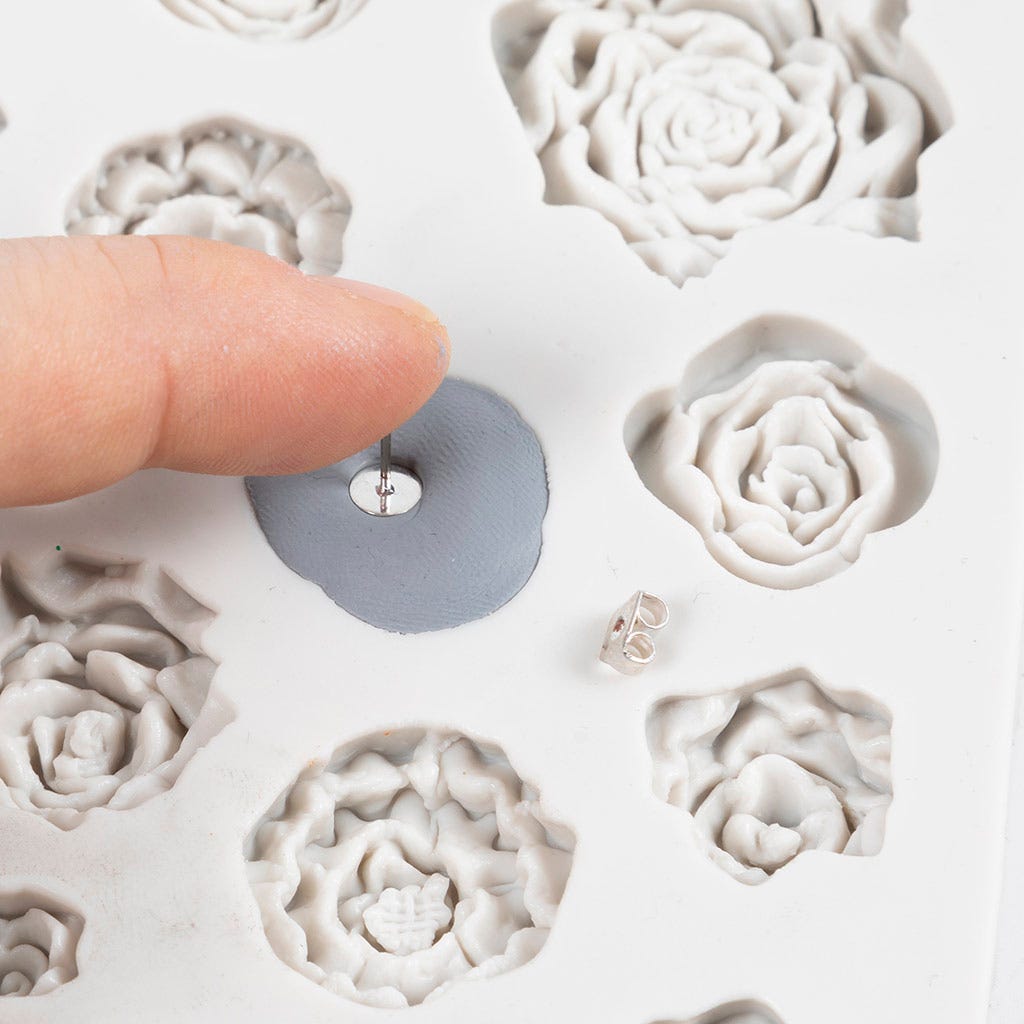
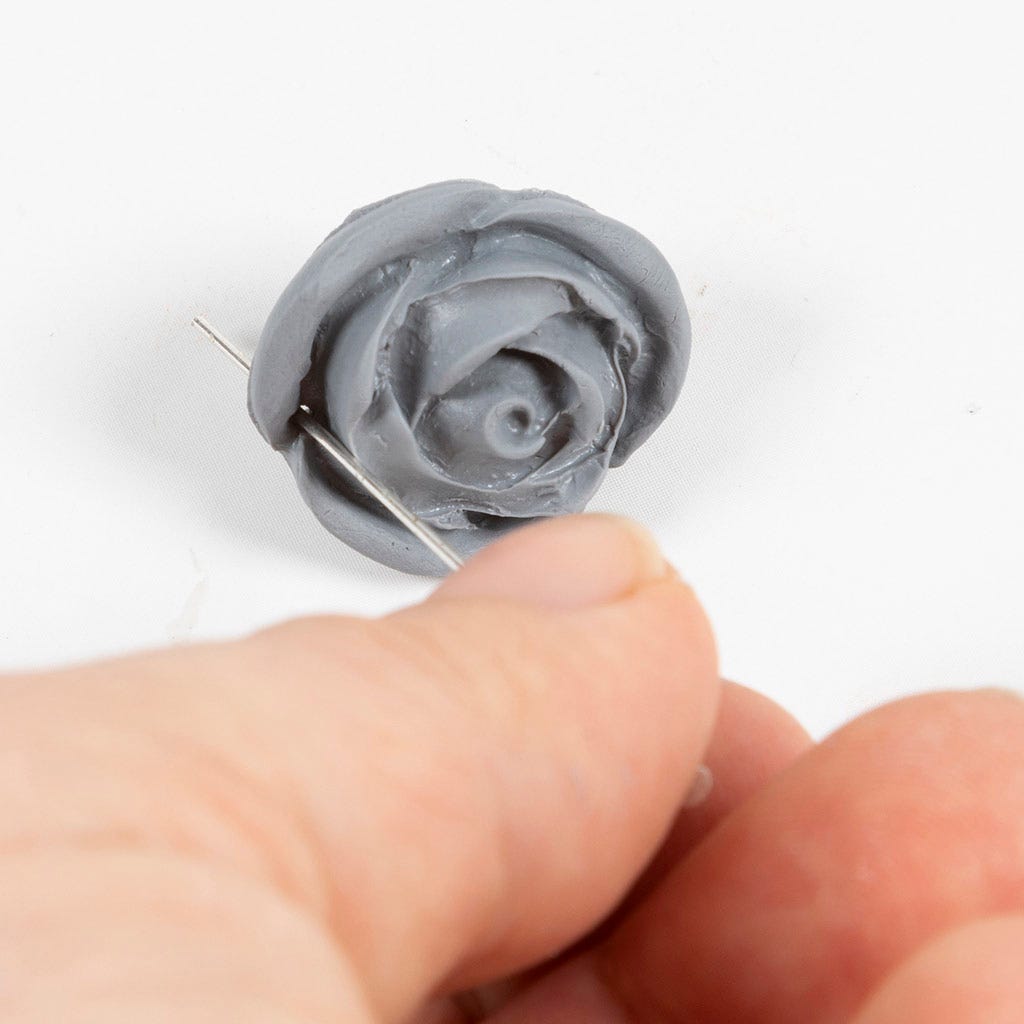
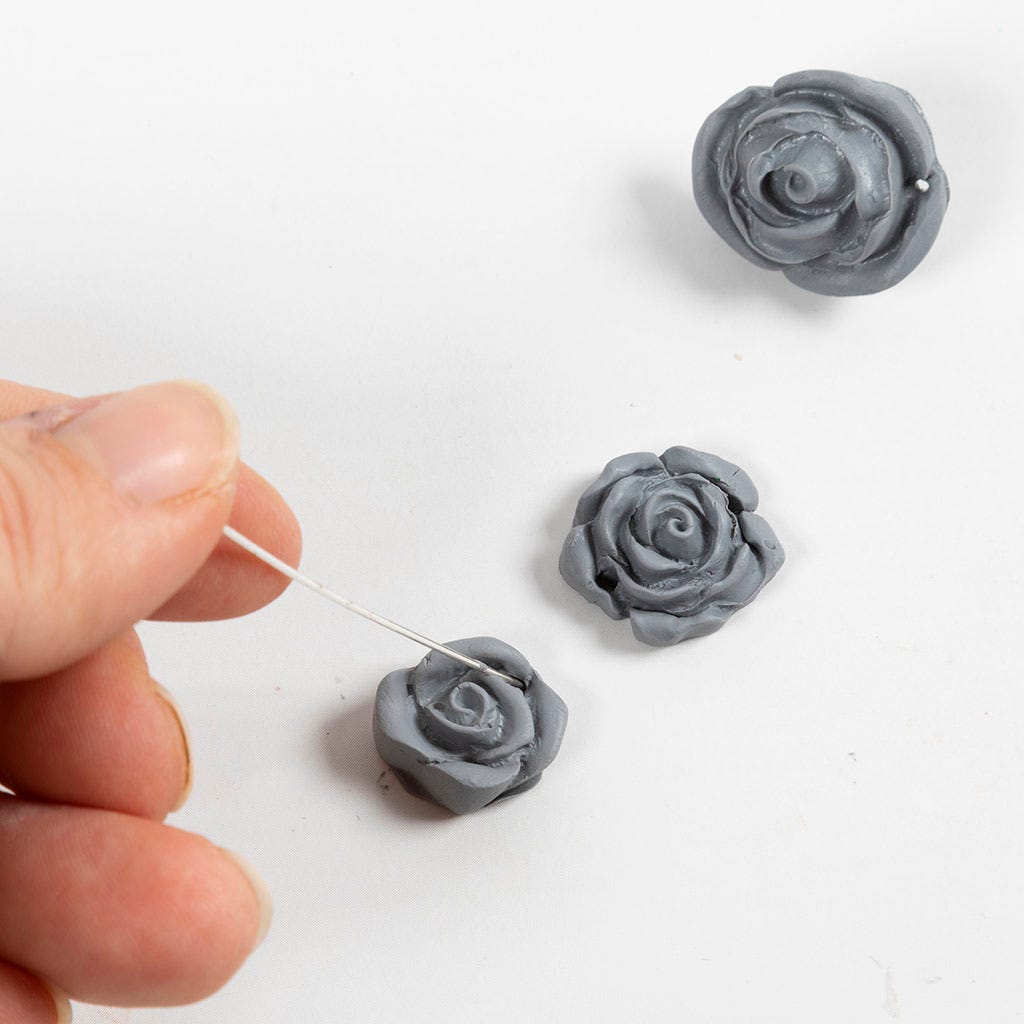
7 Now make a hole in the rose by piercing it with a head pin.
Repeat this process for the other beads.
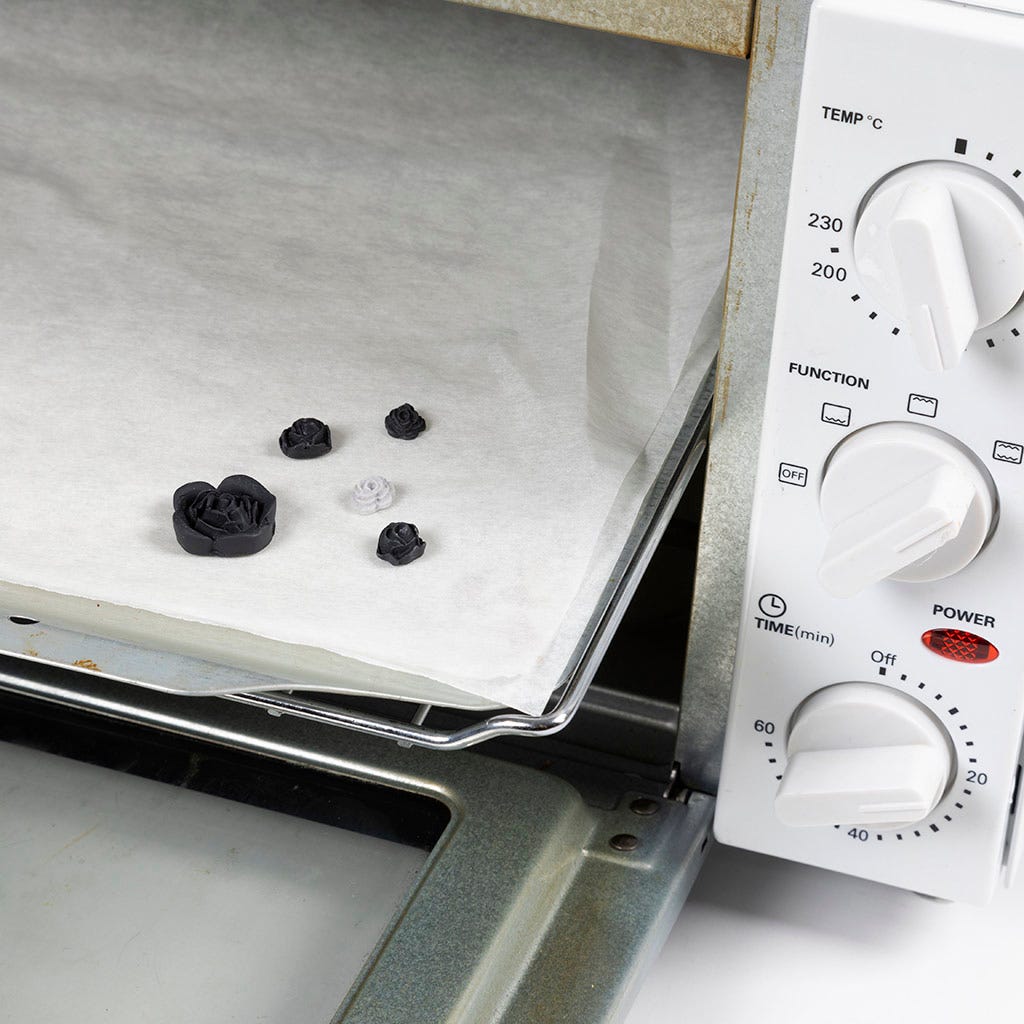
8 Once you have made all the beads you want to use, carefully place them on a baking sheet. Bake them in the oven at 120 degrees for 18 minutes.

9 Thread the beads onto the elastic cord in the desired order using a beading needle.
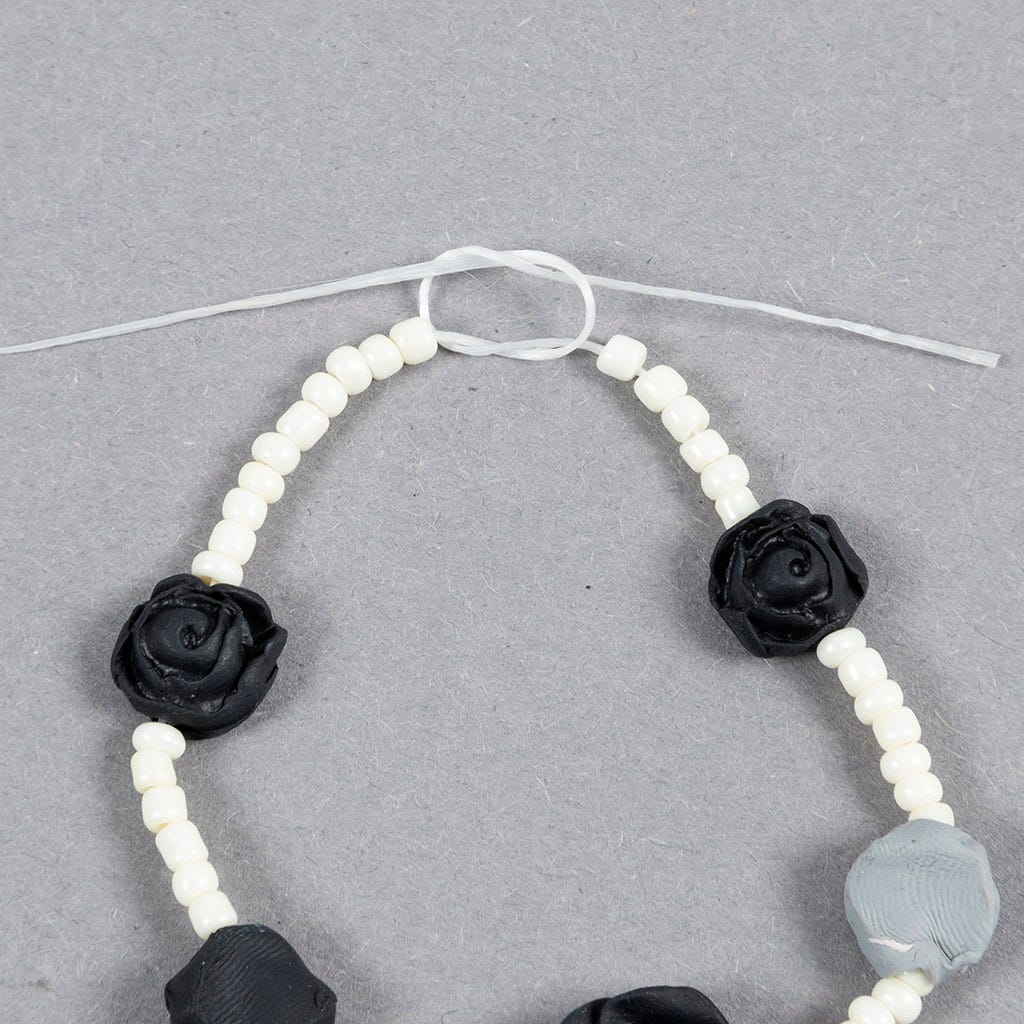
10 Once the bracelet is the right length, secure the ends by tying 2-3 tight knots.
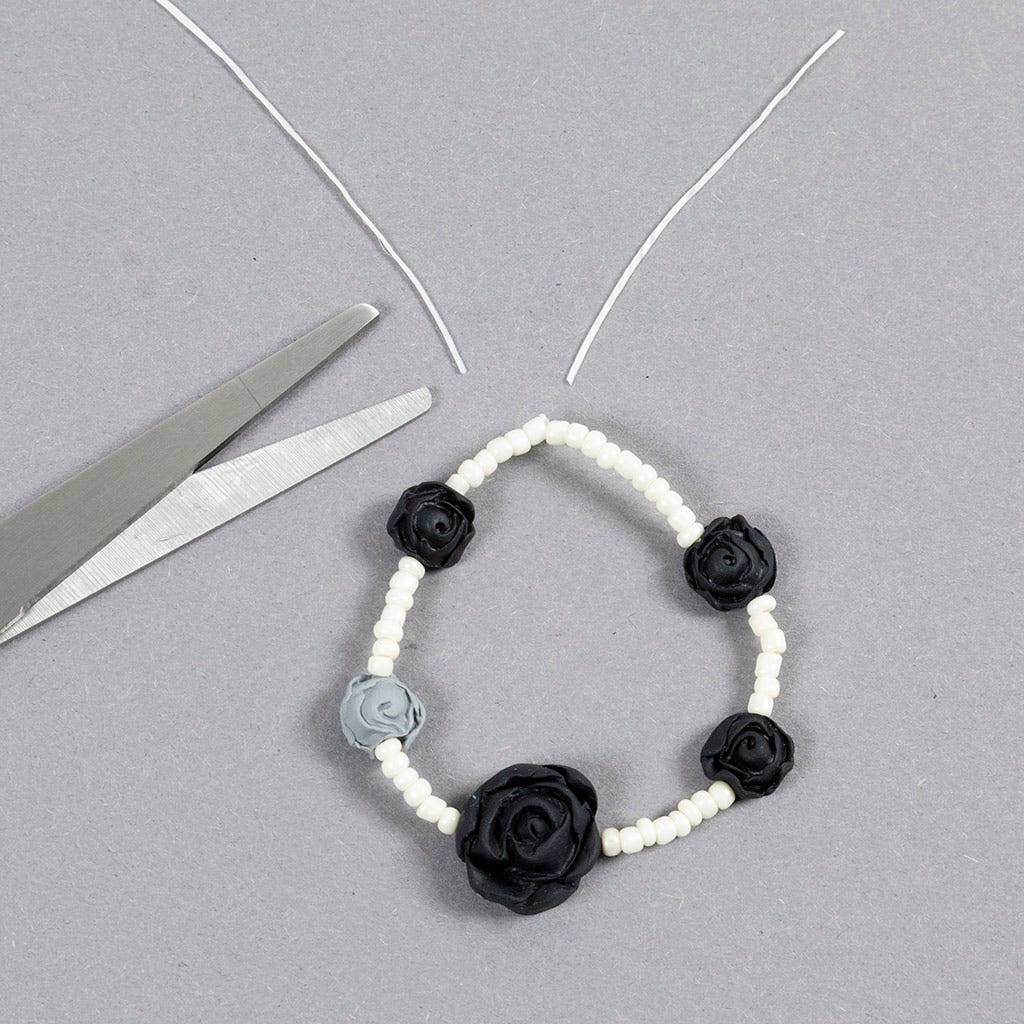
11 Finish the bracelet by cutting off the excess elastic cord.
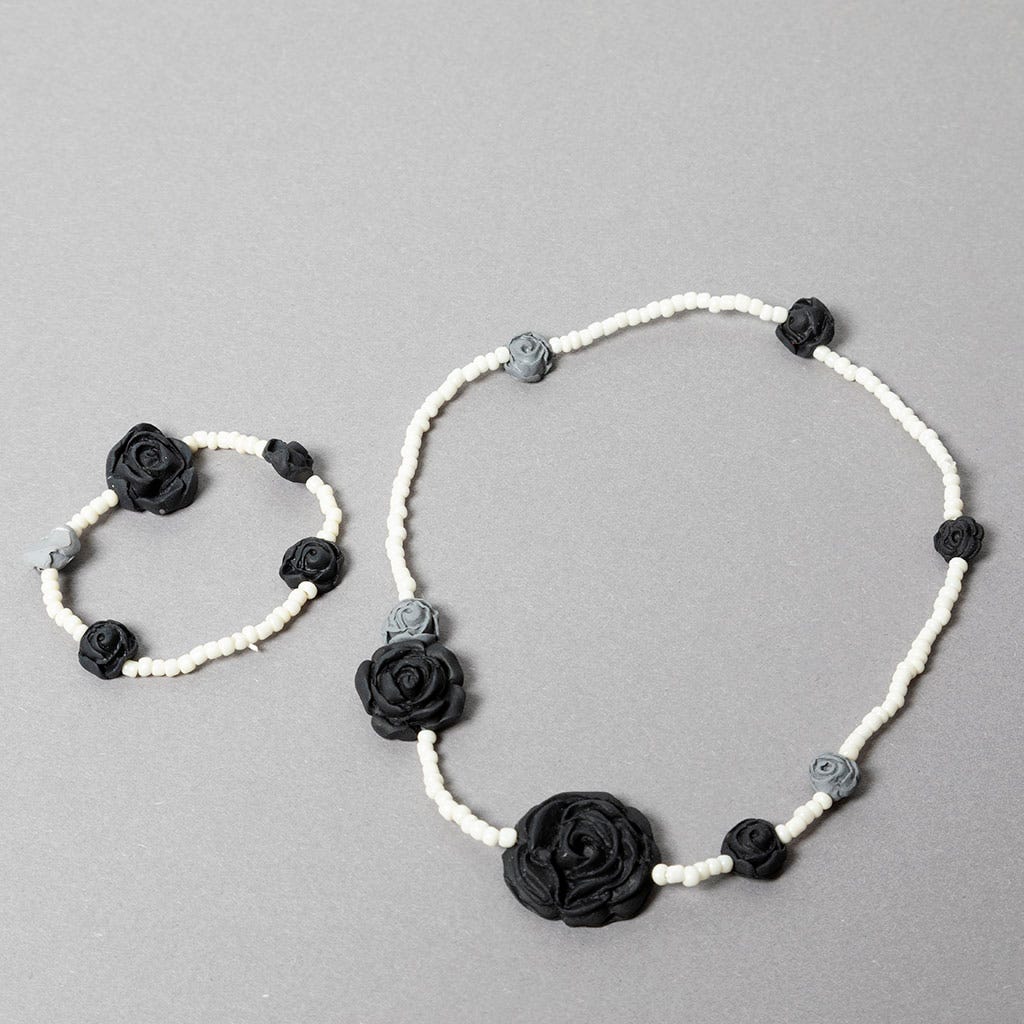
12 The picture here shows the two finished jewellery pieces. You can use the same pattern or your own.
13 Start making the finger ring by kneading the desired colour of jewellery clay for 4 minutes.
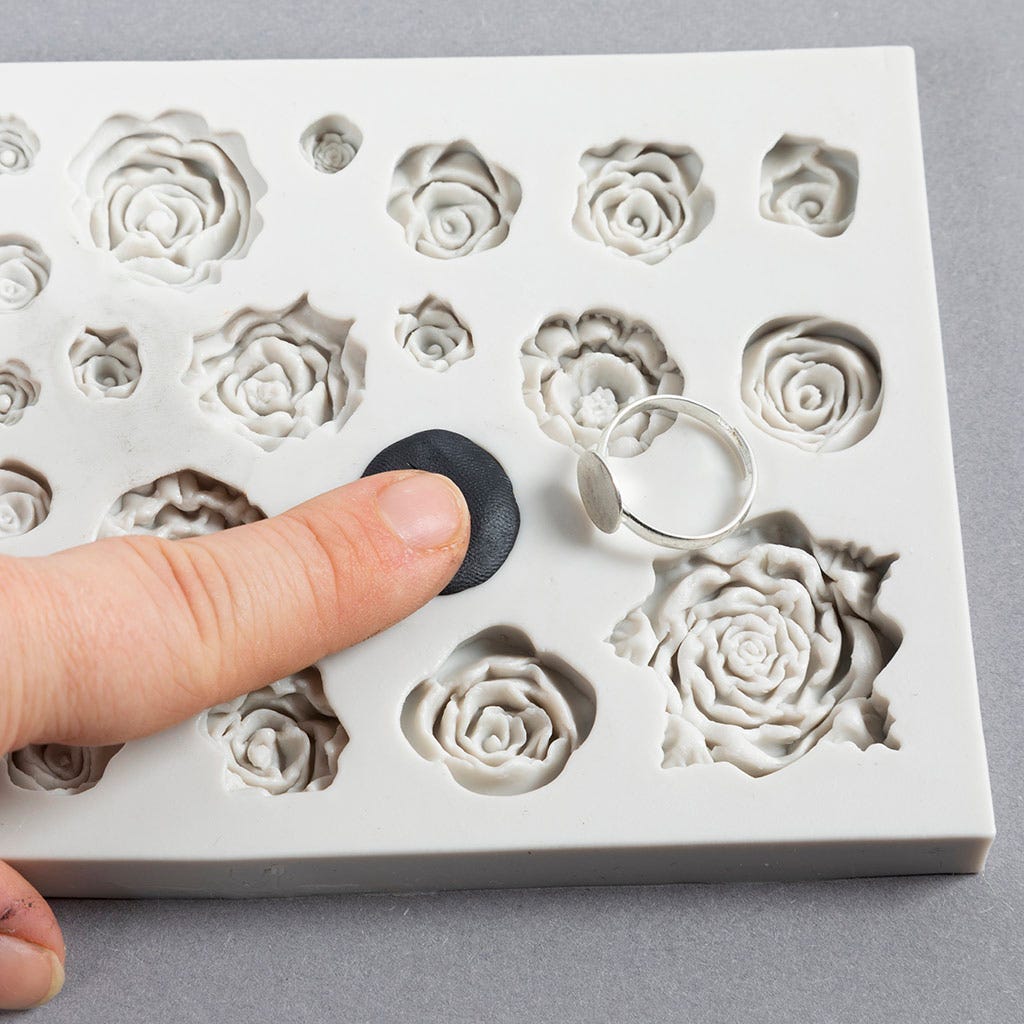
14 Now press the jewellery clay firmly into the rose shape you want to use for the ring.

15 Now press the ring firmly into the centre of the flower.
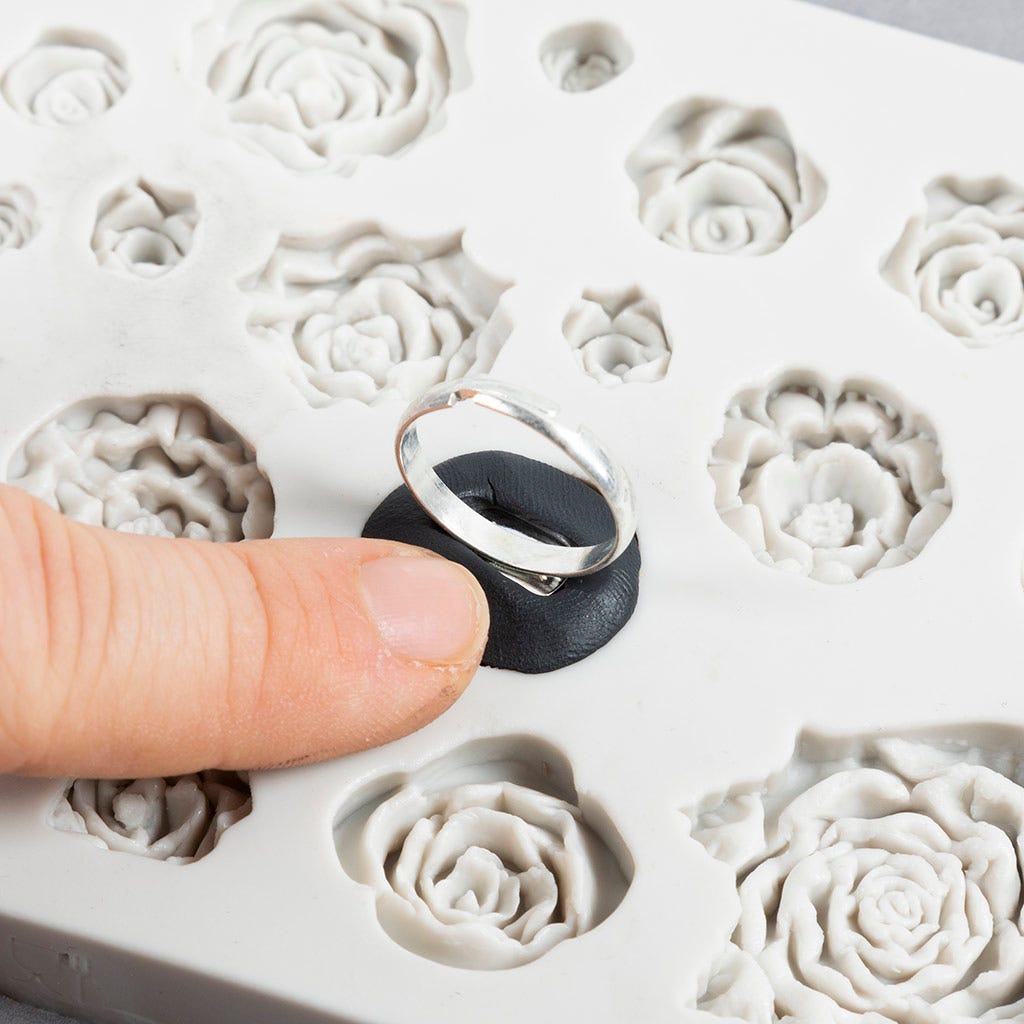
16 Make sure the flat part of the ring is pushed securely into the jewellery clay.
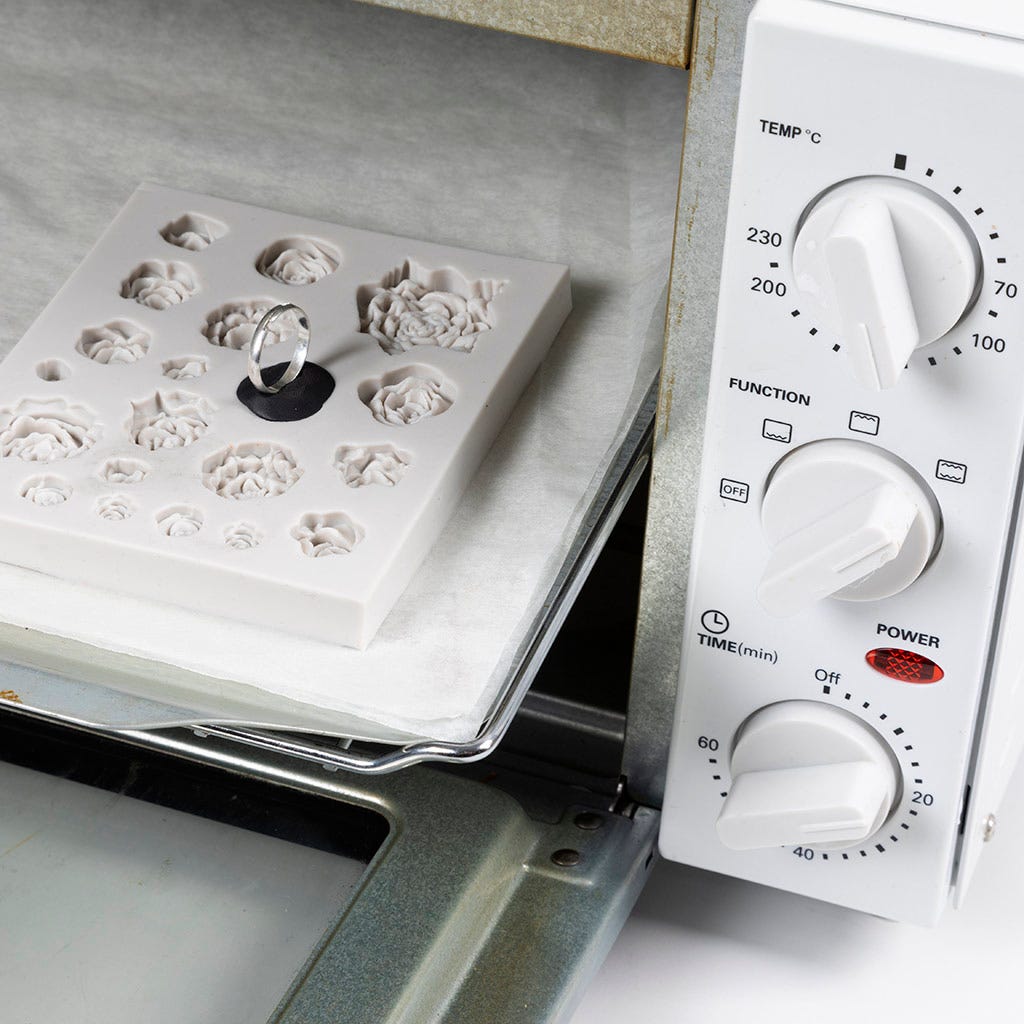
17 Now place the mould with the ring in the oven and bake at 120 degrees for 18 minutes. Once the ring is finished baking and has cooled, it is ready for use.
18 Mix the clay into a grey colour for the stud earrings. Roll a ball of around 1.3 cm of white and 0.5 mm of black jewellery clay. Knead them together until to create an even grey colour.
19 Knead the grey clay for 4 minutes.
20 Now roll two small balls of jewellery clay to fit the shape you want to use for your studs and press them firmly into the mould.
21 Remove the closure from the stud earring and press the earring into the jewellery clay.
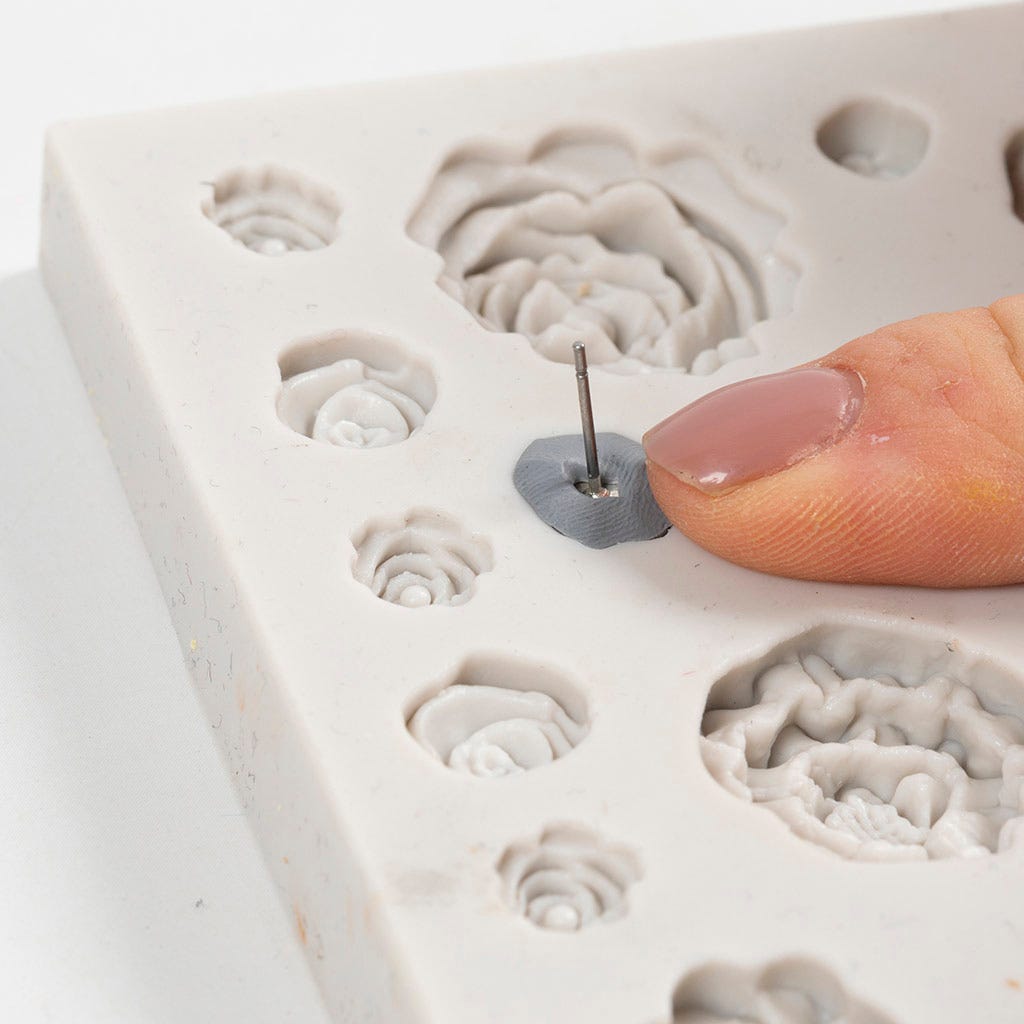
22 Press the plate on the stud earring firmly into the clay to secure it.

23 Place the mould with the studs on a baking sheet. Bake in the oven at 120 degrees for 18 minutes. Once they are baked and have cooled, the studs are ready for use.
24 Knead the desired colour of jewellery clay for the earrings for 4 minutes (if you want them to be grey, make this clay first).
25 Use enough jewellery clay for the desired flower and press firmly into the mould.
26 Remove the closure from the earring and press the stud earring firmly into the middle of the jewellery clay.
27 Now press down the plate on the stud earring firmly into the clay to secure it. Carefully remove the rose with the stud earring from the mould.
28 Use a head pin to pierce a hole in the bottom edge of the rose.
29 Now create the two parts to hang in the other two links of the stud earring.
30 Use the head pin to pierce holes for the jump rings. Pierce a hole in the middle rose and a hole in the bottom edge of the rose. Also make a hole at the top of the smallest rose.

31 The parts are now ready to be baked. Carefully place them on a baking sheet lined with baking paper. Bake them at 120 degrees for 18 minutes and then allow to cool.
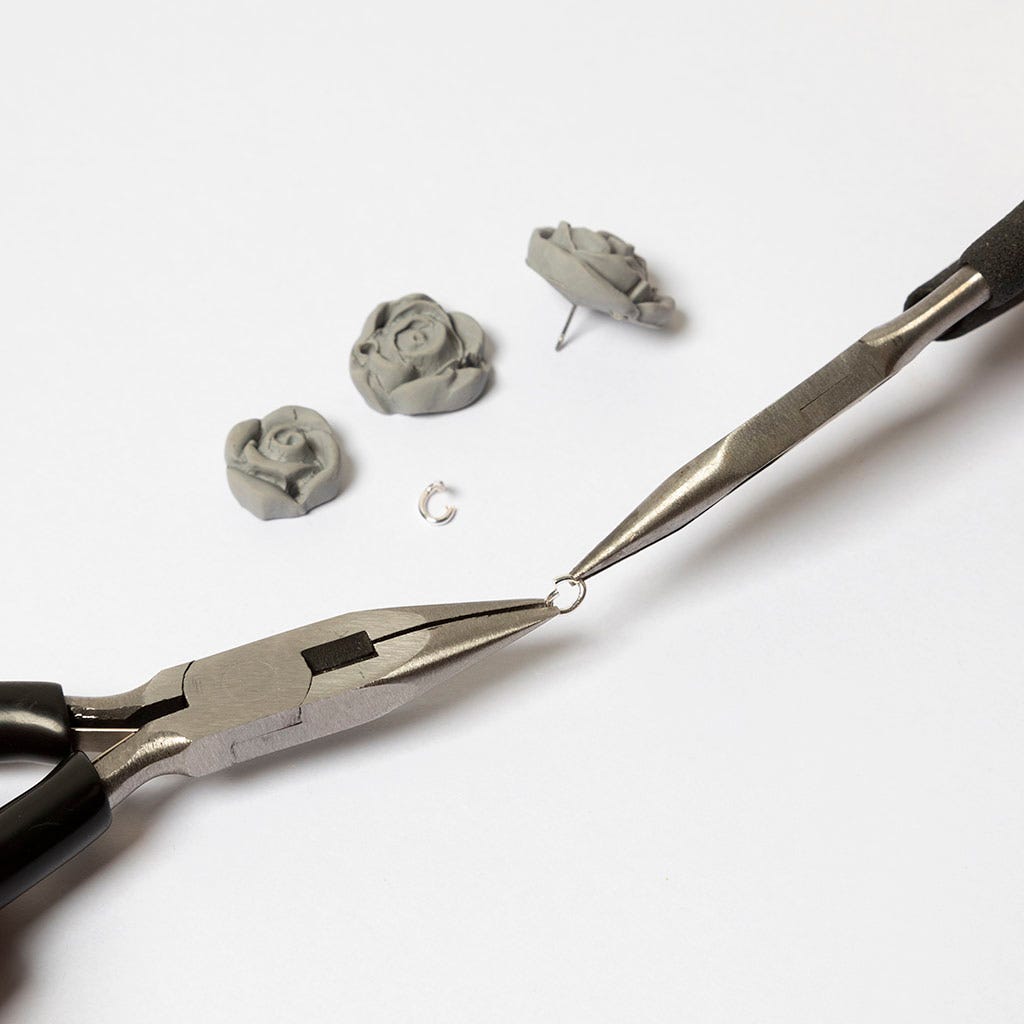
32 Now take two jump rings and carefully twist them open.
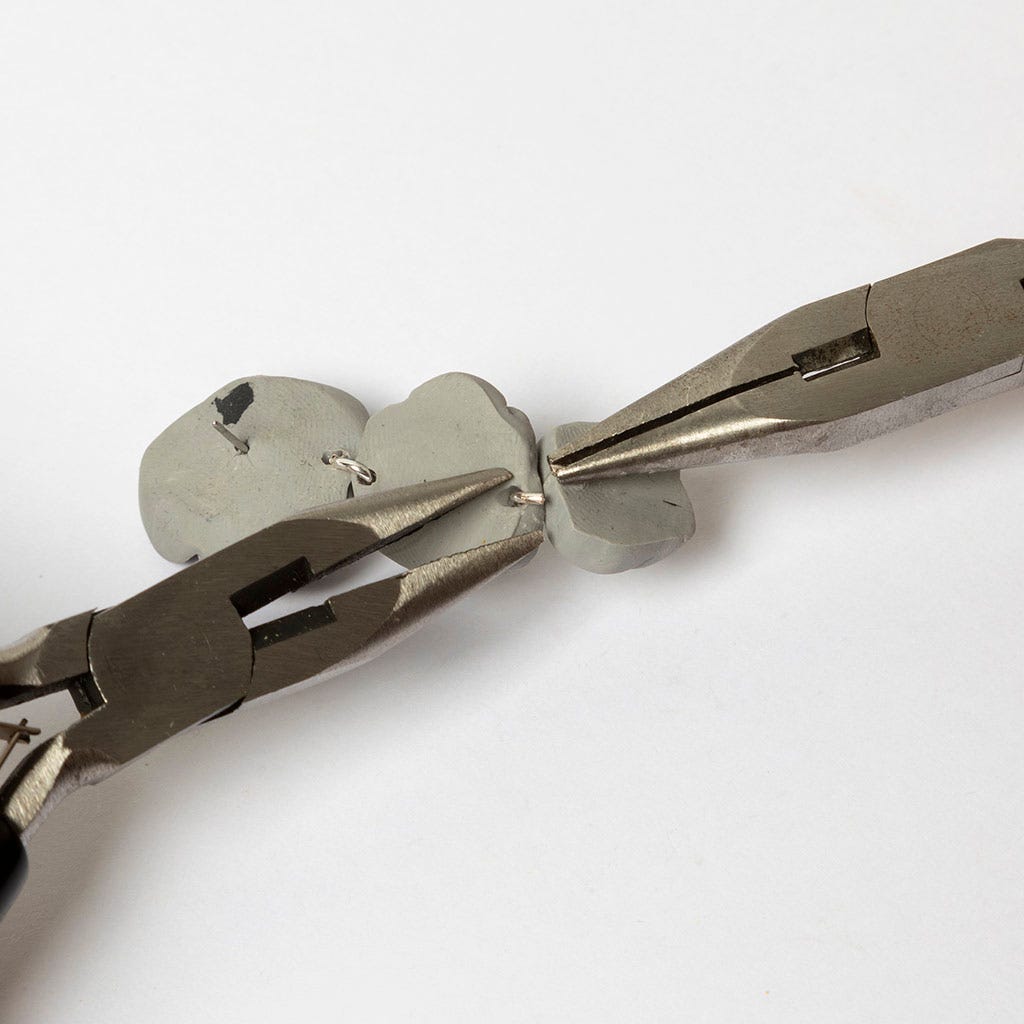
33 Connect the three roses by inserting the oval jump rings into the holes as shown in the picture (twist close the oval jump rings on the back of the rose). Your earring is now ready for use. Repeat for process for the other earring.
Also go exploring in