
Creative idea
New
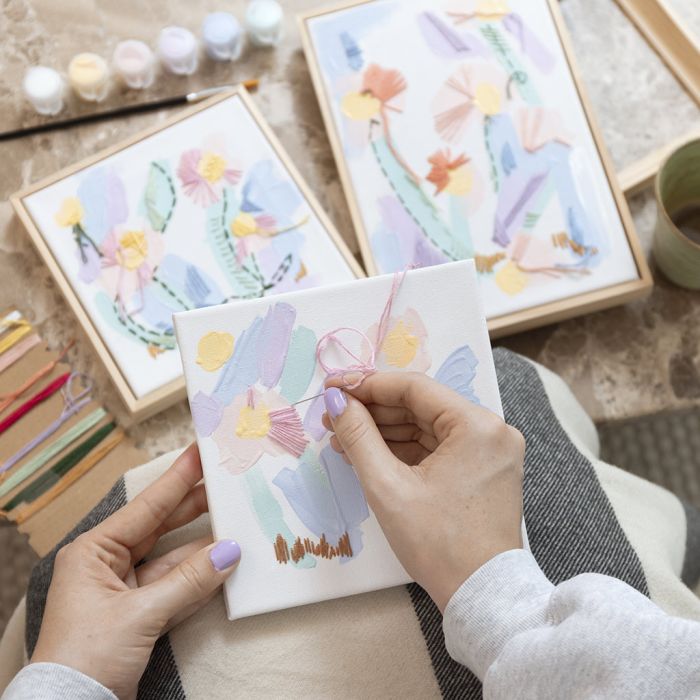
Mixed media images with acrylic and embroidery
#v17114
Create these beautiful pictures with both acrylic paint and embroidery. The canvases are freehand painted and embroidered after drying. There are no rules, only an opportunity to experiment and immerse yourself in the process.
#v17114
How to do it
1 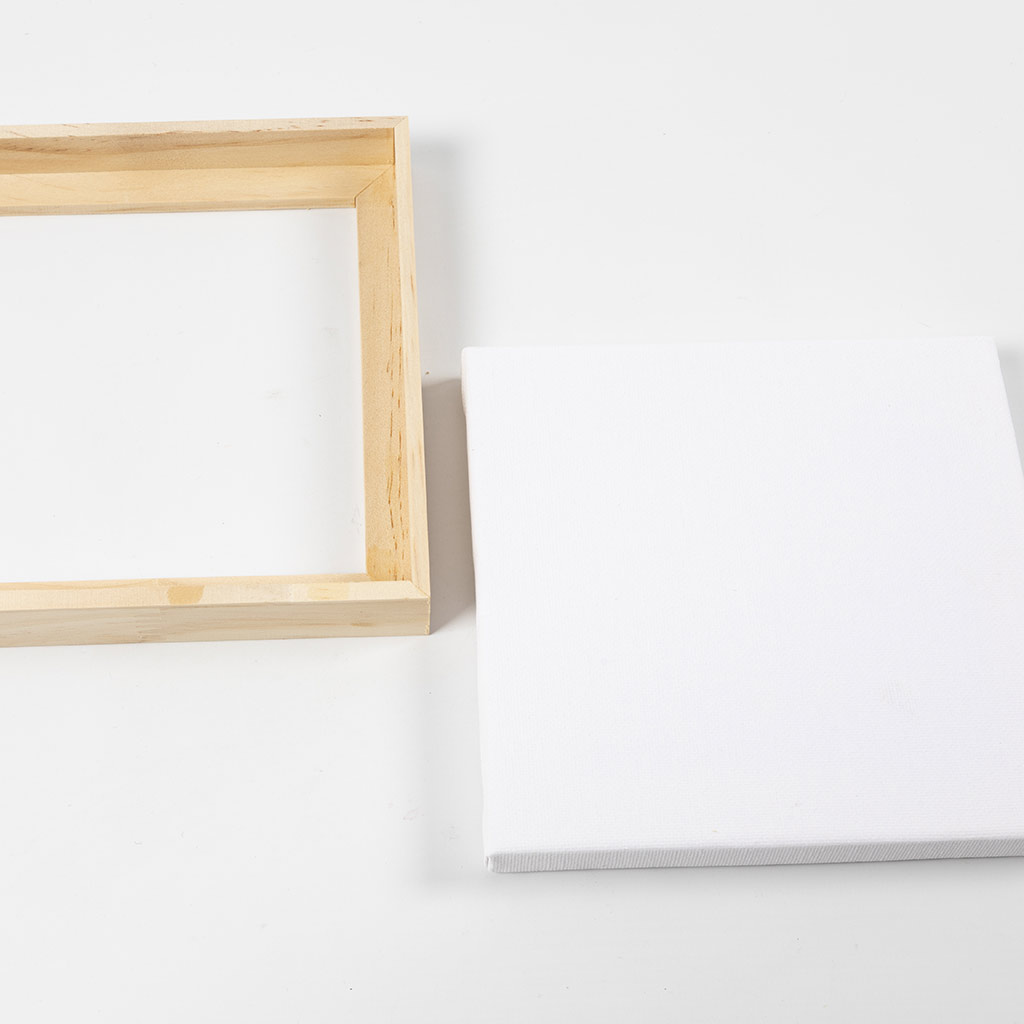 Remove the frame from the canvas.
Remove the frame from the canvas.2 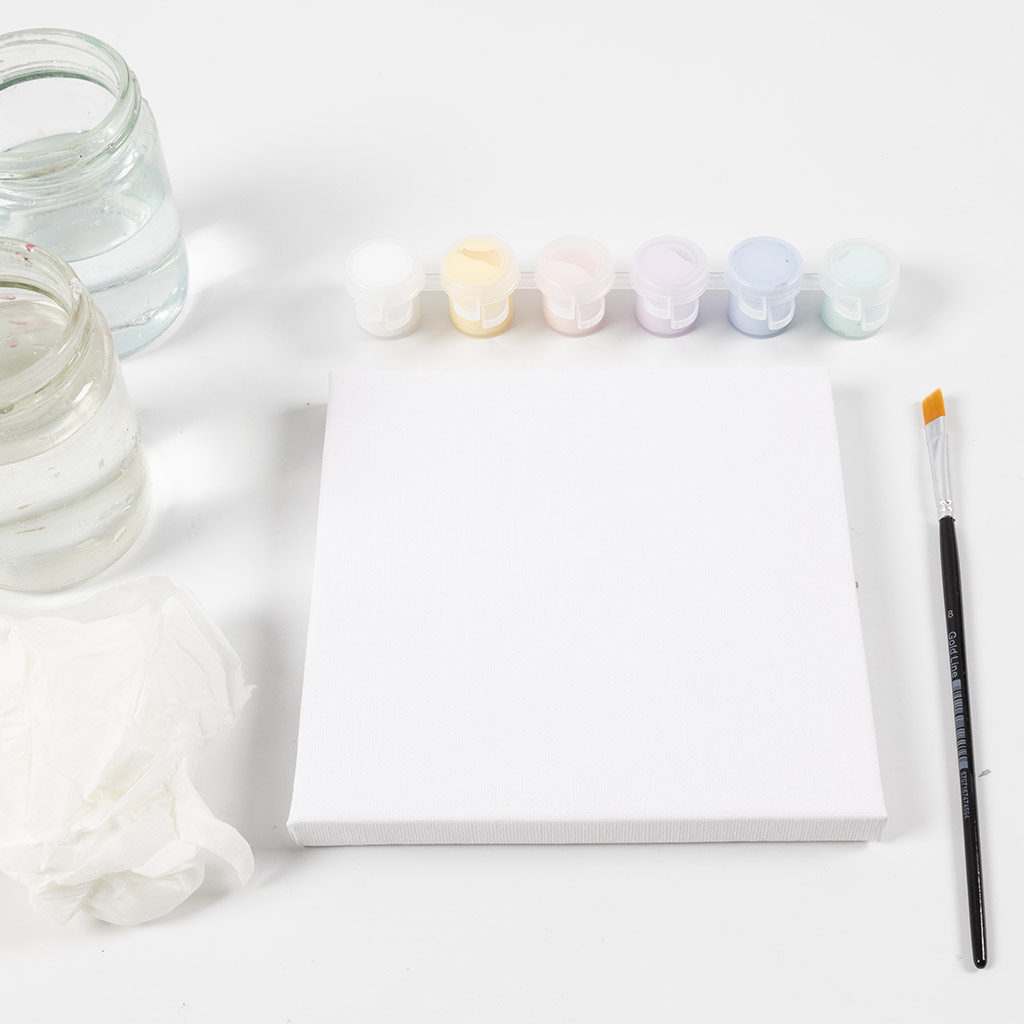 Prepare everything you will need. Two glasses of water to clean the brush, paper towel to dry the brush, paint, canvas and brush.
Prepare everything you will need. Two glasses of water to clean the brush, paper towel to dry the brush, paint, canvas and brush.3 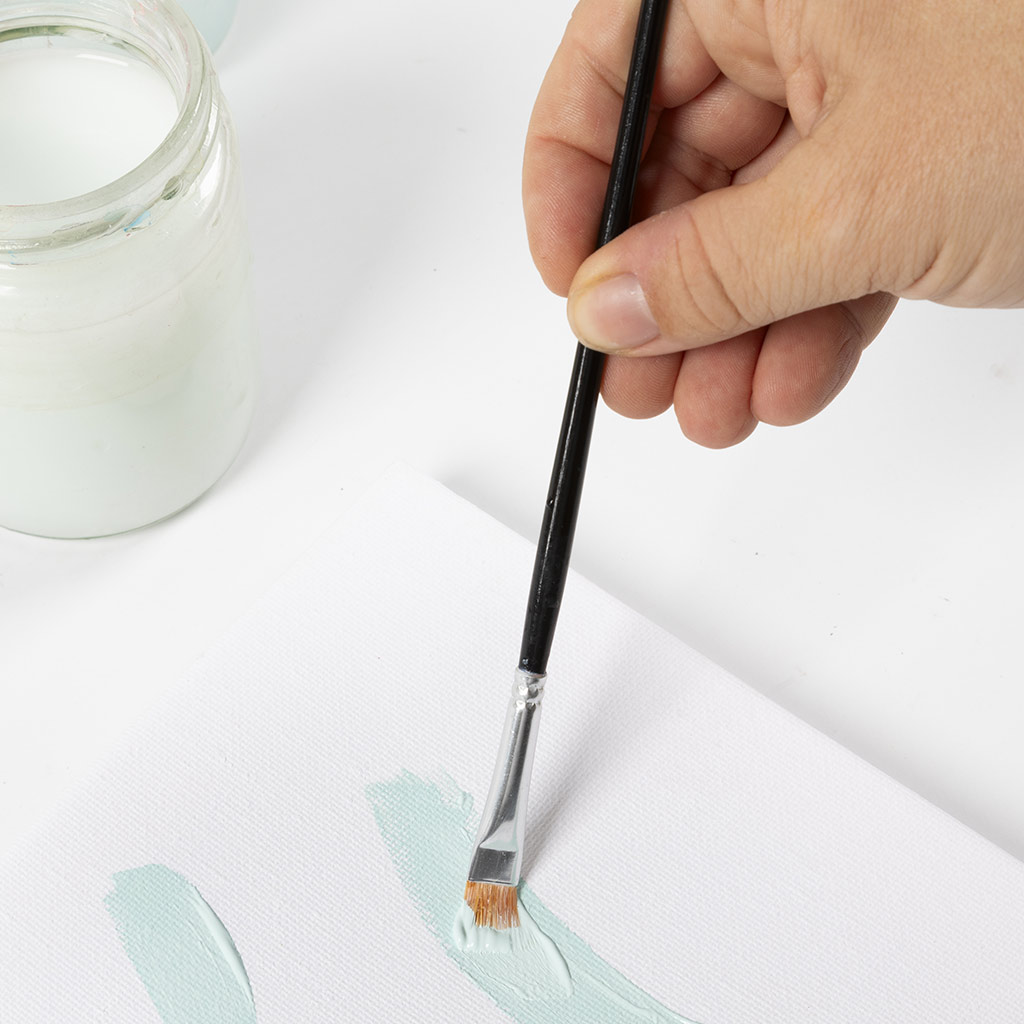 Dip the brush into the colour you want to use and start painting. In the example shown here, abstract flower stems are painted.
Dip the brush into the colour you want to use and start painting. In the example shown here, abstract flower stems are painted.4 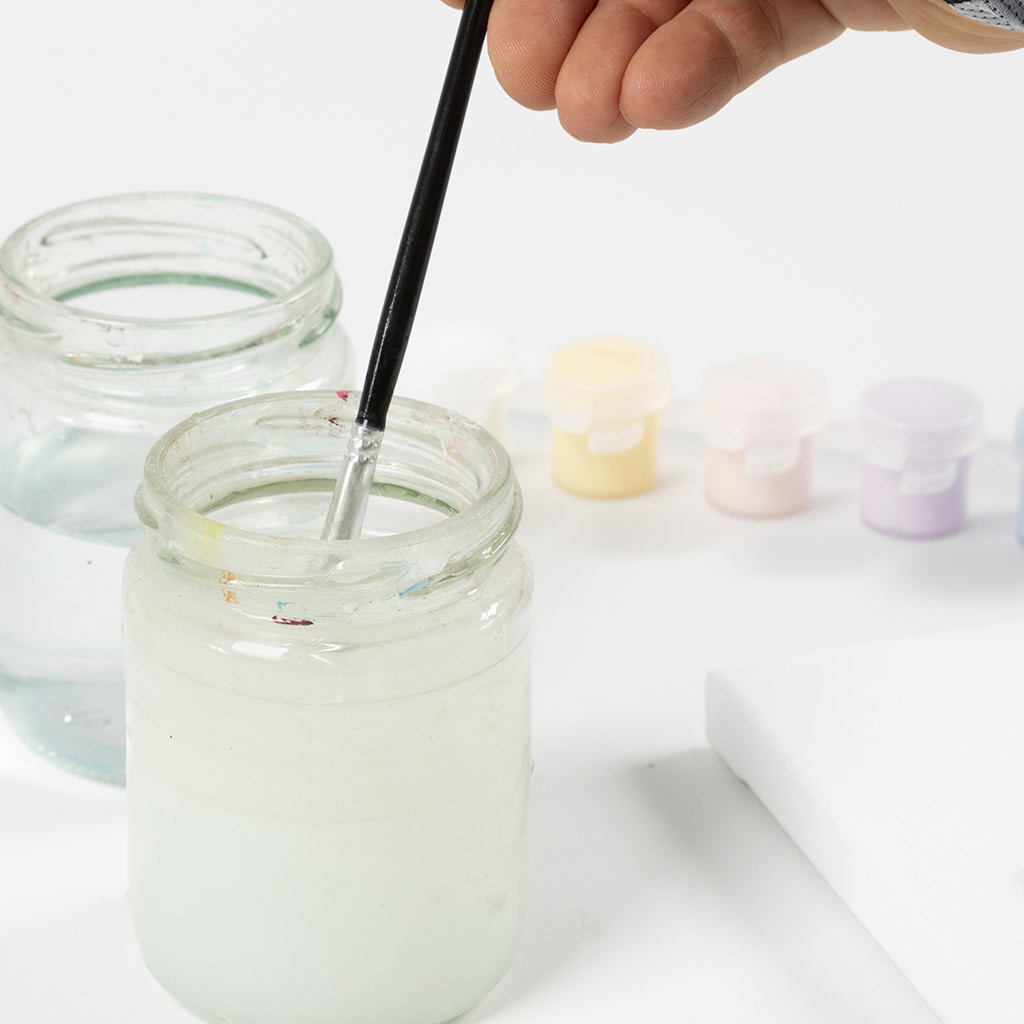 Clean the brush before switching colours, first in the one glass of water.
Clean the brush before switching colours, first in the one glass of water.5 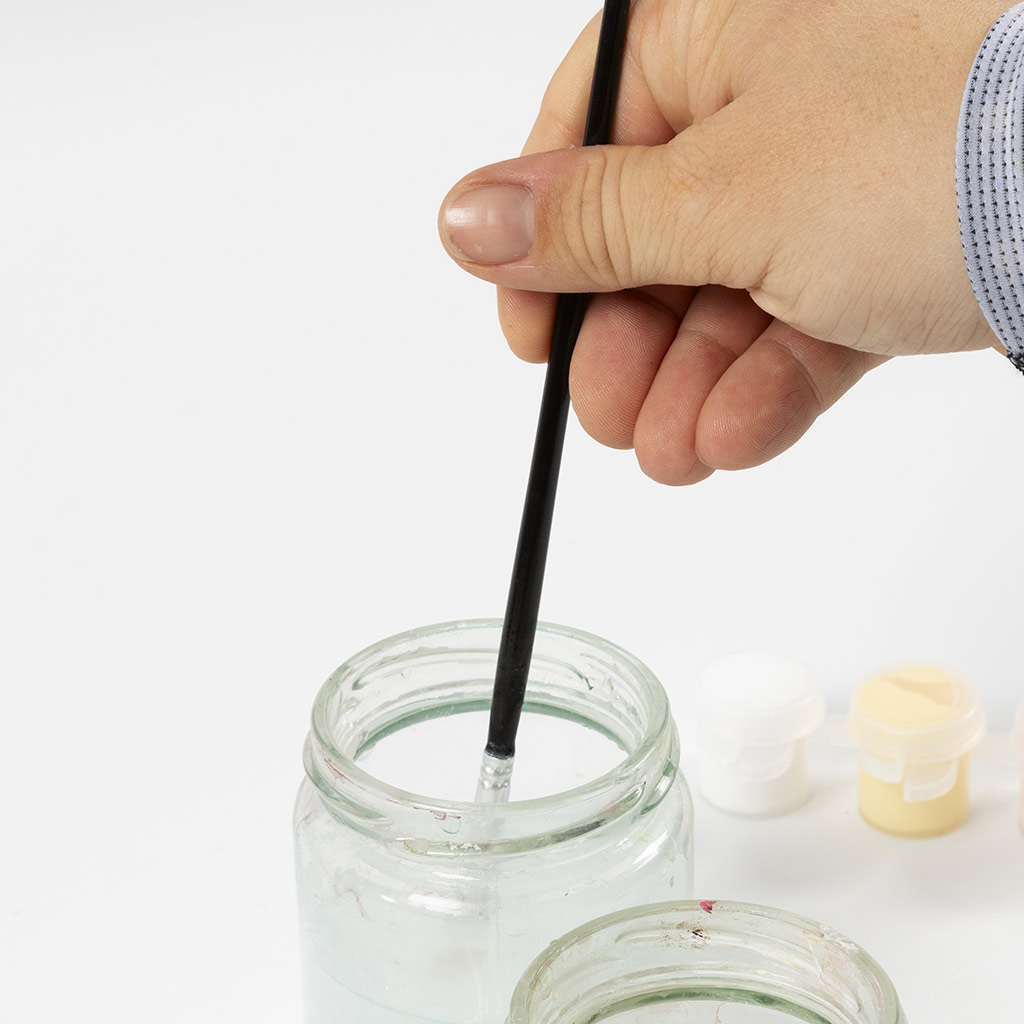 Then clean it completely in the second glass of water.
Then clean it completely in the second glass of water.6 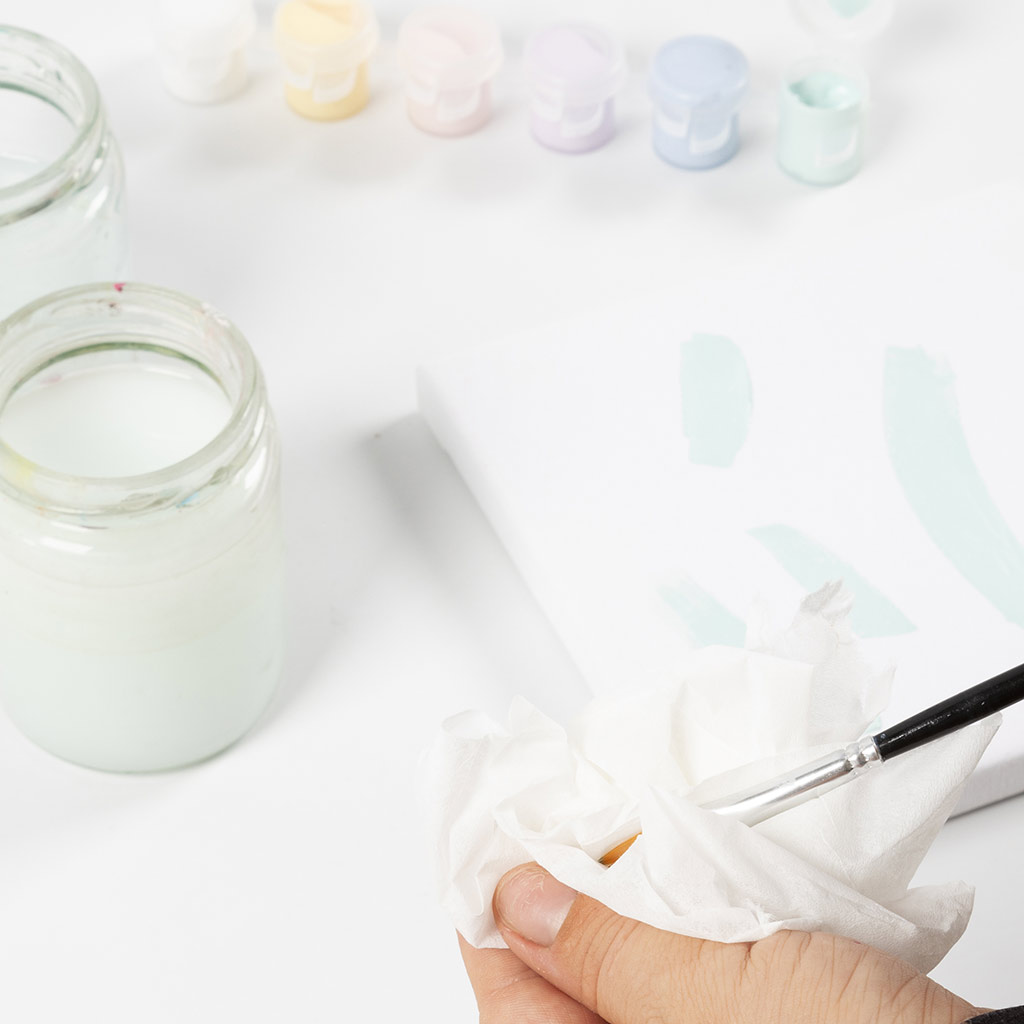 Now dry it.
Now dry it.7 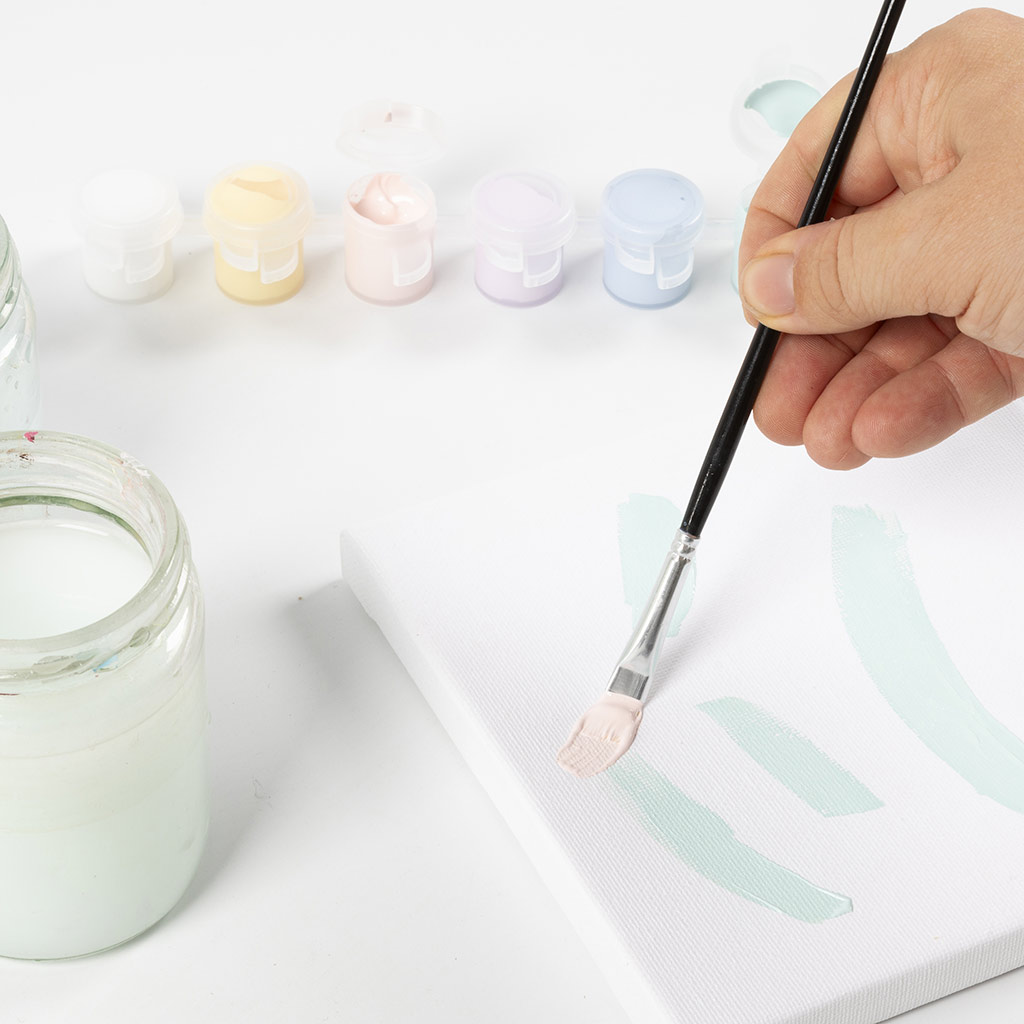 Now paint with a different colour.
Now paint with a different colour.8 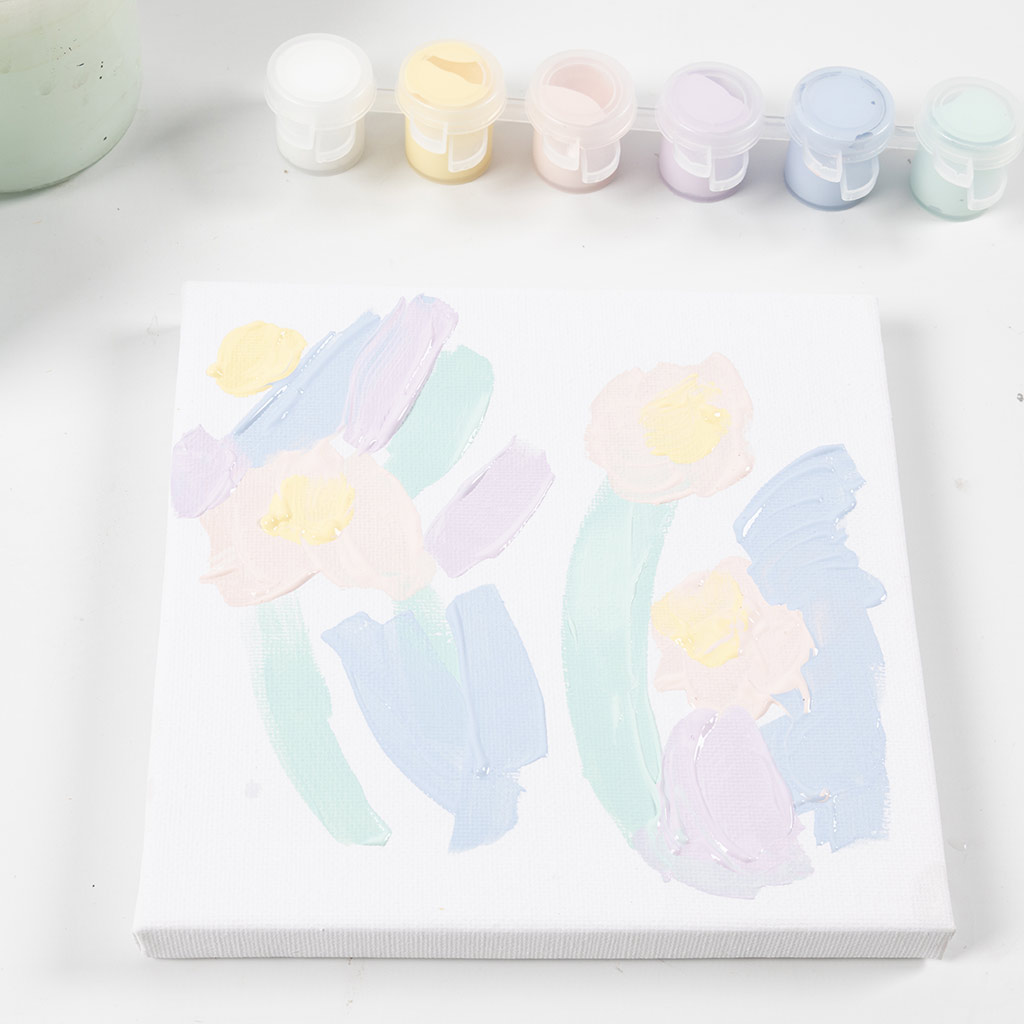 Repeat the process until your picture is exactly how you want it and allow to dry.
Repeat the process until your picture is exactly how you want it and allow to dry.9 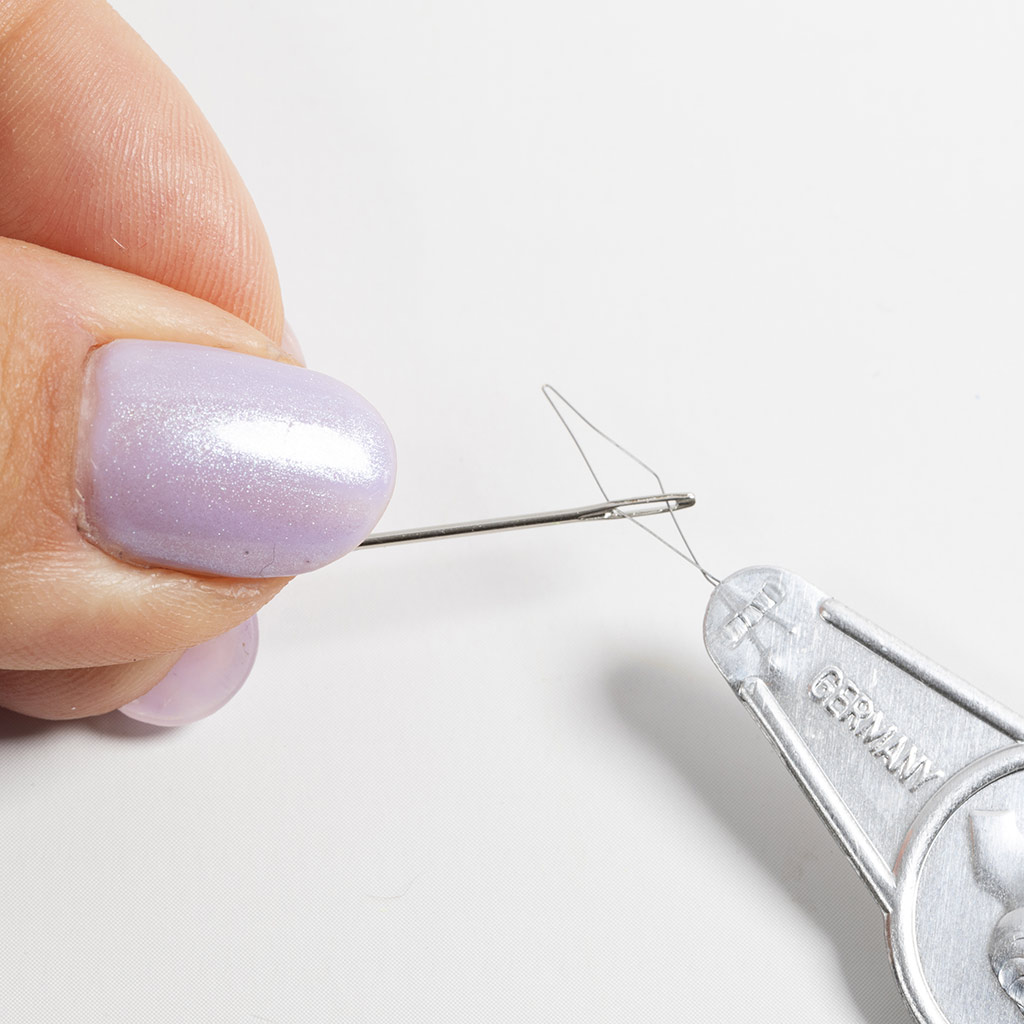 We're now going to embroider. Start by threading the needle. Insert the loop of the needle threader through the eye of the needle.
We're now going to embroider. Start by threading the needle. Insert the loop of the needle threader through the eye of the needle.10 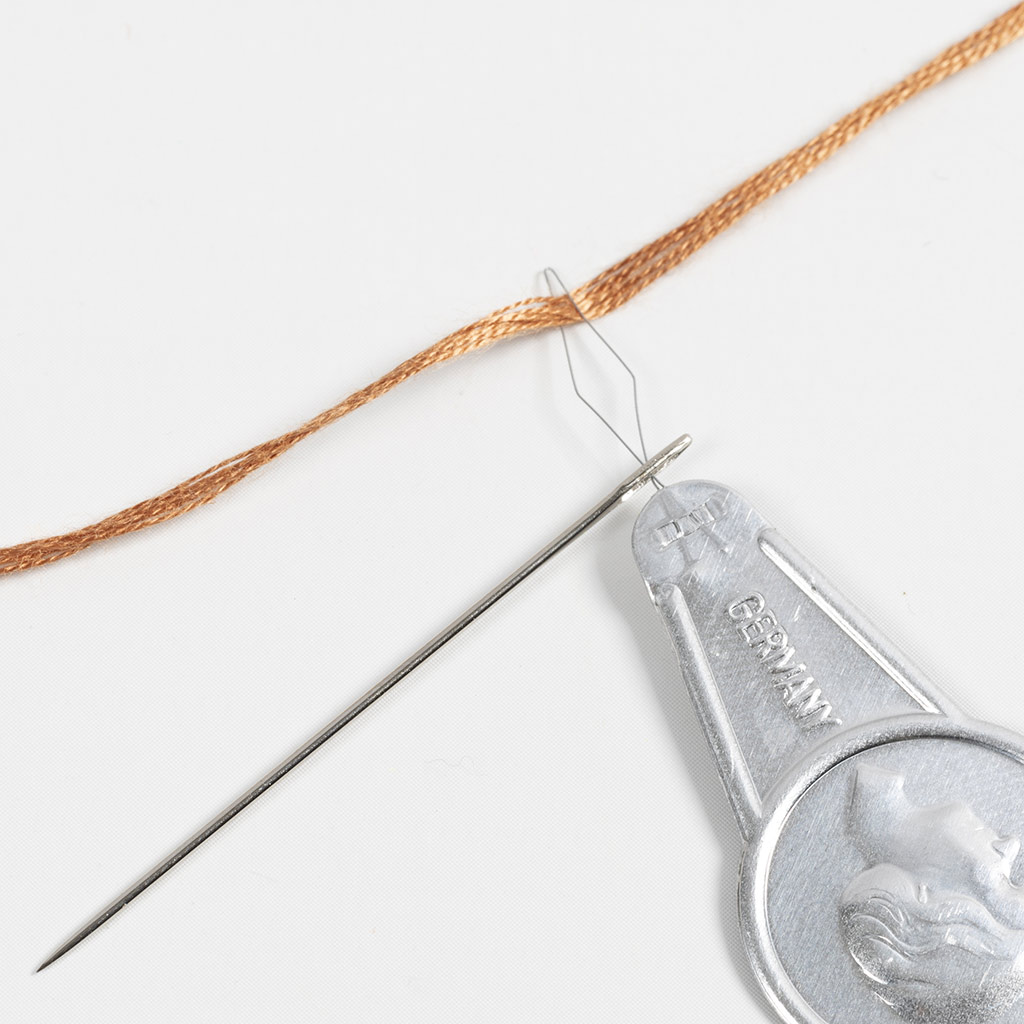 Thread the yarn through the loop on the needle threader.
Thread the yarn through the loop on the needle threader.11 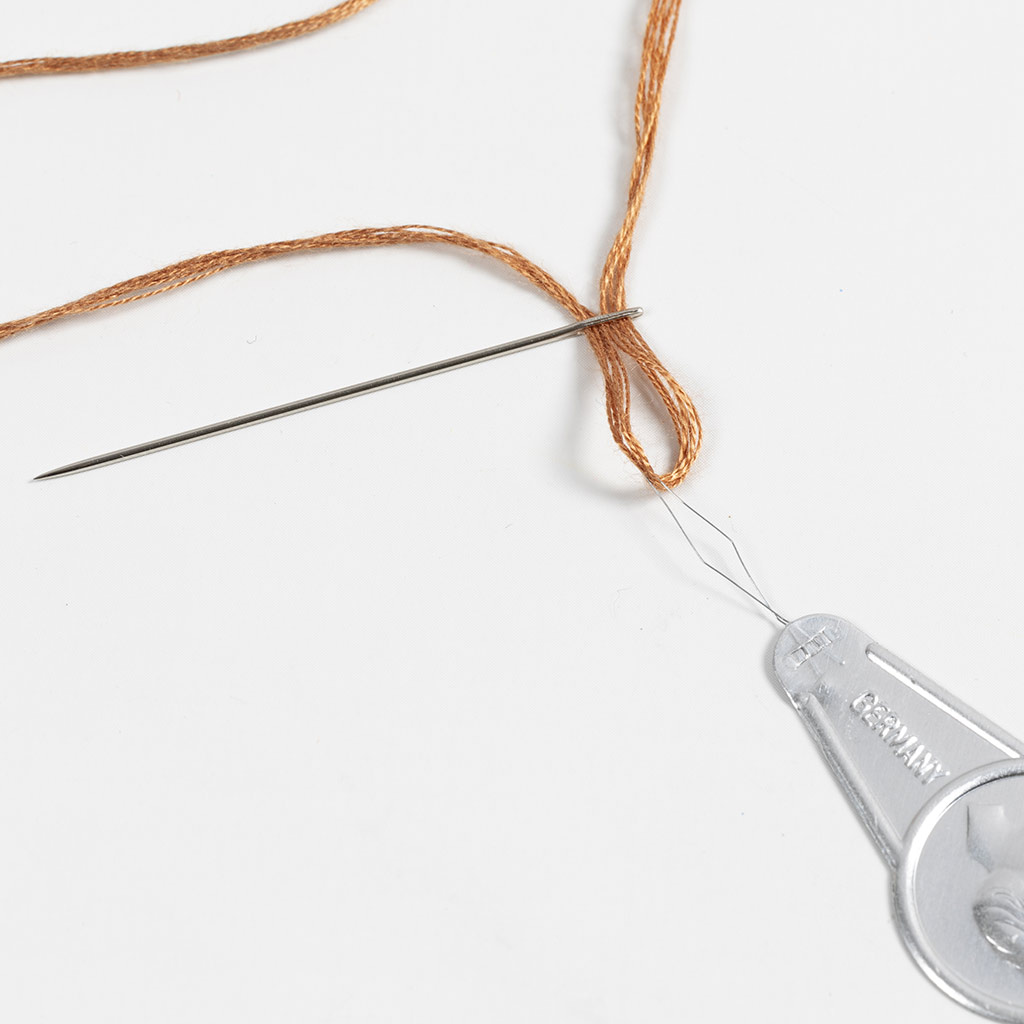 Thread the yarn through the eye of the needle by pulling the needle threader.
Thread the yarn through the eye of the needle by pulling the needle threader.12 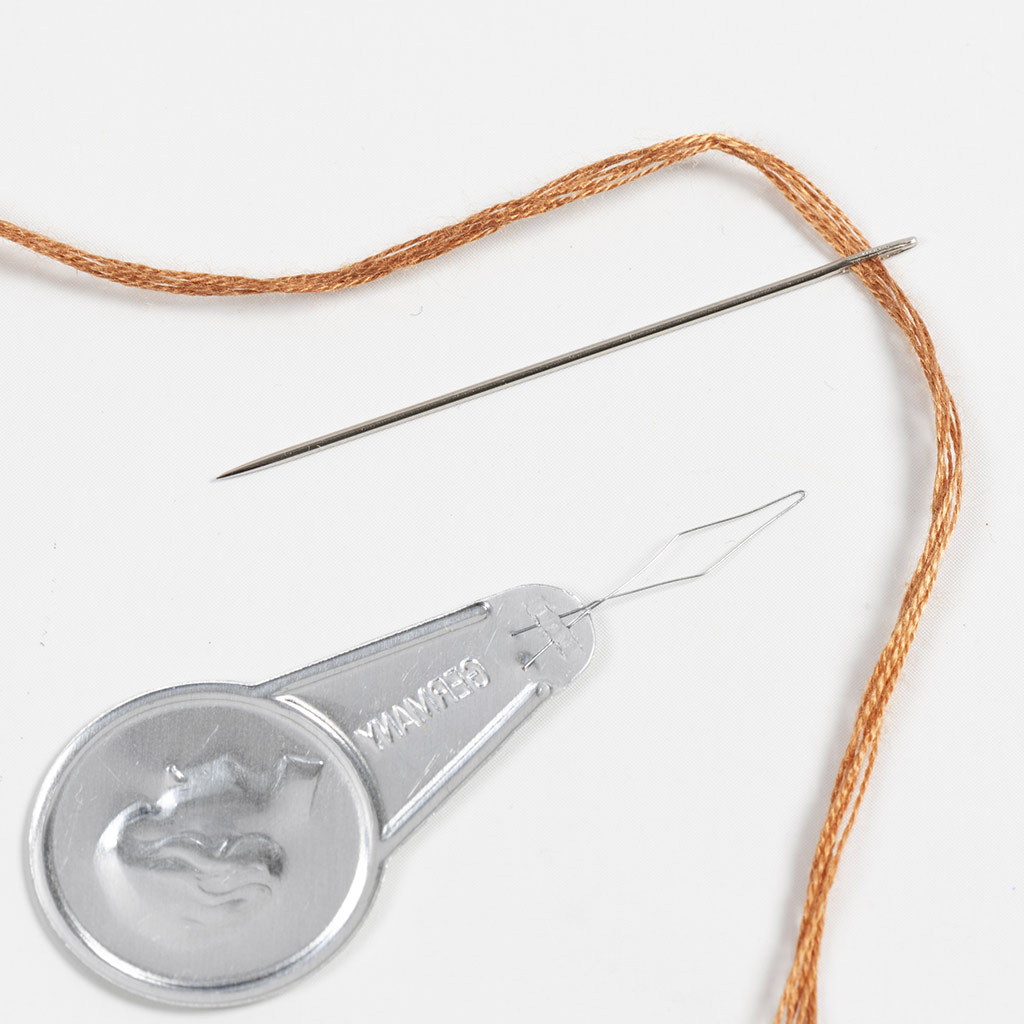 Remove the needle threader from the yarn and your needle is now ready for use.
Remove the needle threader from the yarn and your needle is now ready for use.13 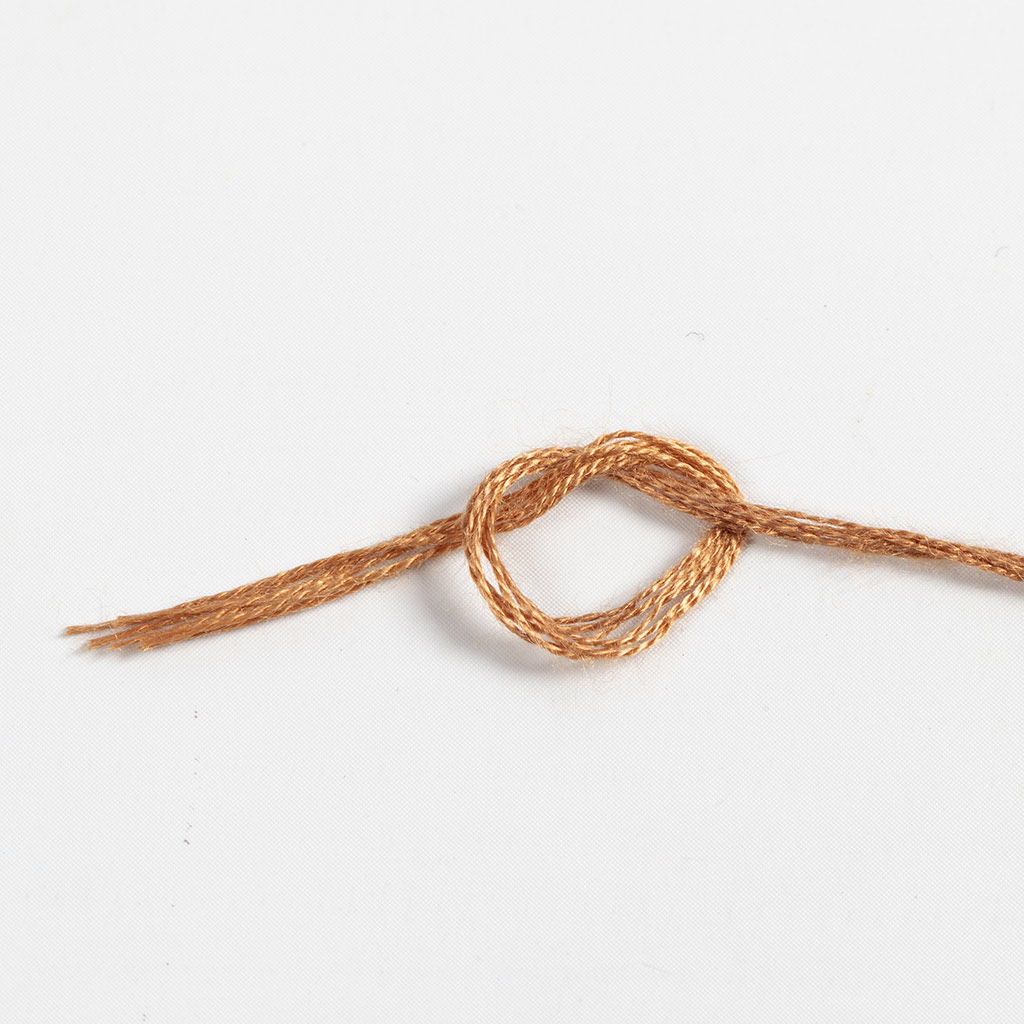 Tie a knot at the end of the yarn.
Tie a knot at the end of the yarn.14 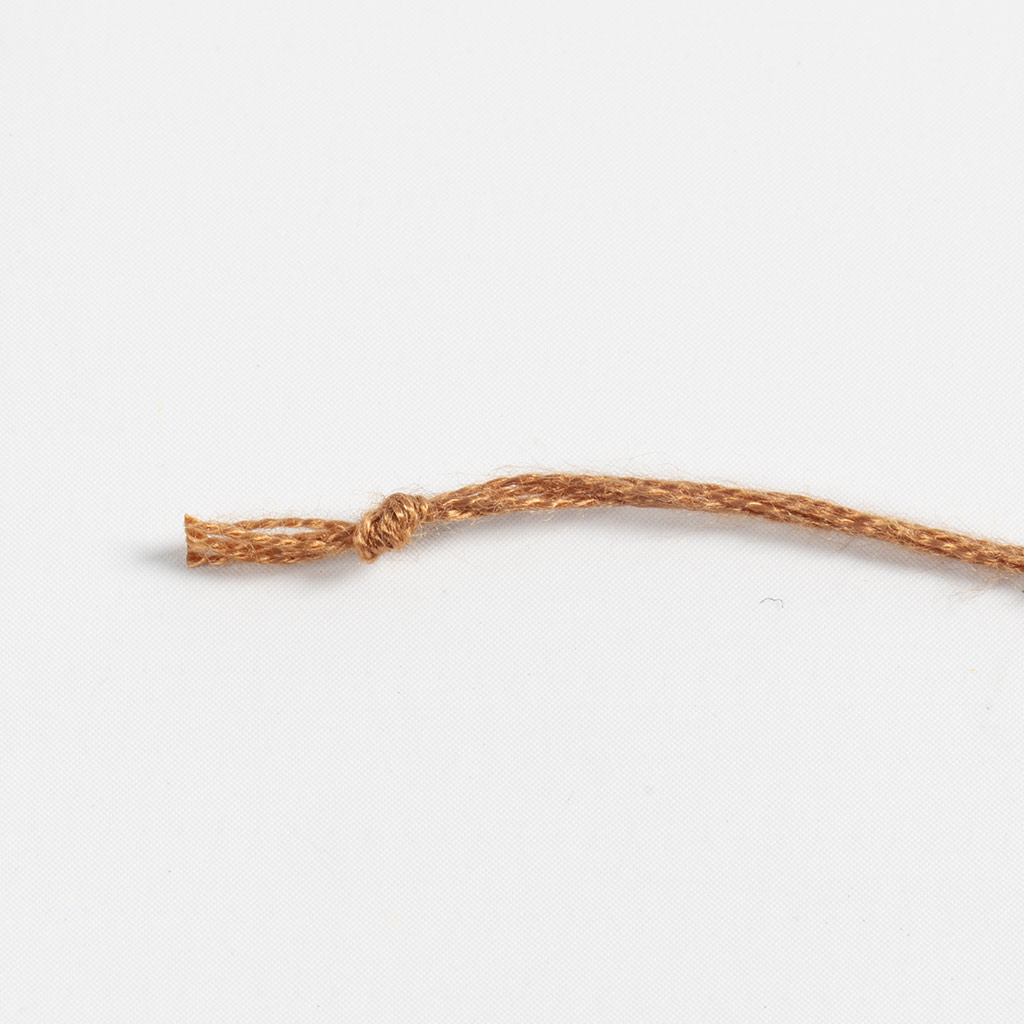 Tighten.
Tighten.15 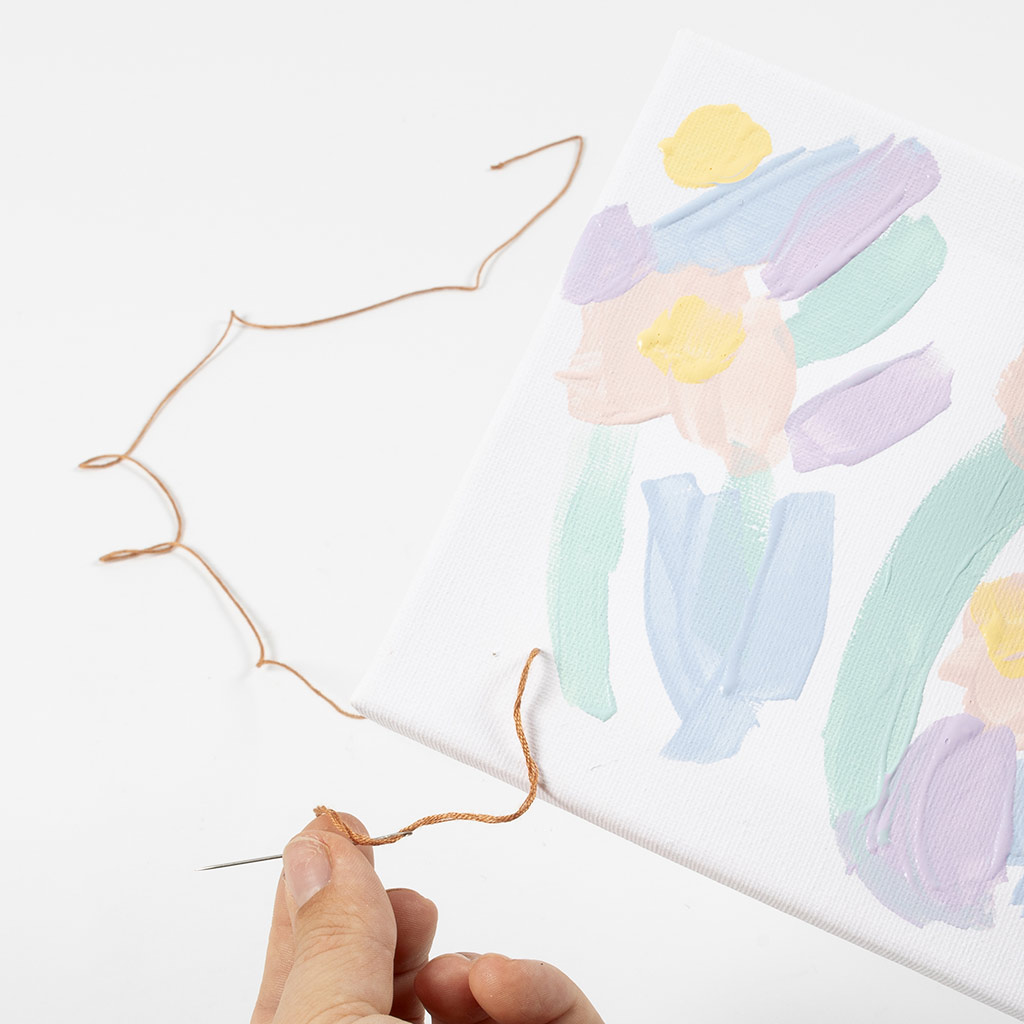 Insert the needle from the inside of the canvas where you want to embroider.
Insert the needle from the inside of the canvas where you want to embroider.16 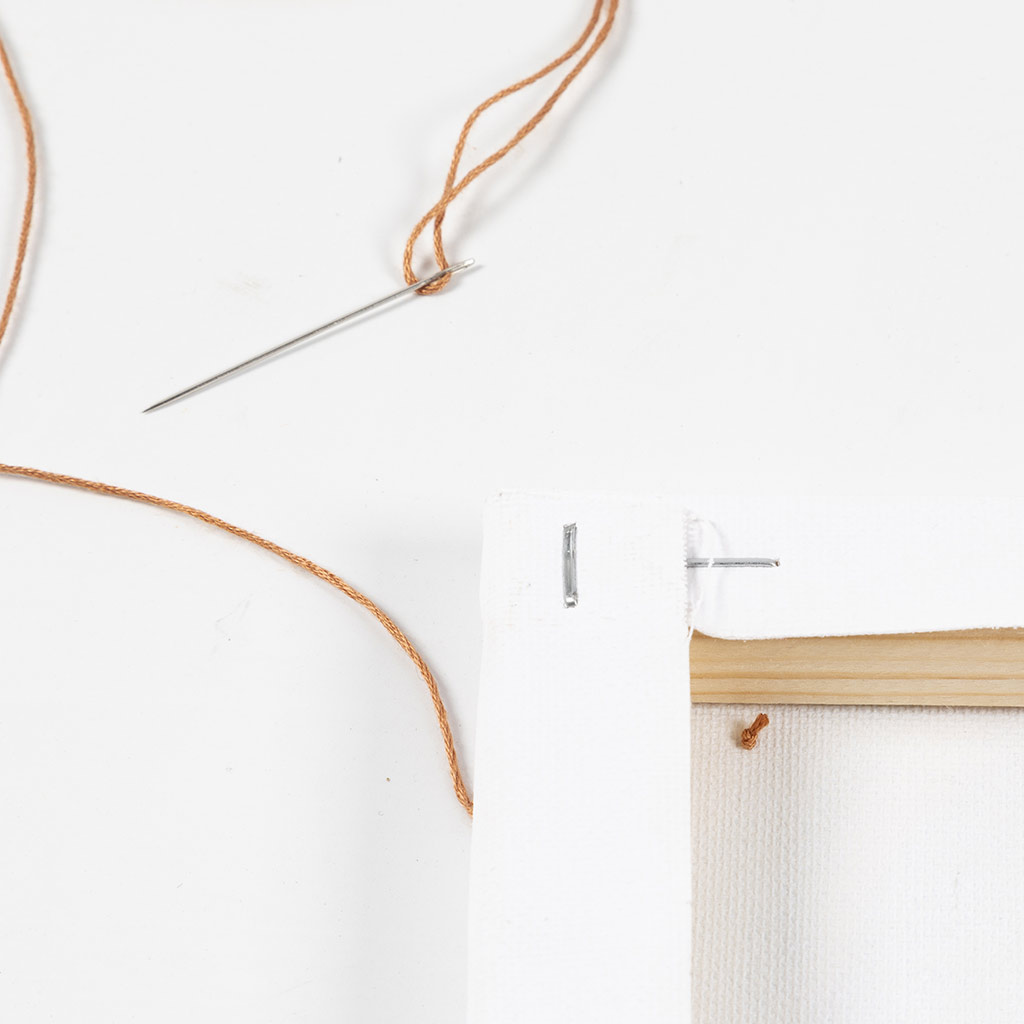 Pull the yarn through. The knot will keep the thread in place.
Pull the yarn through. The knot will keep the thread in place.17 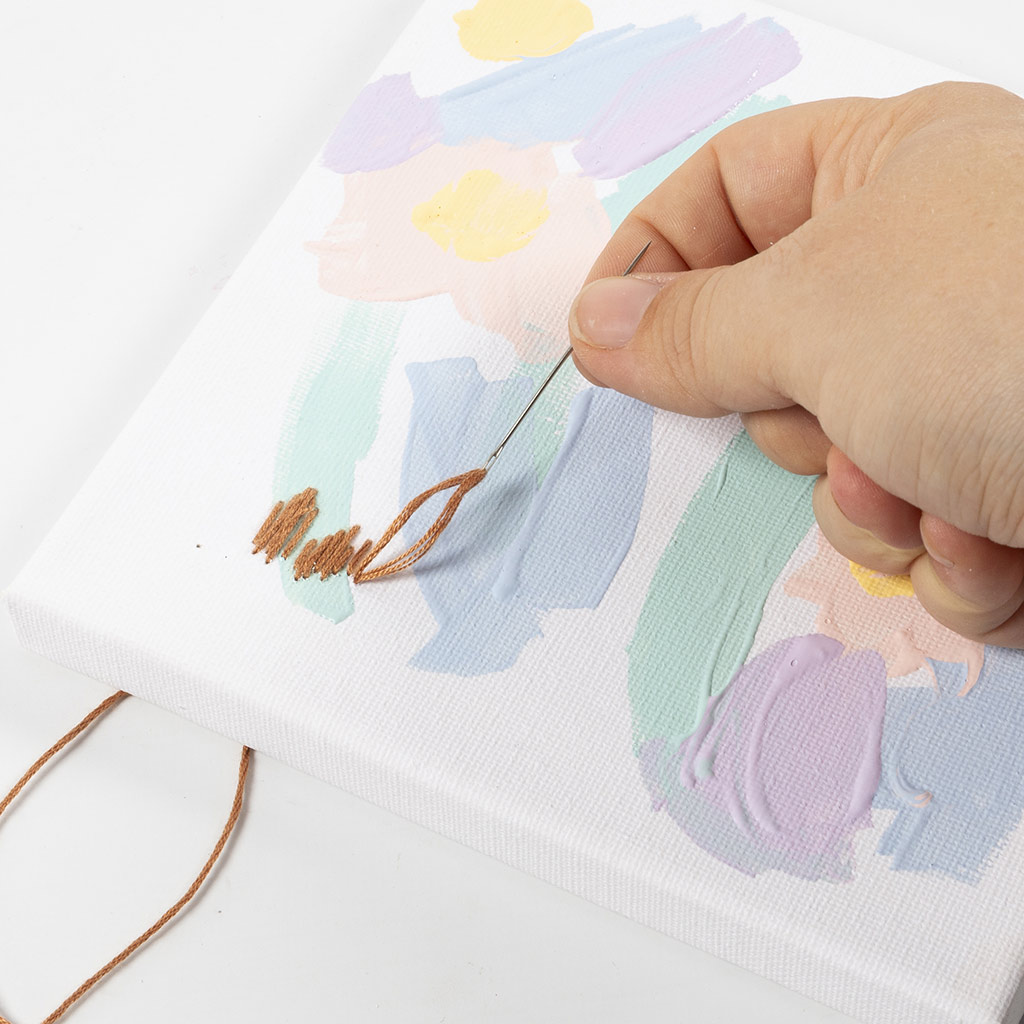 Thread the yarn through from the back to the front.
Thread the yarn through from the back to the front.18 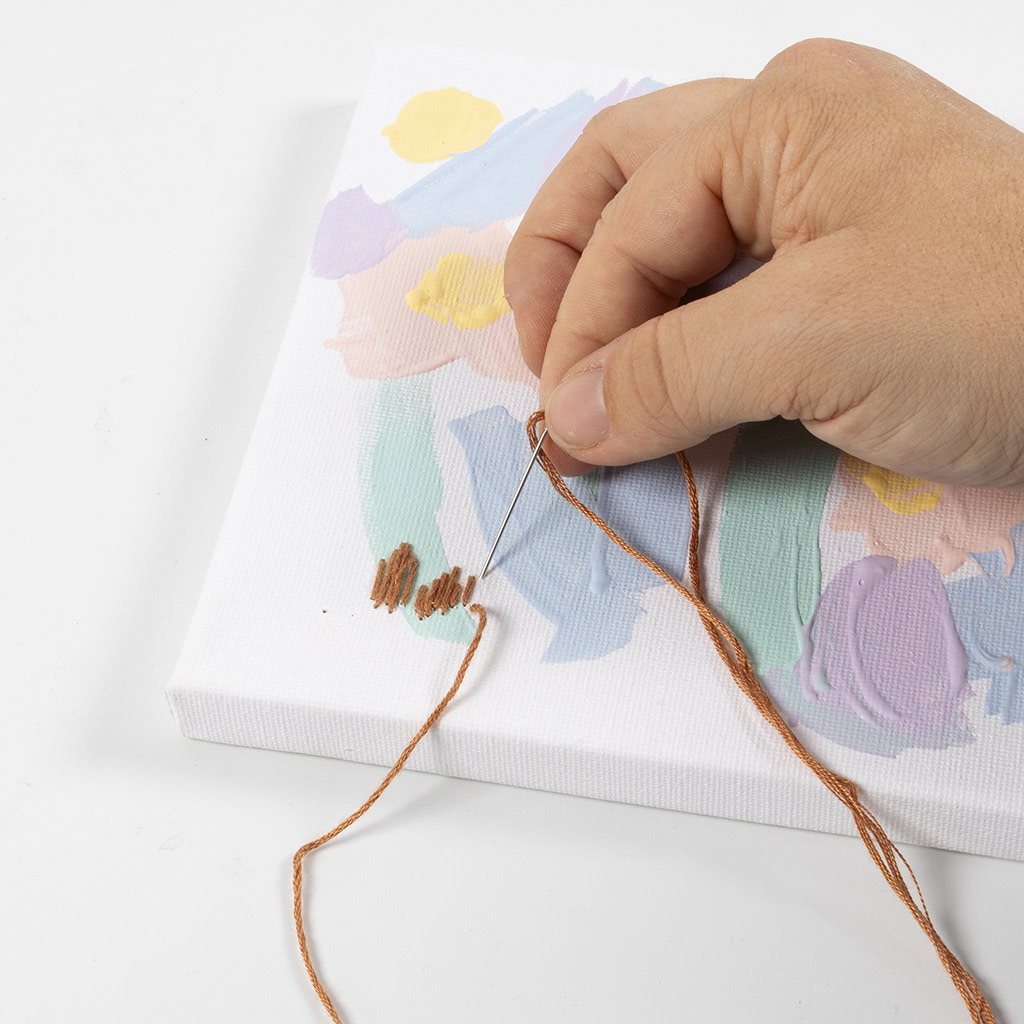 Now insert the needle from the front to the back.
Now insert the needle from the front to the back.19 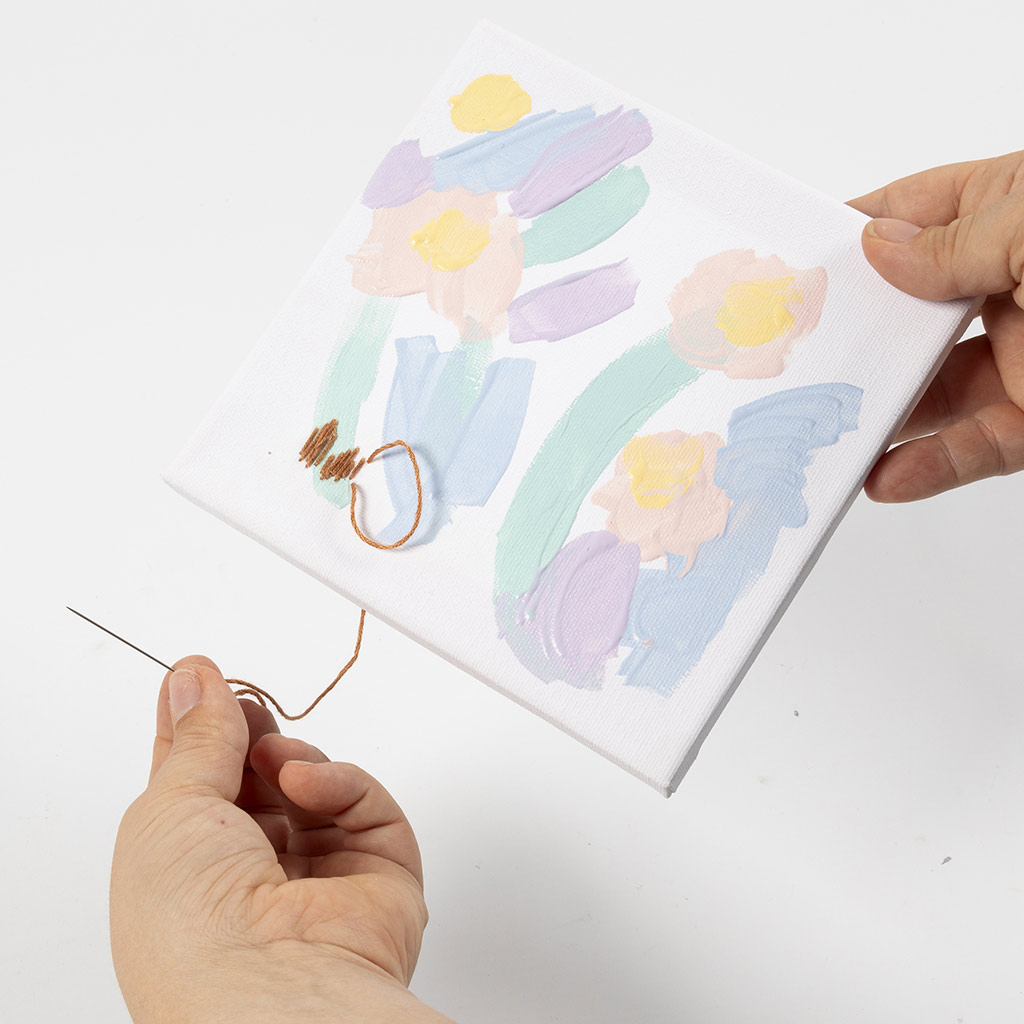 Tighten and you’ve made a stitch. Repeat the process until you have the desired design.
Tighten and you’ve made a stitch. Repeat the process until you have the desired design.20 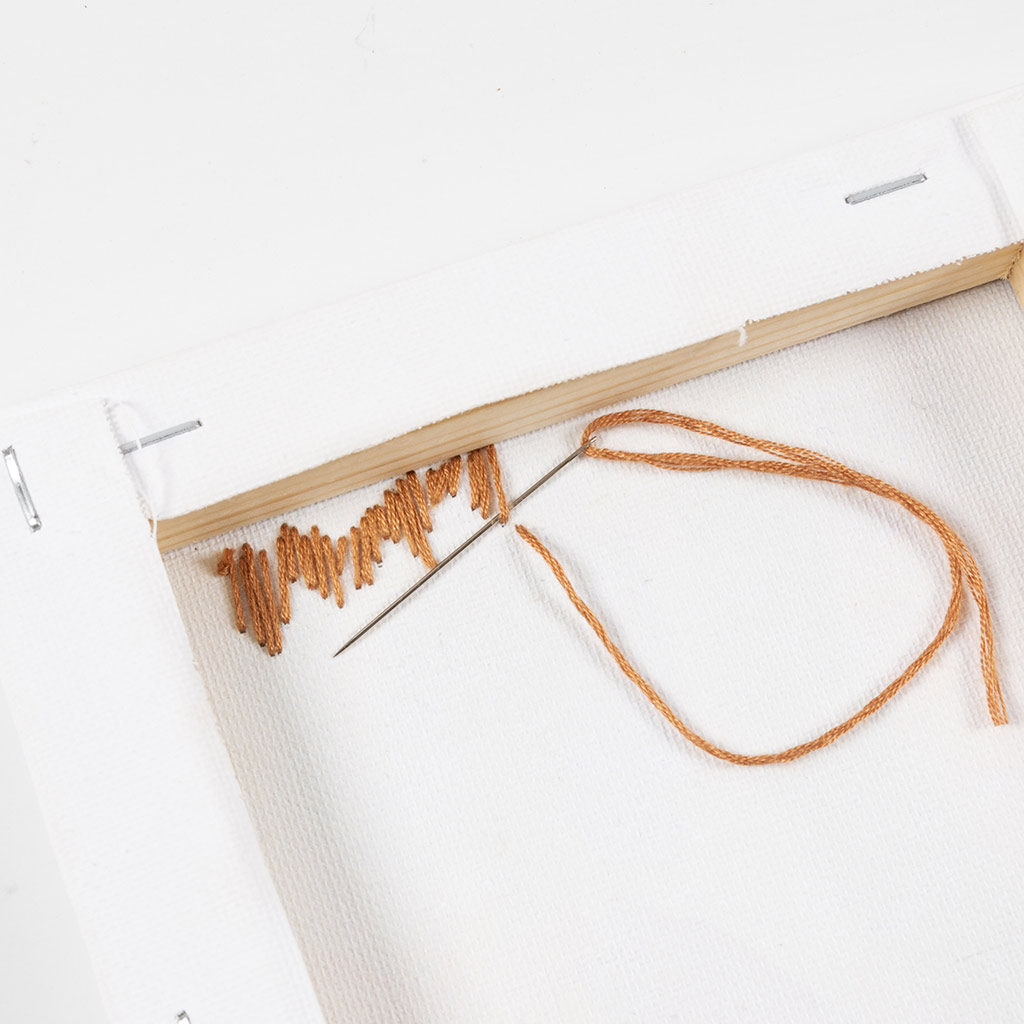 Fasten the thread by pulling the needle through the last stitch on the back as shown in the picture.
Tip: you can also let the thread hang freely on the front instead of fastening off the end.
Fasten the thread by pulling the needle through the last stitch on the back as shown in the picture.
Tip: you can also let the thread hang freely on the front instead of fastening off the end.
Fasten the thread by pulling the needle through the last stitch on the back as shown in the picture.
Tip: you can also let the thread hang freely on the front instead of fastening off the end.21 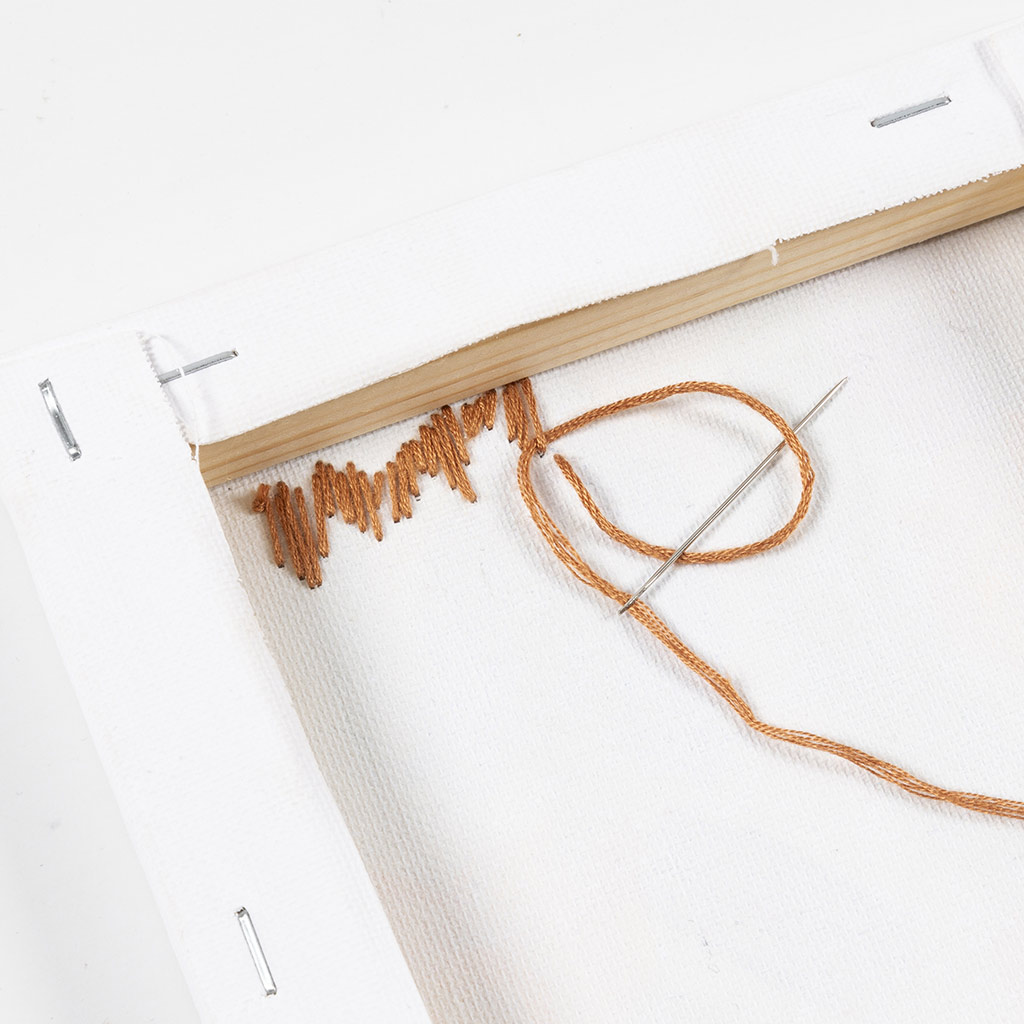 Push the needle through the loop that forms.
Push the needle through the loop that forms.22 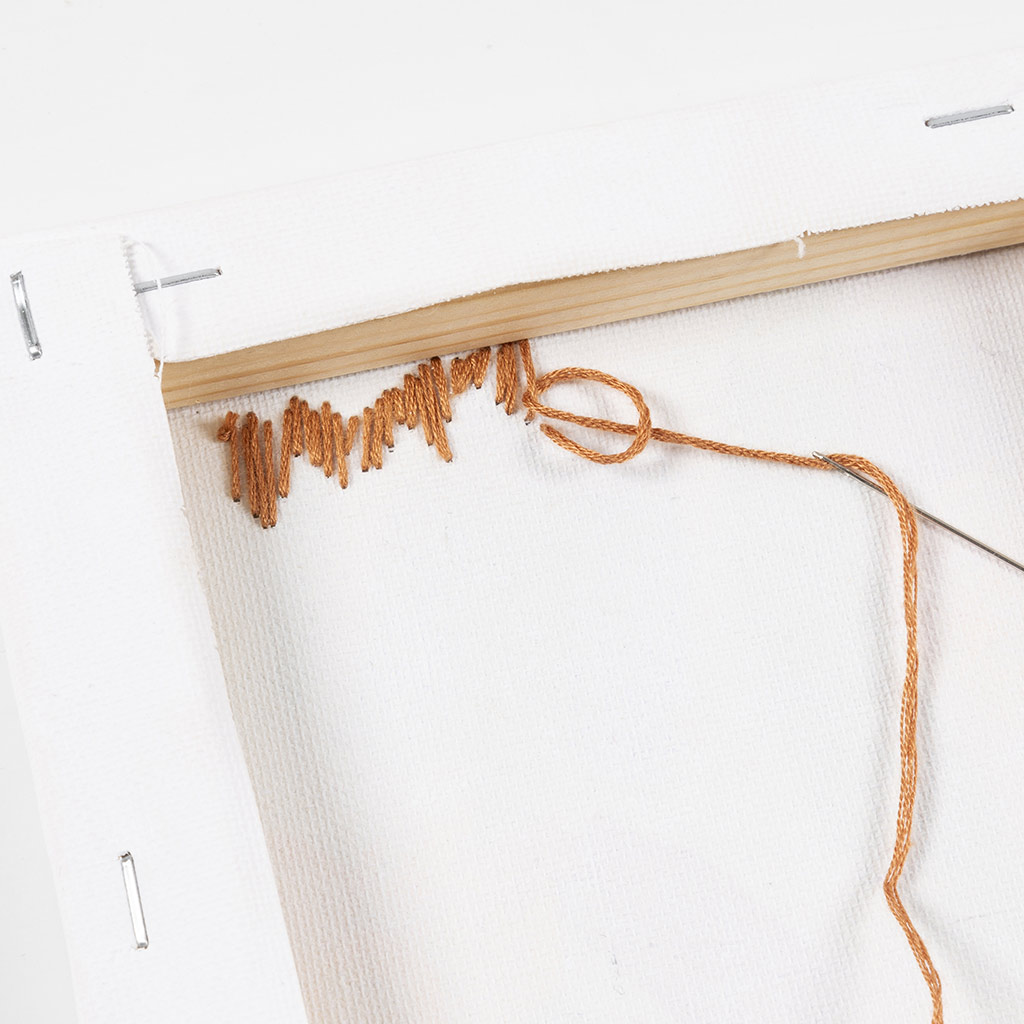 Tighten.
Tighten.23 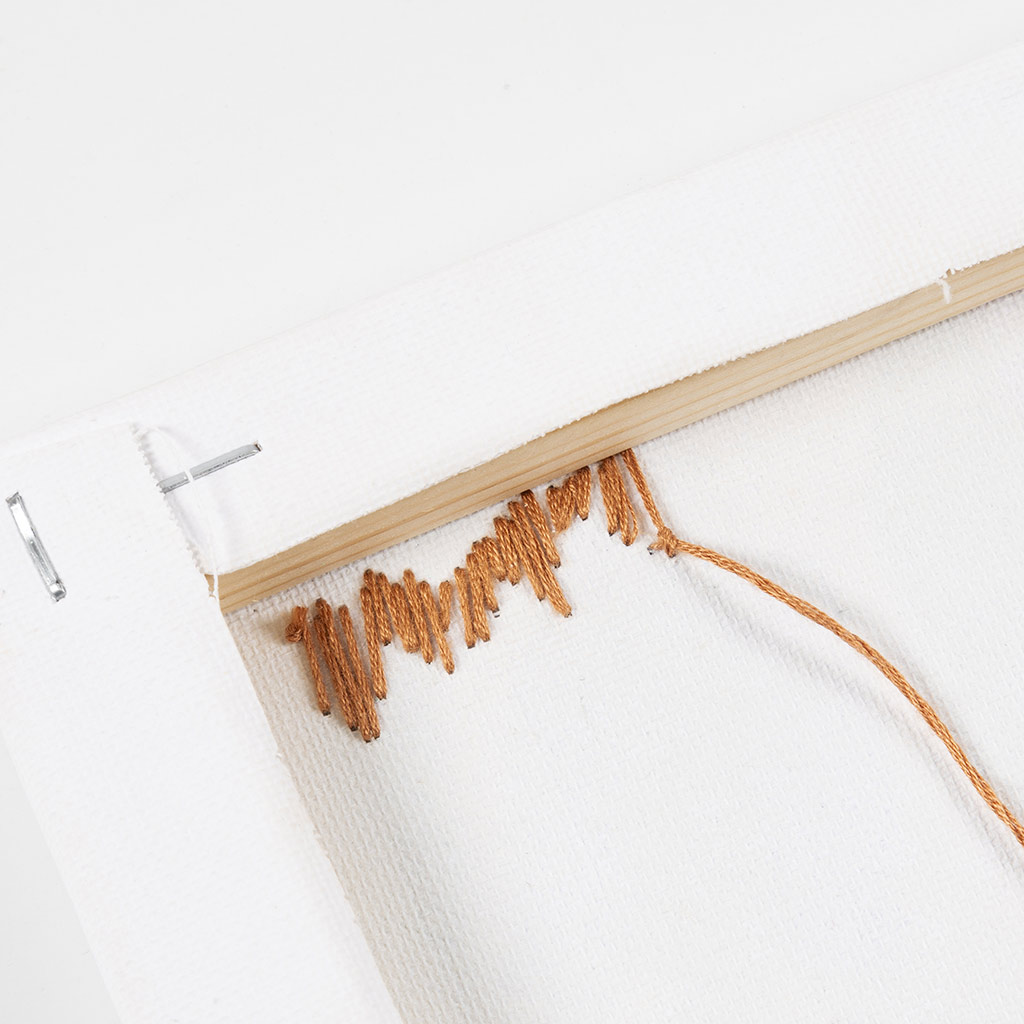 This creates a knot.
This creates a knot.24 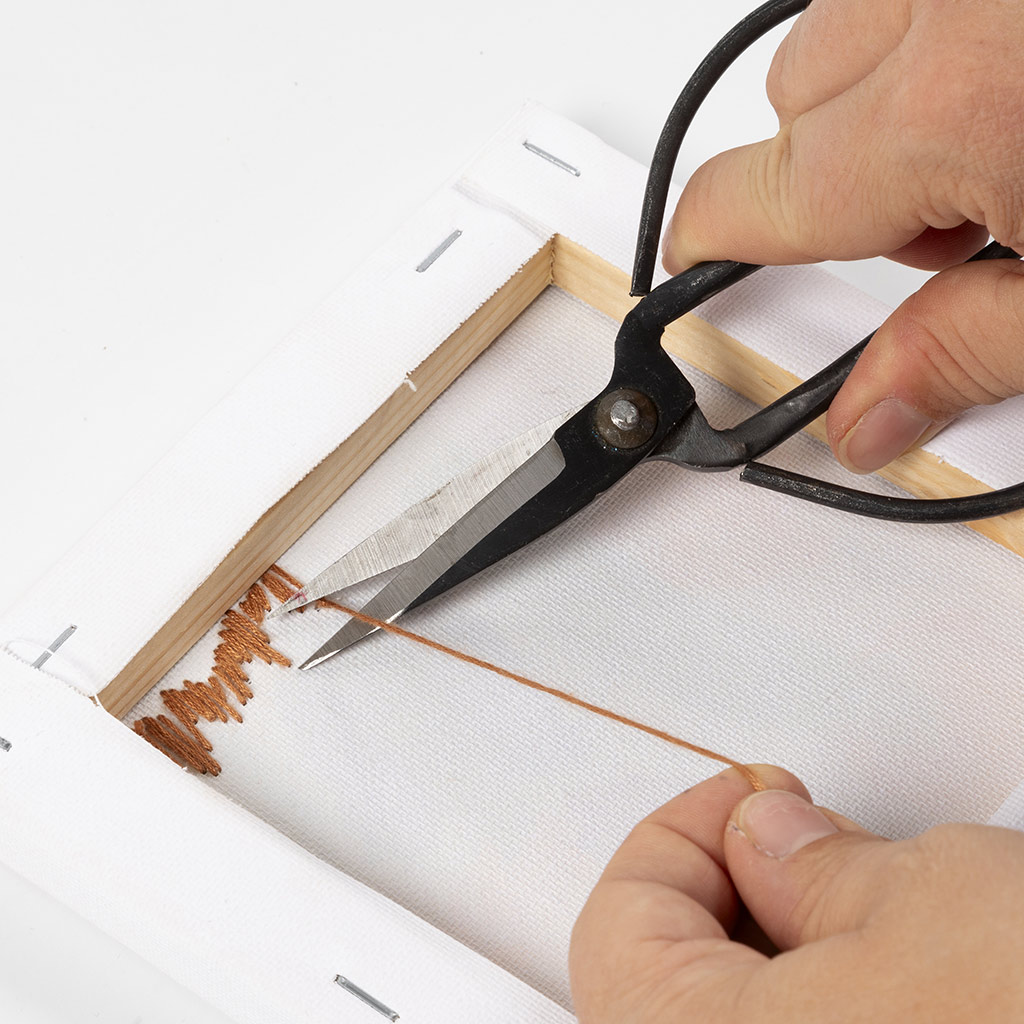 Cut off the excess thread.
Cut off the excess thread.25 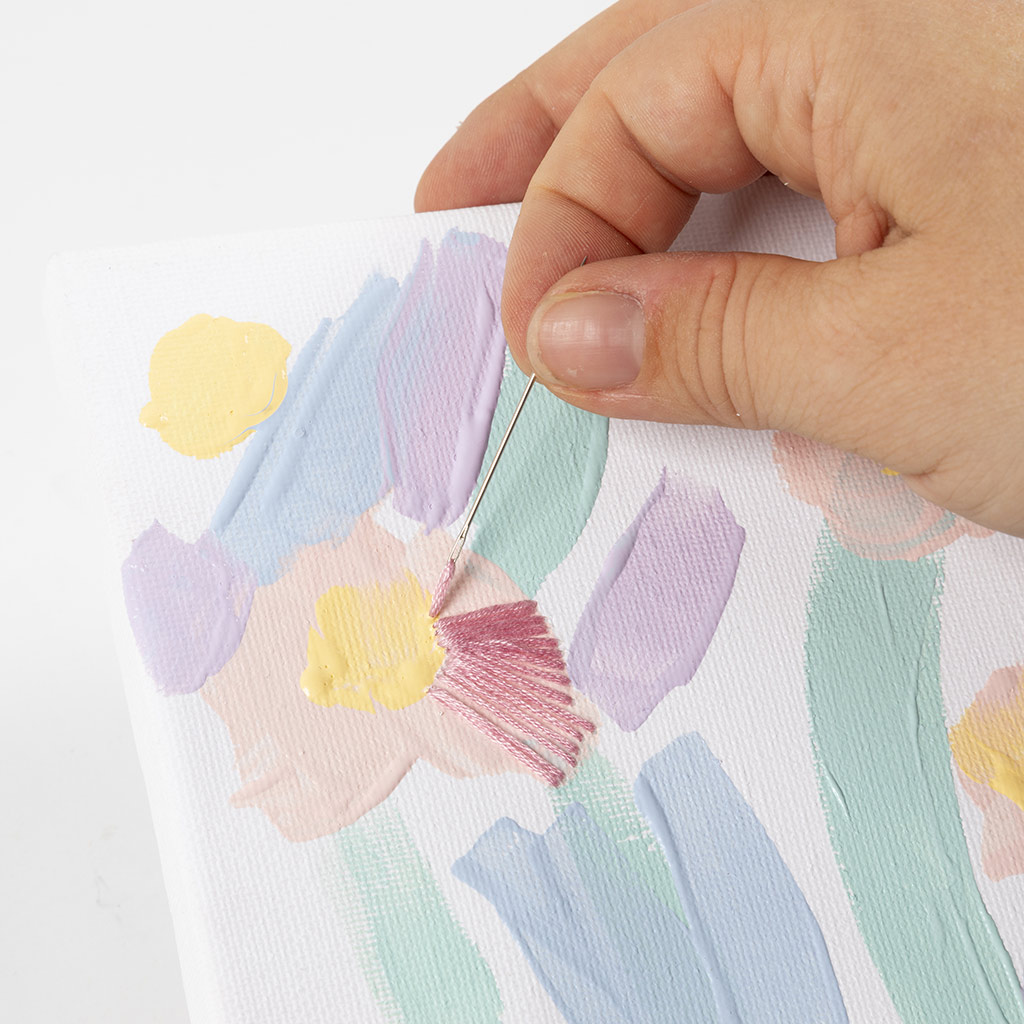 Repeat steps 9-16 to switch to a different thread colour.
Insert the needle from back to front again.
Repeat steps 9-16 to switch to a different thread colour.
Insert the needle from back to front again.
Repeat steps 9-16 to switch to a different thread colour.
Insert the needle from back to front again.26 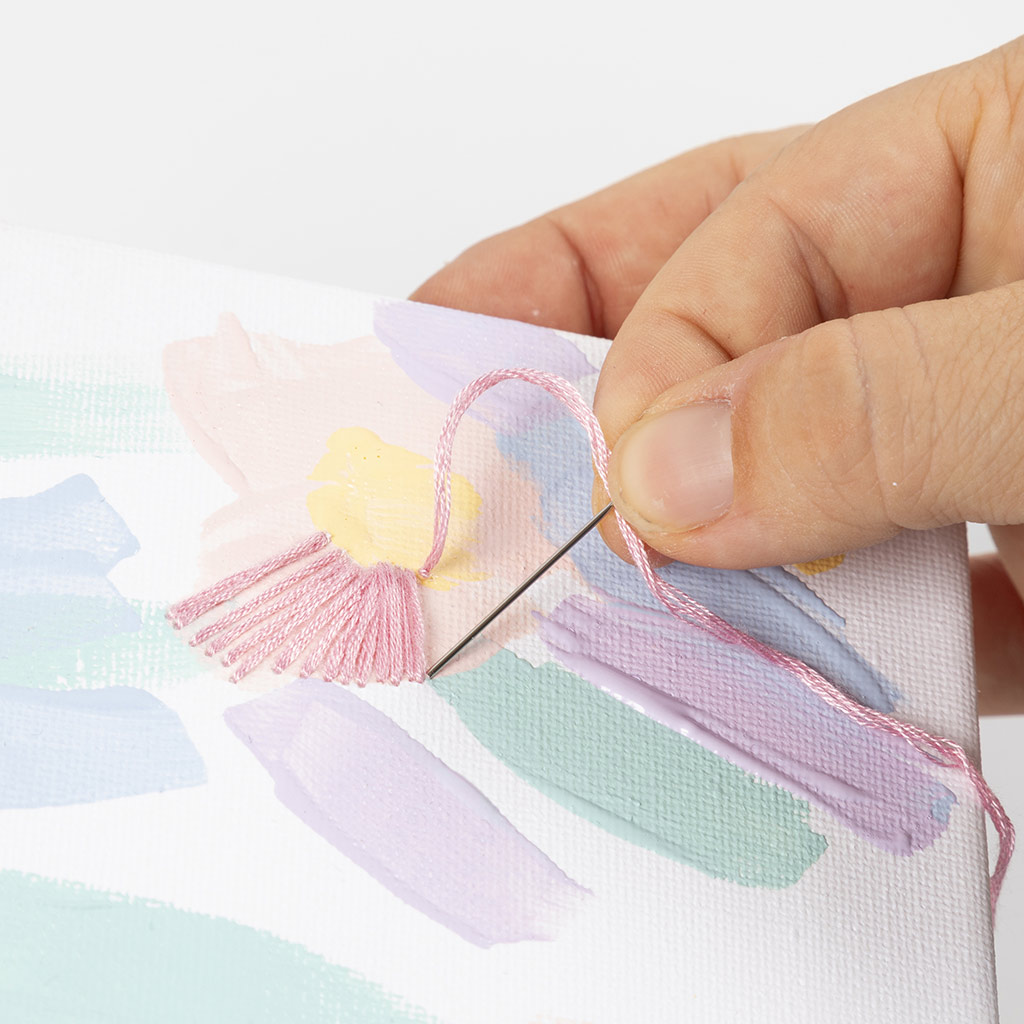 Continue from front to back. Repeat the process with all the colours you want to use.
Continue from front to back. Repeat the process with all the colours you want to use.27 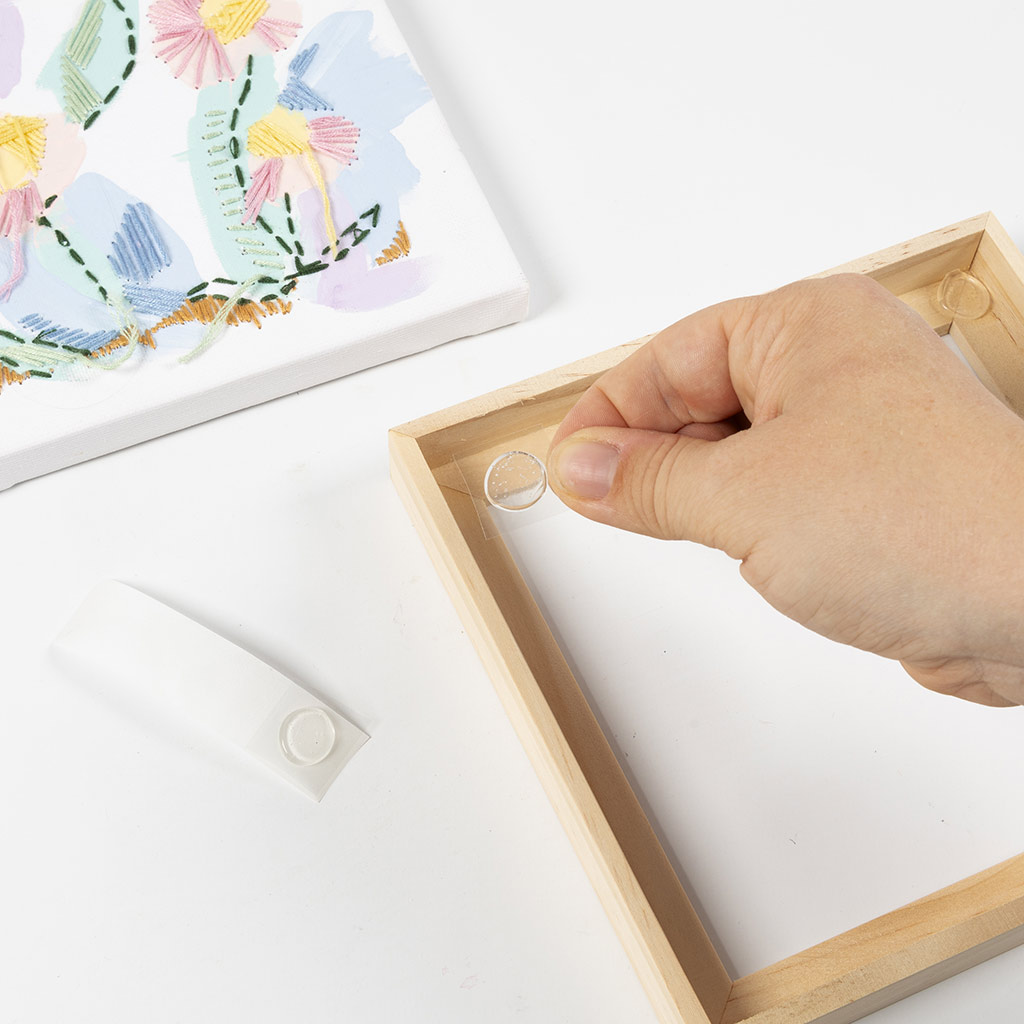 When you're done with the picture, you can place the canvas in the frame. Apply glue dots to the four corners of the frame.
When you're done with the picture, you can place the canvas in the frame. Apply glue dots to the four corners of the frame.28 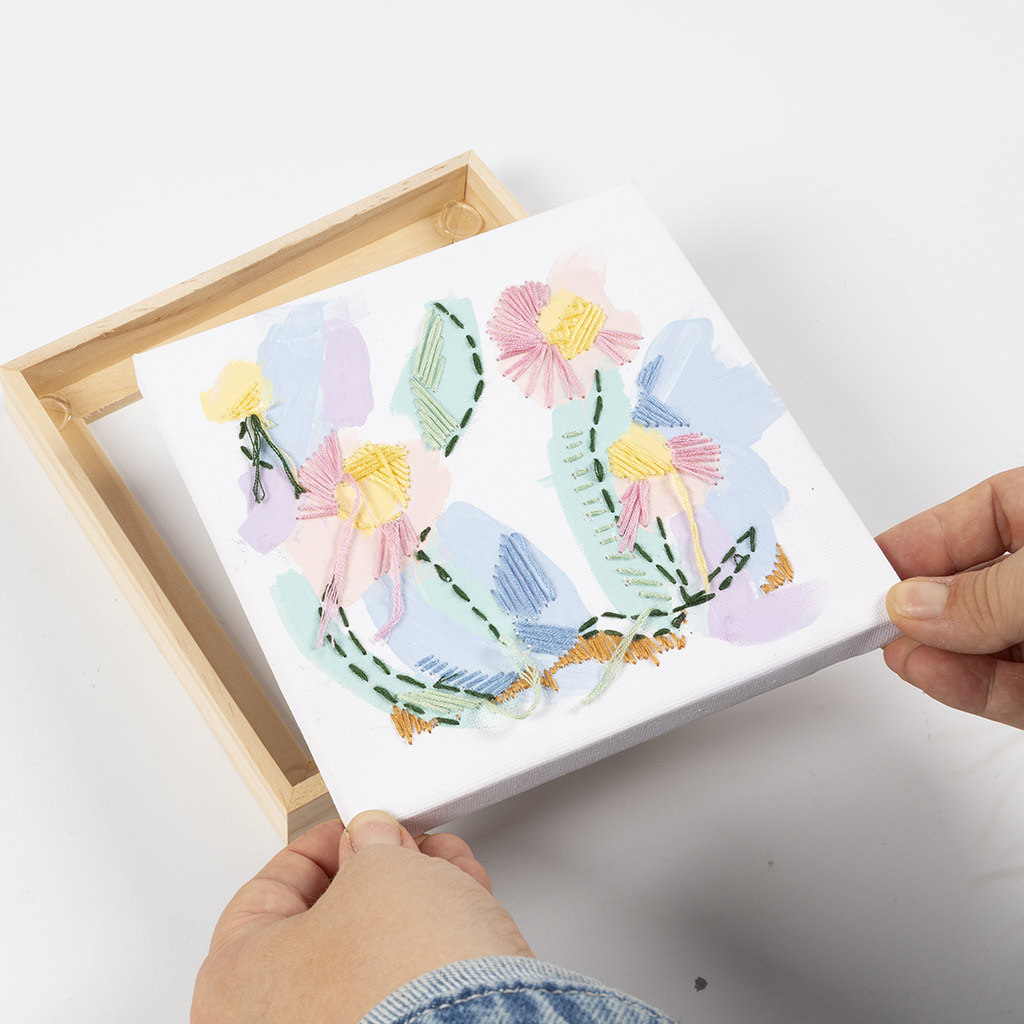 Place the canvas in the frame.
Place the canvas in the frame.29 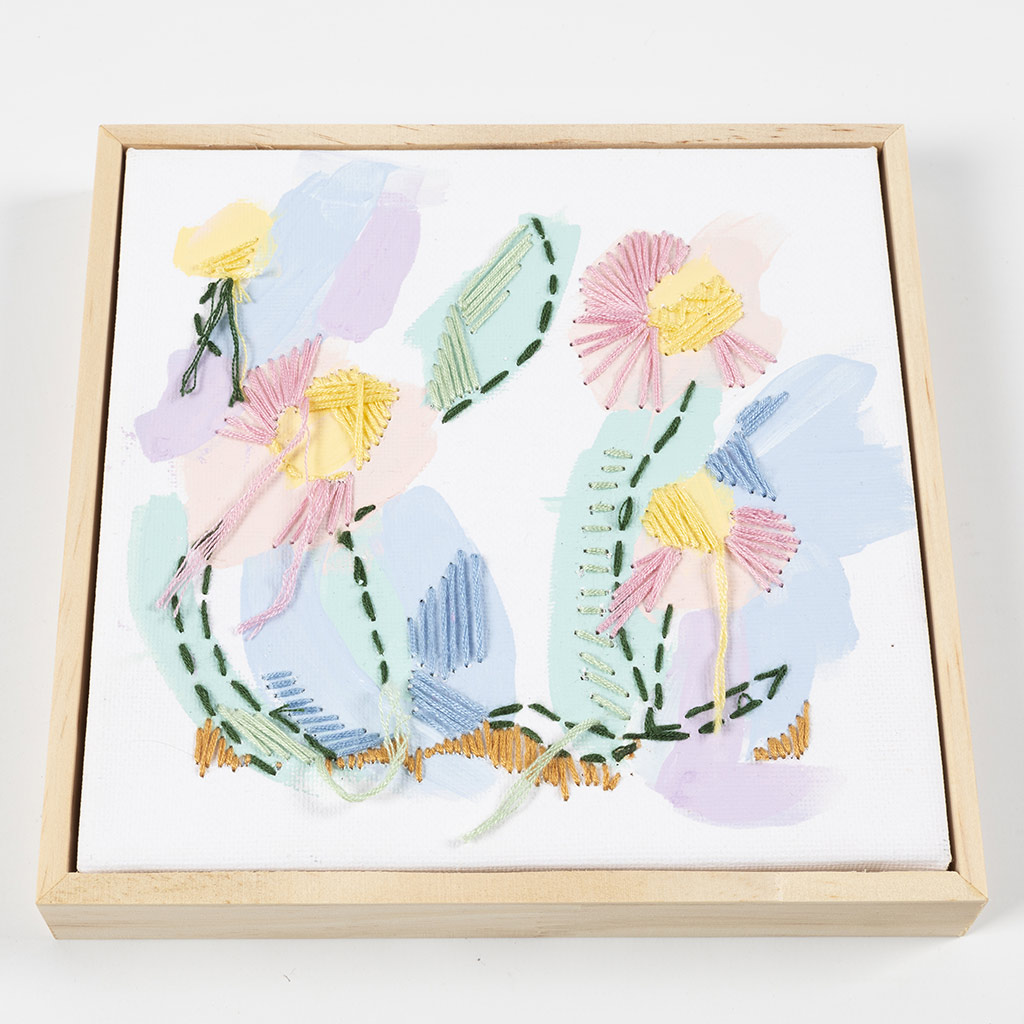 It should look like this.
It should look like this.30 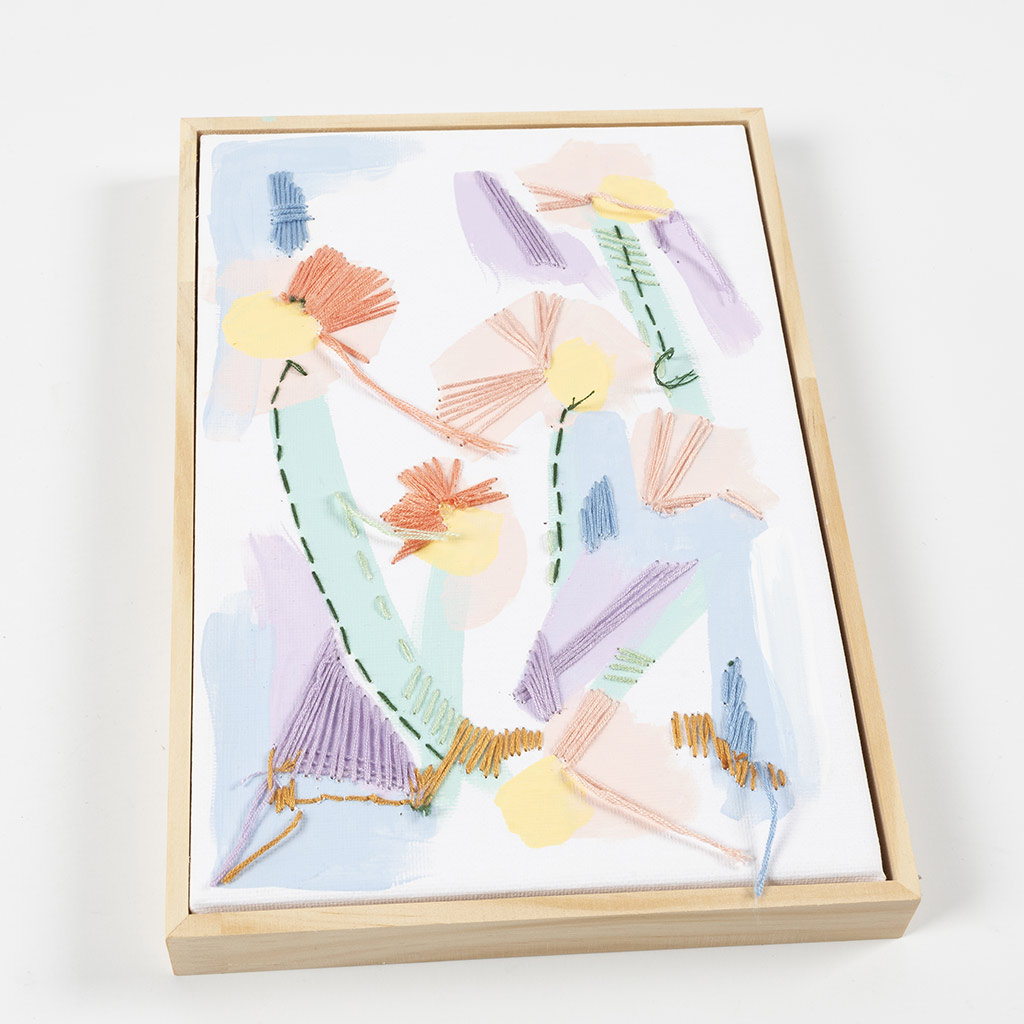 If you’re looking for inspiration, here’s an example of a design.
If you’re looking for inspiration, here’s an example of a design.Also go exploring in
