
New
Creative idea
Decorative bow in self-hardening clay
#v17323
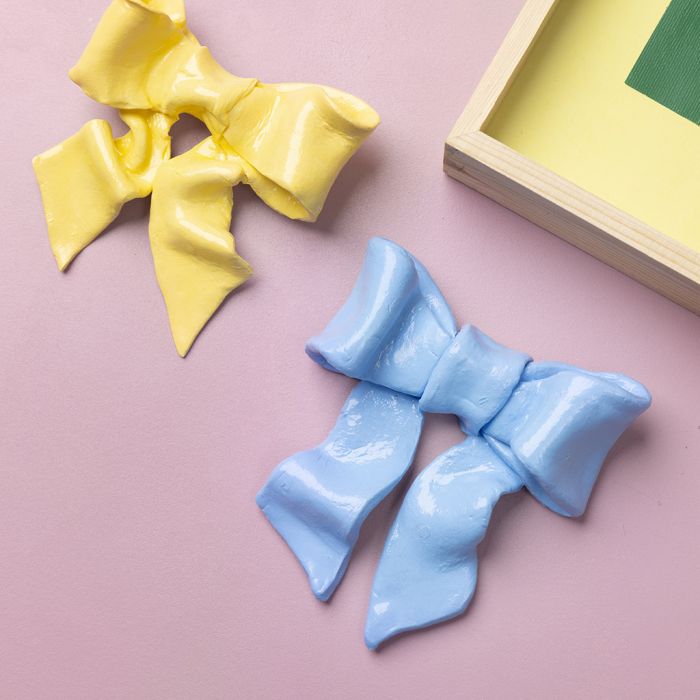
Create your own shiny bow for the wall using self-hardening clay. Print the template and follow the guide step by step.
#v17323
How to do it Download the templates/recipes
1 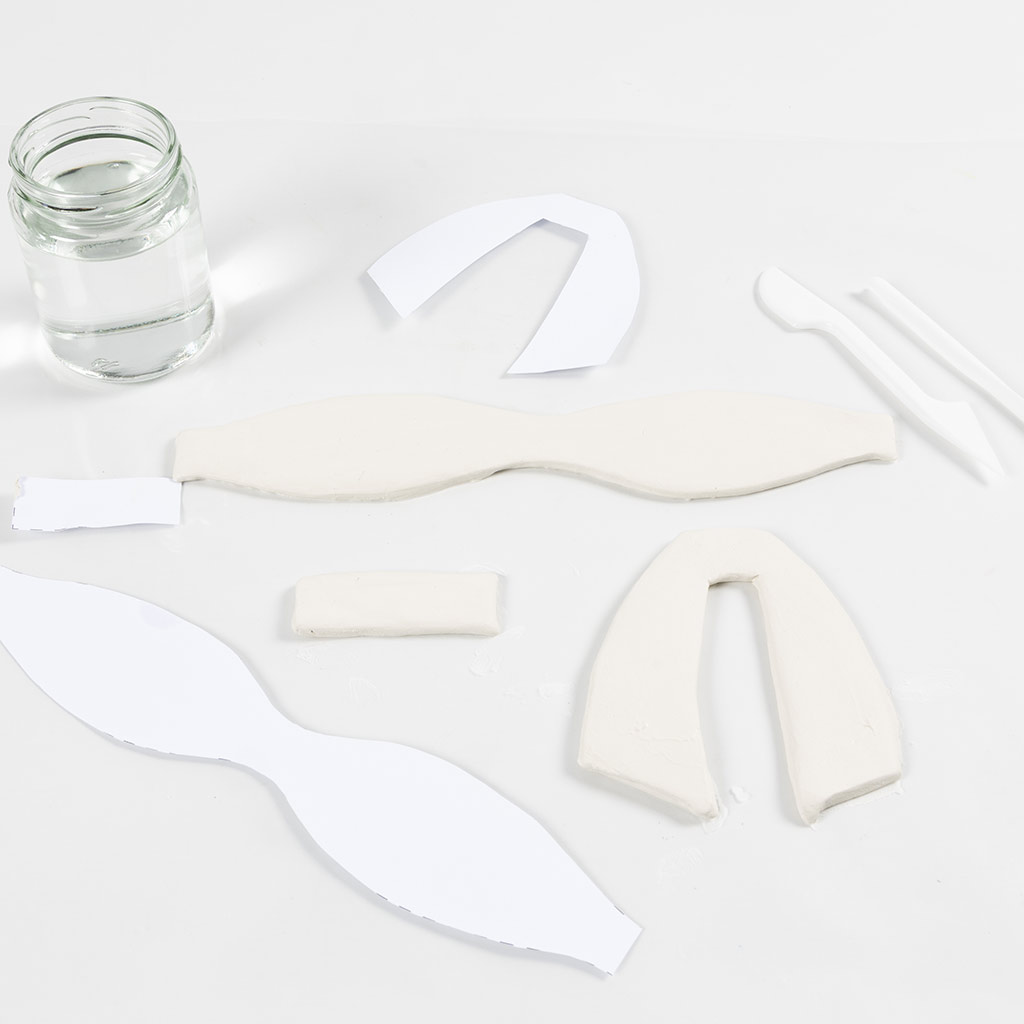 Cut out the template. Knead the clay well and roll it out to a thickness of approx. 4 mm. Place the template on top and cut around it. Remove the excess clay so that only the three parts remain. Smooth the edges of the clay with a little water to make them soft and neat.
Cut out the template. Knead the clay well and roll it out to a thickness of approx. 4 mm. Place the template on top and cut around it. Remove the excess clay so that only the three parts remain. Smooth the edges of the clay with a little water to make them soft and neat.2 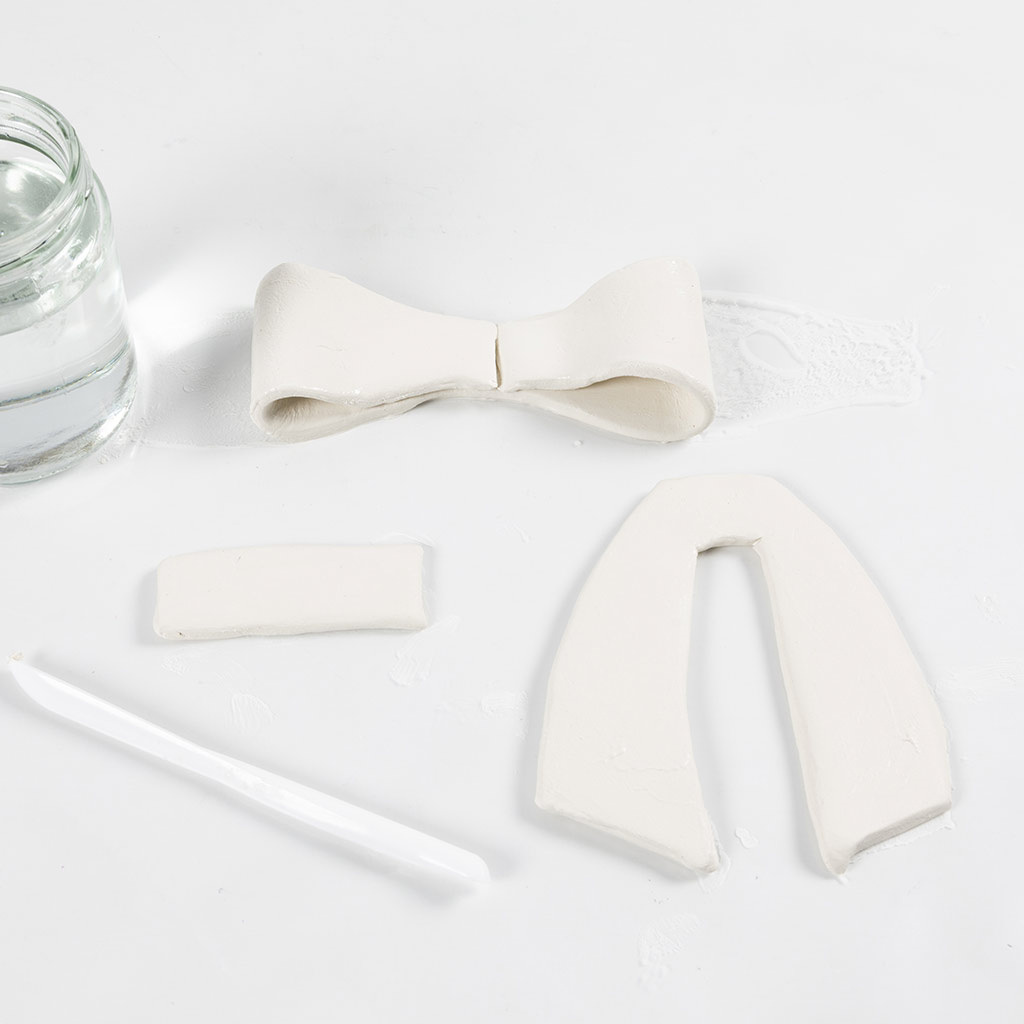 Take the longest piece of clay. Gently scrape a little in the centre and fold the two ends in towards the middle, as shown in the image. Press them gently together so they stick. You can use a little water to help join them.
Take the longest piece of clay. Gently scrape a little in the centre and fold the two ends in towards the middle, as shown in the image. Press them gently together so they stick. You can use a little water to help join them.3 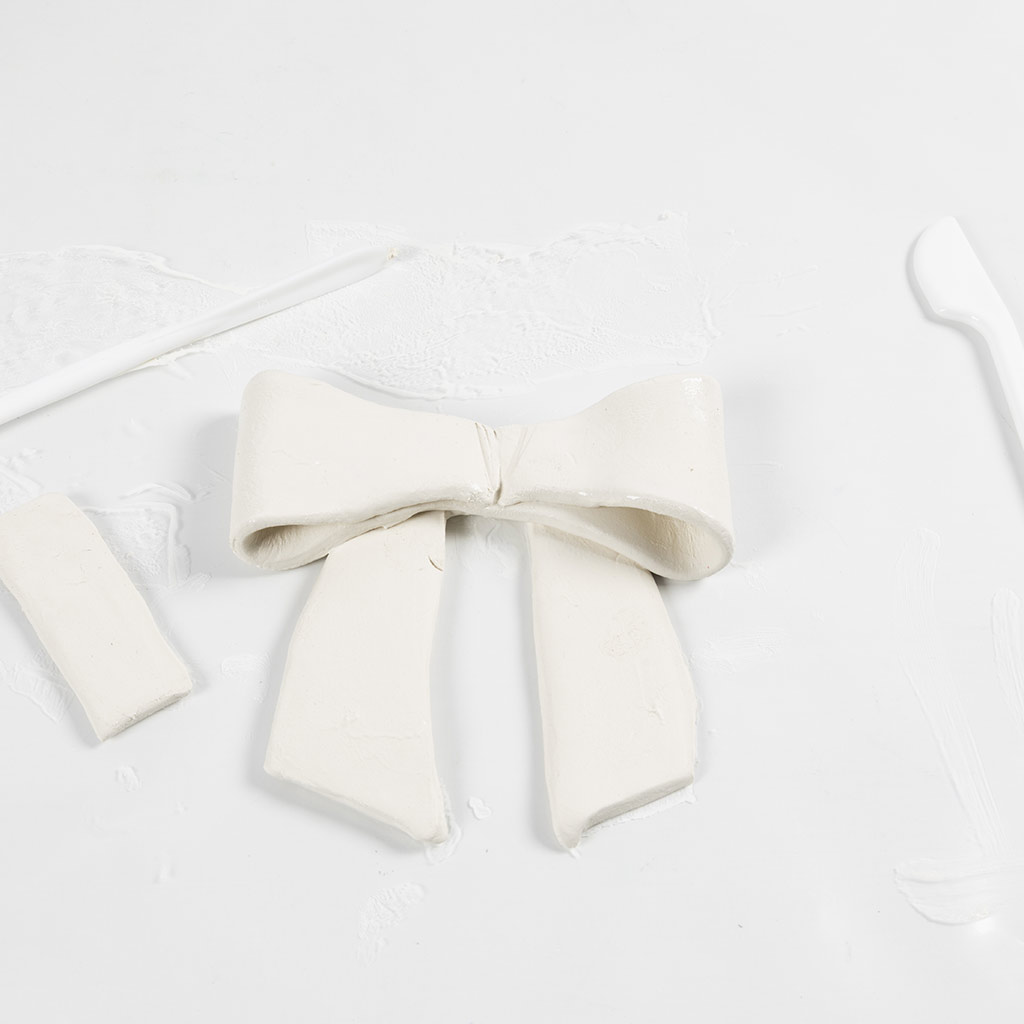 Take the piece you have just folded and place it on top of the bow’s ends. Attach the parts by gently scraping the clay where the pieces meet and adding a little water. Also give the clay a light press.
Take the piece you have just folded and place it on top of the bow’s ends. Attach the parts by gently scraping the clay where the pieces meet and adding a little water. Also give the clay a light press.4 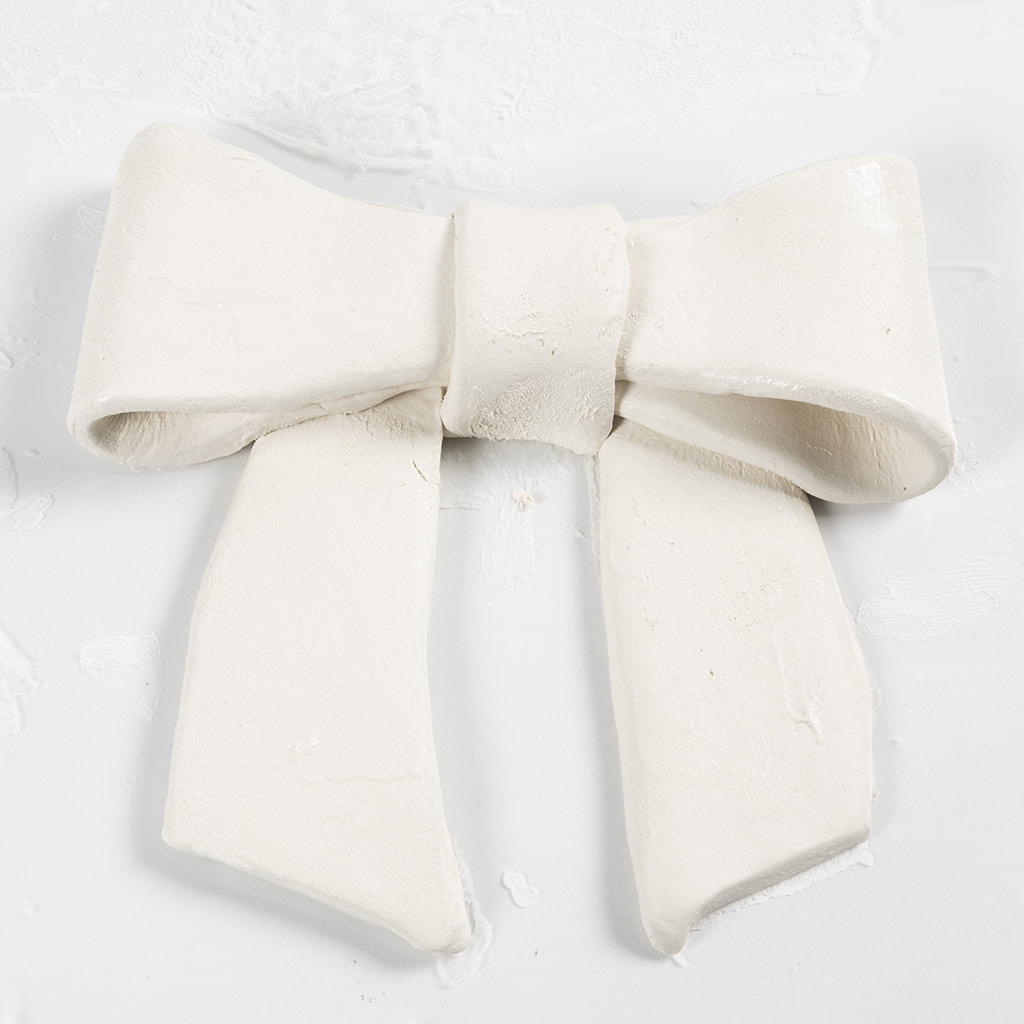 Take the last piece of clay and fold it around the centre of the bow. It is important that it sticks well. Attach it in the same way as the previous parts.
Take the last piece of clay and fold it around the centre of the bow. It is important that it sticks well. Attach it in the same way as the previous parts.5 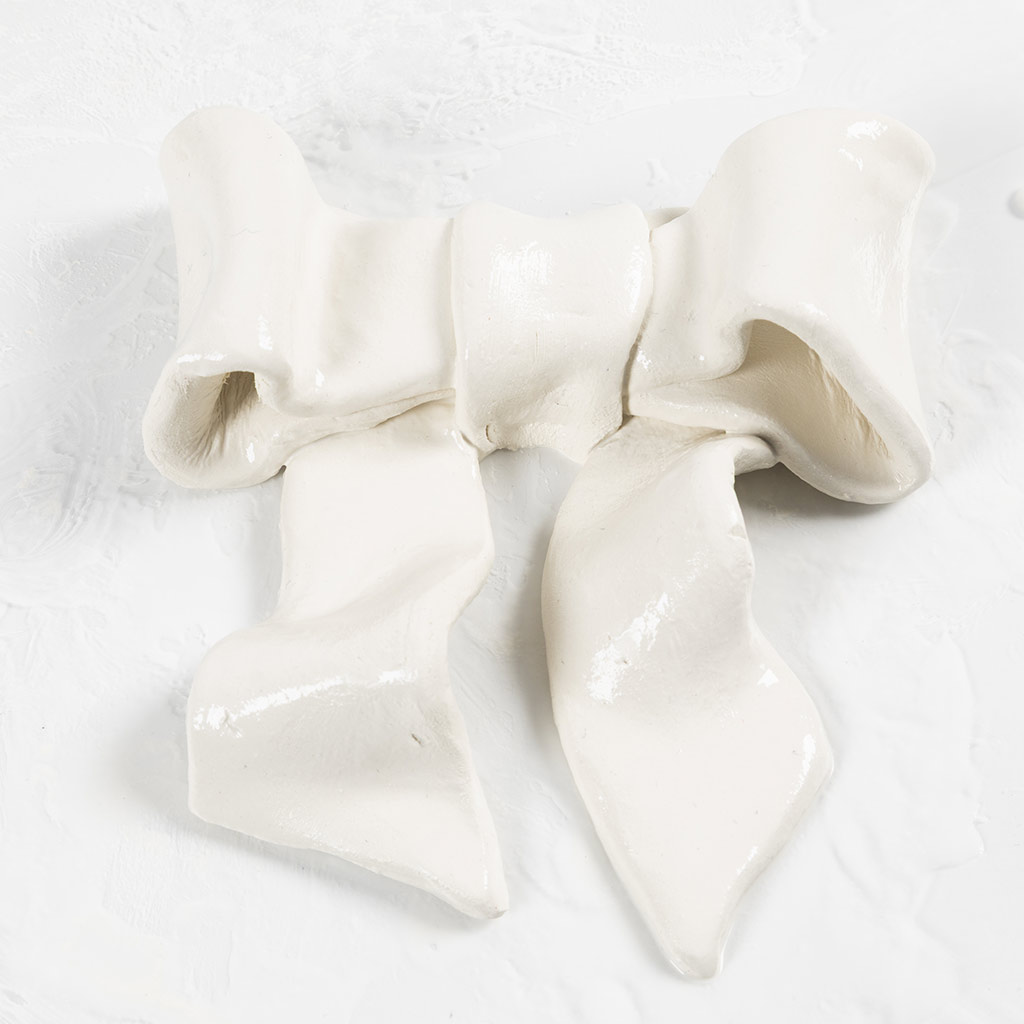 You can choose to leave the bow as it is. If you would like to give it more personality, you can continue shaping it for a more organic look, as shown in the image.
You can choose to leave the bow as it is. If you would like to give it more personality, you can continue shaping it for a more organic look, as shown in the image.6 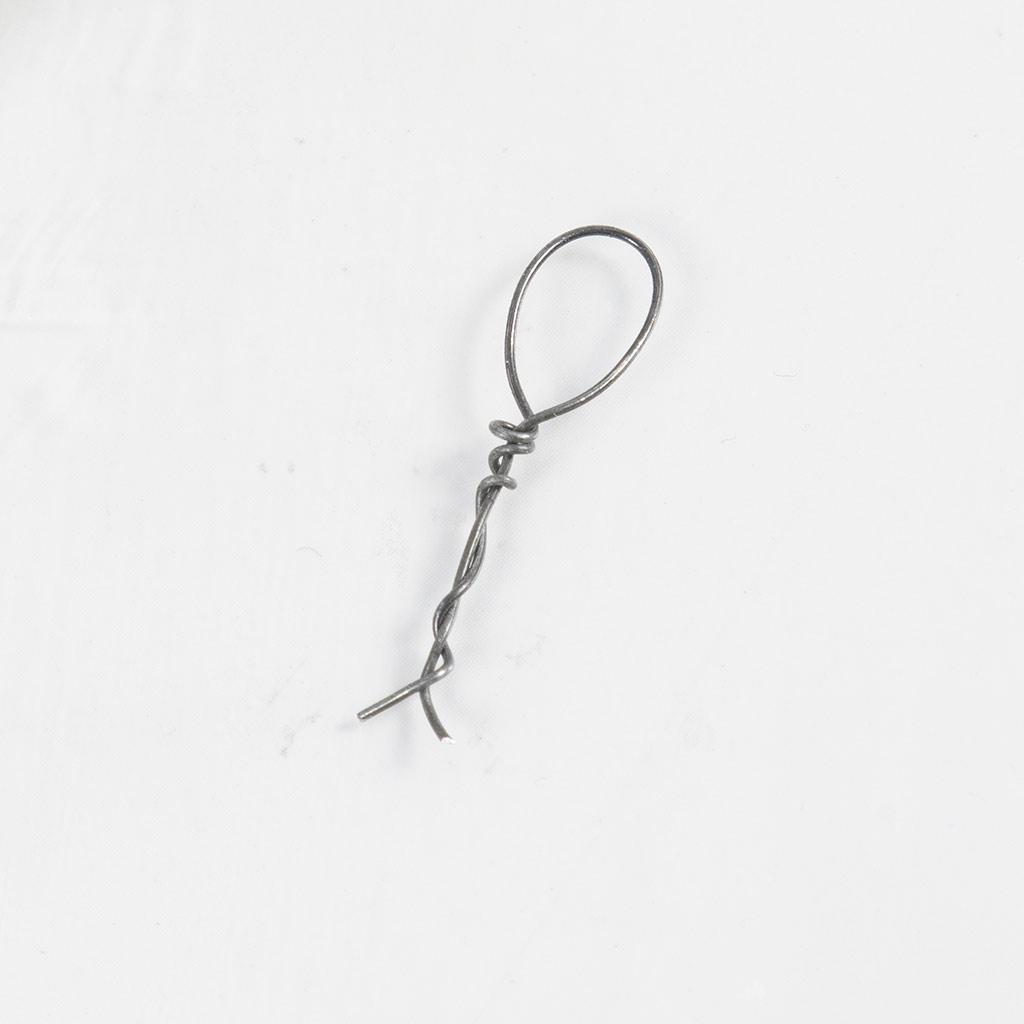 Cut a piece of florist wire approx. 10 cm long. Bend it in half and twist it to form a loop, as shown in the image.
Cut a piece of florist wire approx. 10 cm long. Bend it in half and twist it to form a loop, as shown in the image.7 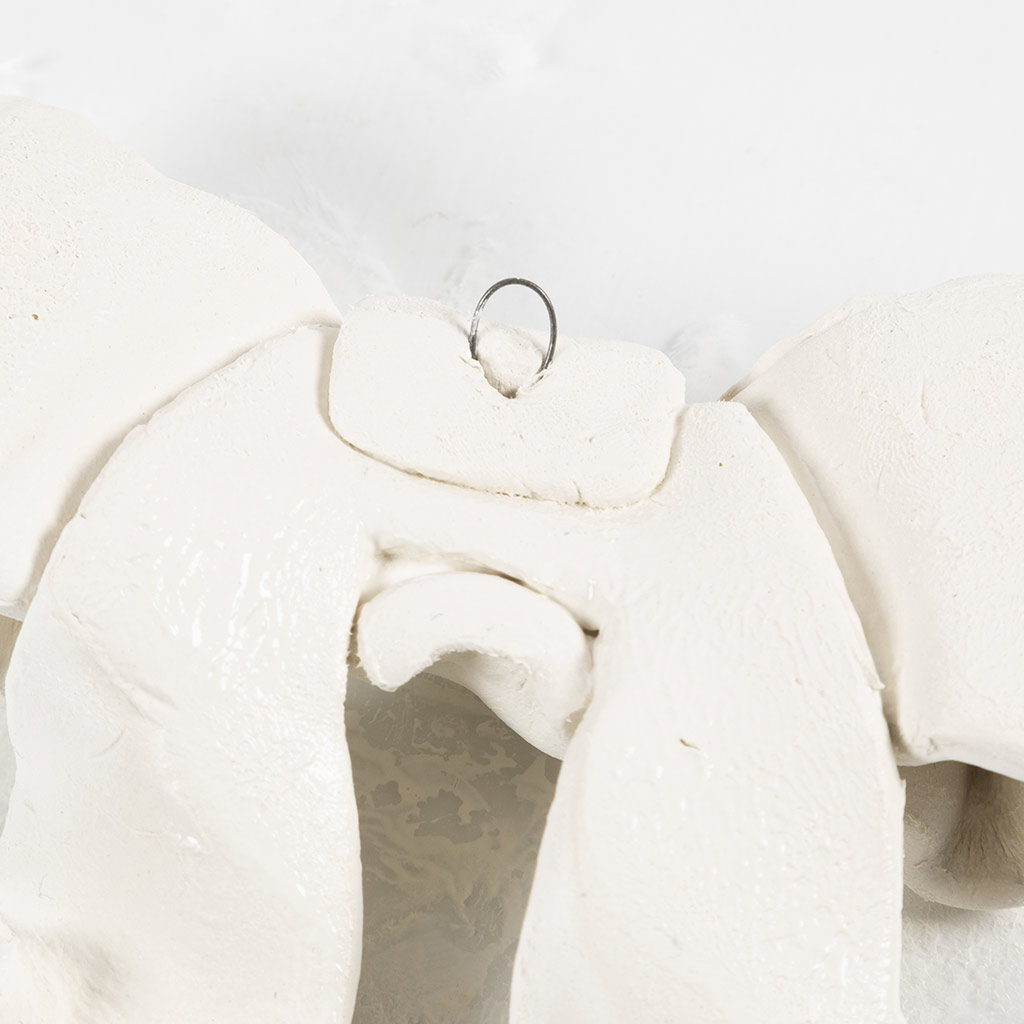 Insert the loop into the back of the bow and let the bow dry for 1–2 days.
Insert the loop into the back of the bow and let the bow dry for 1–2 days.8 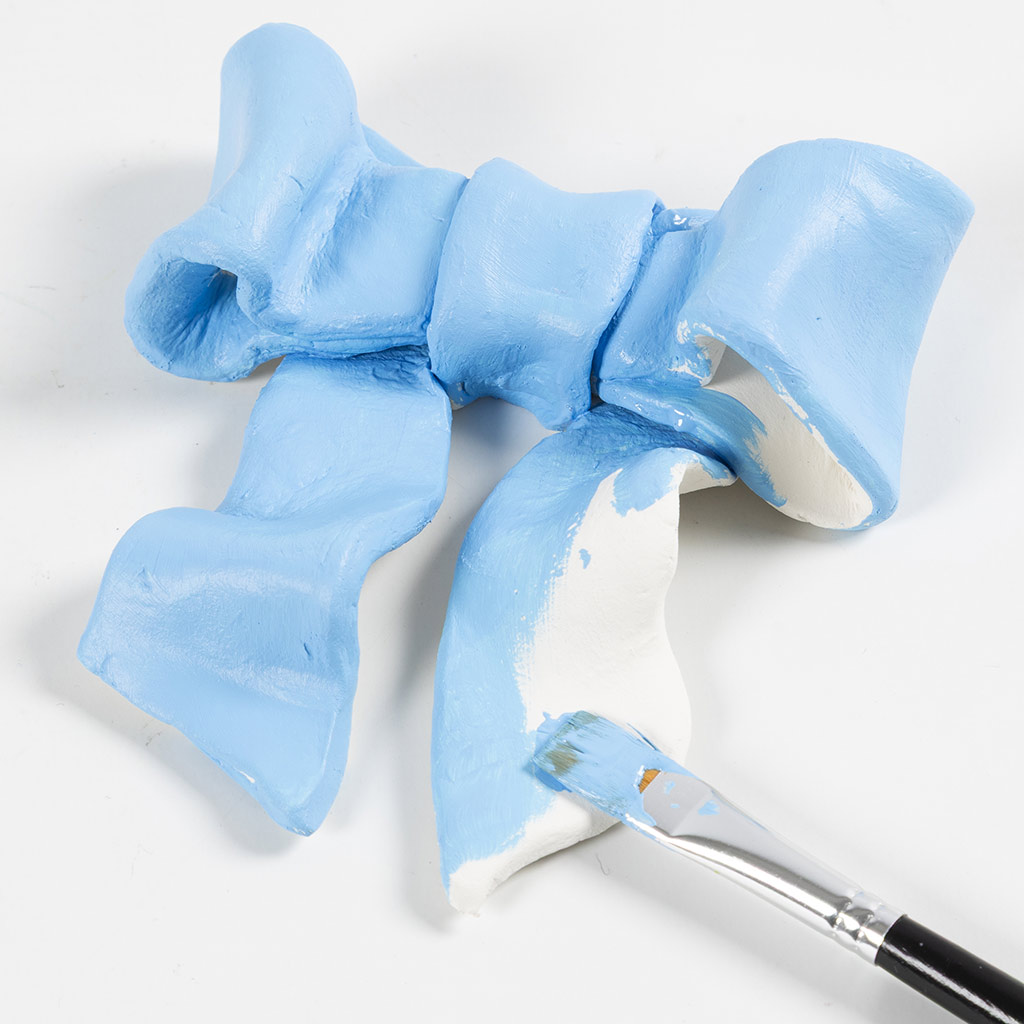 Once the bow is dry, you can paint it in the colour of your choice.
Once the bow is dry, you can paint it in the colour of your choice.9 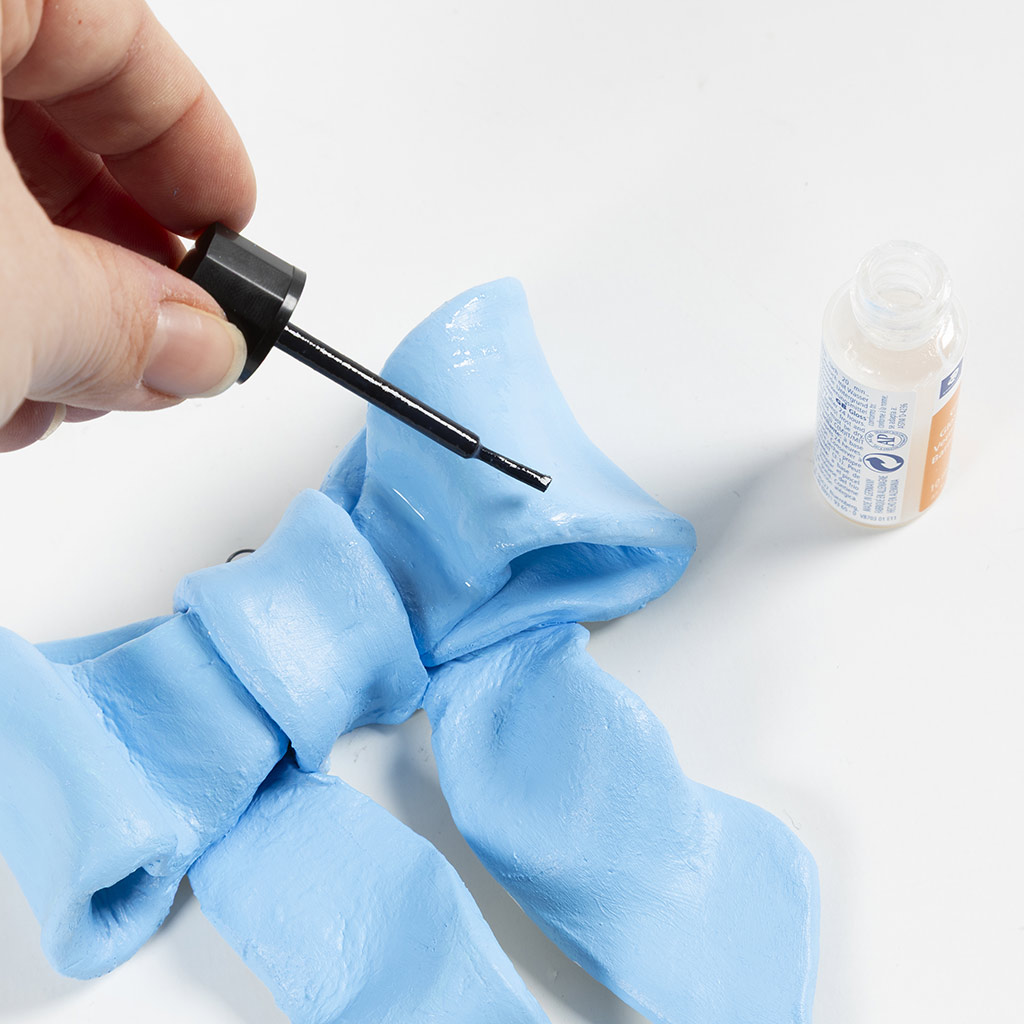 If you would like a shinier finish, you can finish by applying a glossy varnish to the bow.
If you would like a shinier finish, you can finish by applying a glossy varnish to the bow.Also go exploring in
