

New
Creative idea
Christmas-themed shaker frames
#v17178
Create a personal and fun Christmas gift with beautiful shaker frames. Children can decorate the frame with Foam Clay®, creative multi markers and sequins – and make it completely unique with their own pictures and drawings.
#v17178
How to do it
1 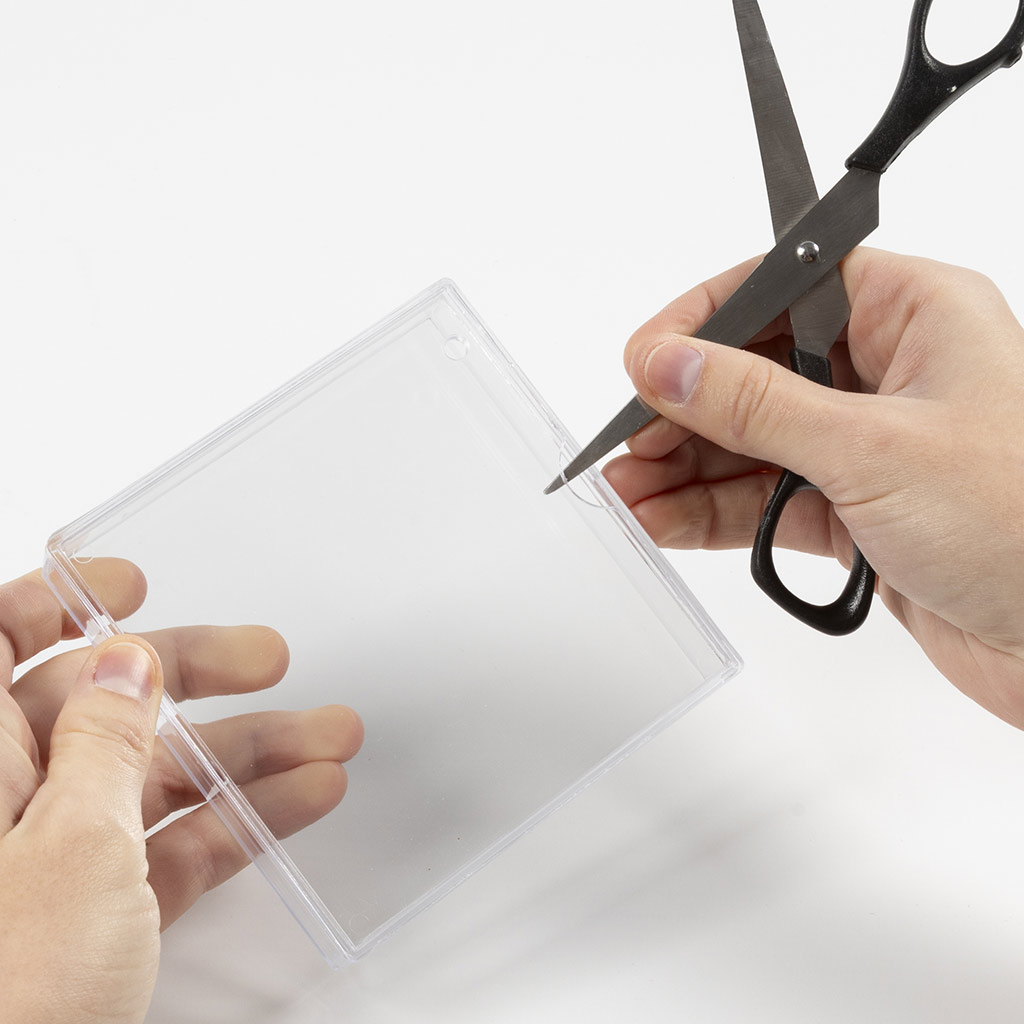 Lift the back plate from the frame using the tip of scissors.
Lift the back plate from the frame using the tip of scissors.2 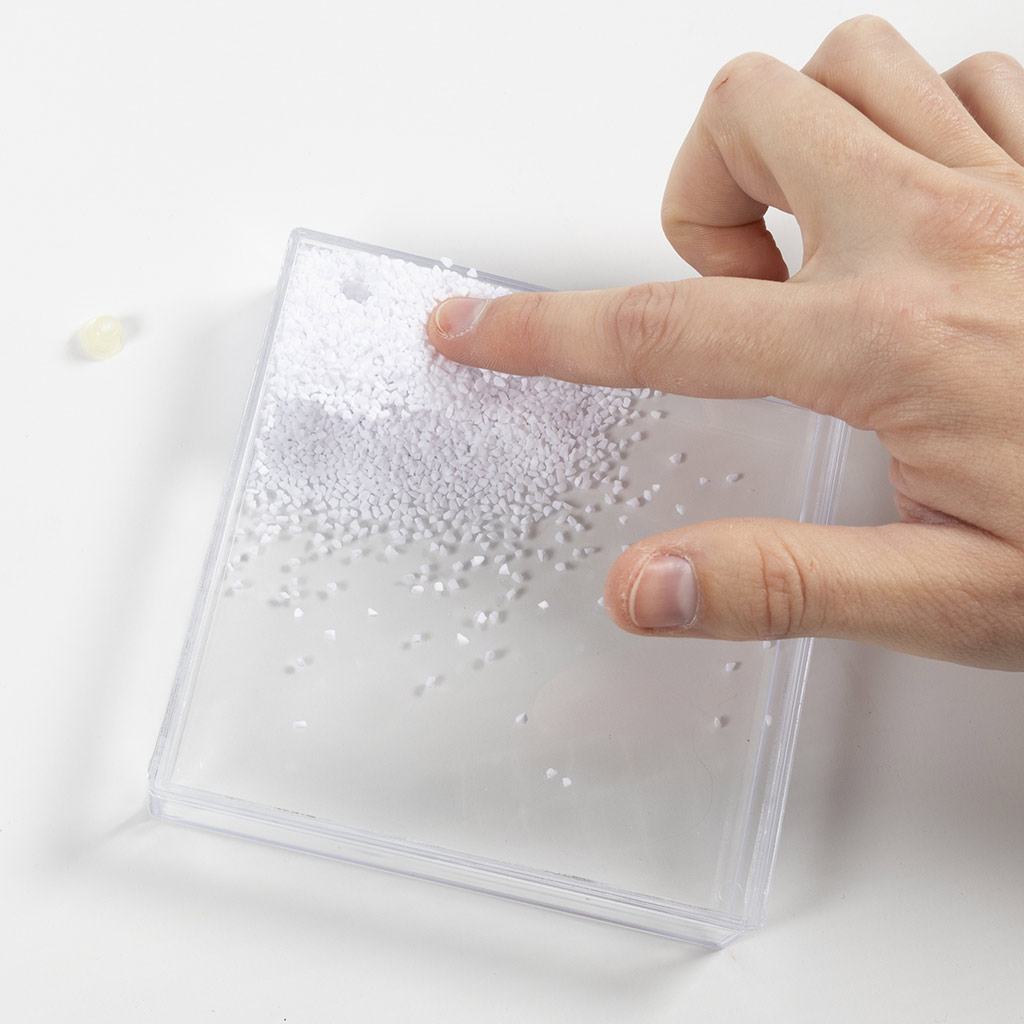 Carefully push the artificial snow provided down through the small hole in the corner.
Carefully push the artificial snow provided down through the small hole in the corner.3 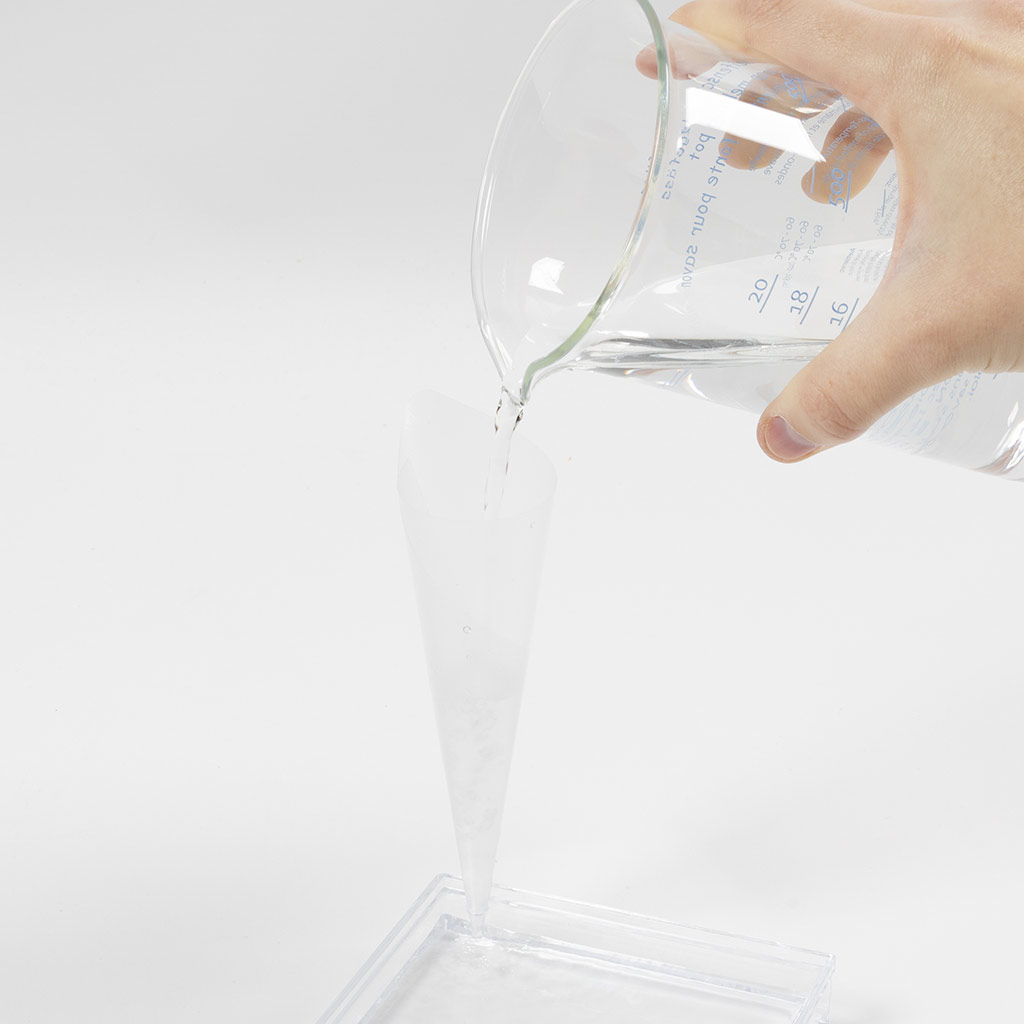 Cut out a square of approx. 12x12 cm from a plastic pocket. Fold it into a funnel that fits in the hole and seal with a piece of tape if necessary. Now fill the frame with water using the funnel.
Cut out a square of approx. 12x12 cm from a plastic pocket. Fold it into a funnel that fits in the hole and seal with a piece of tape if necessary. Now fill the frame with water using the funnel.4 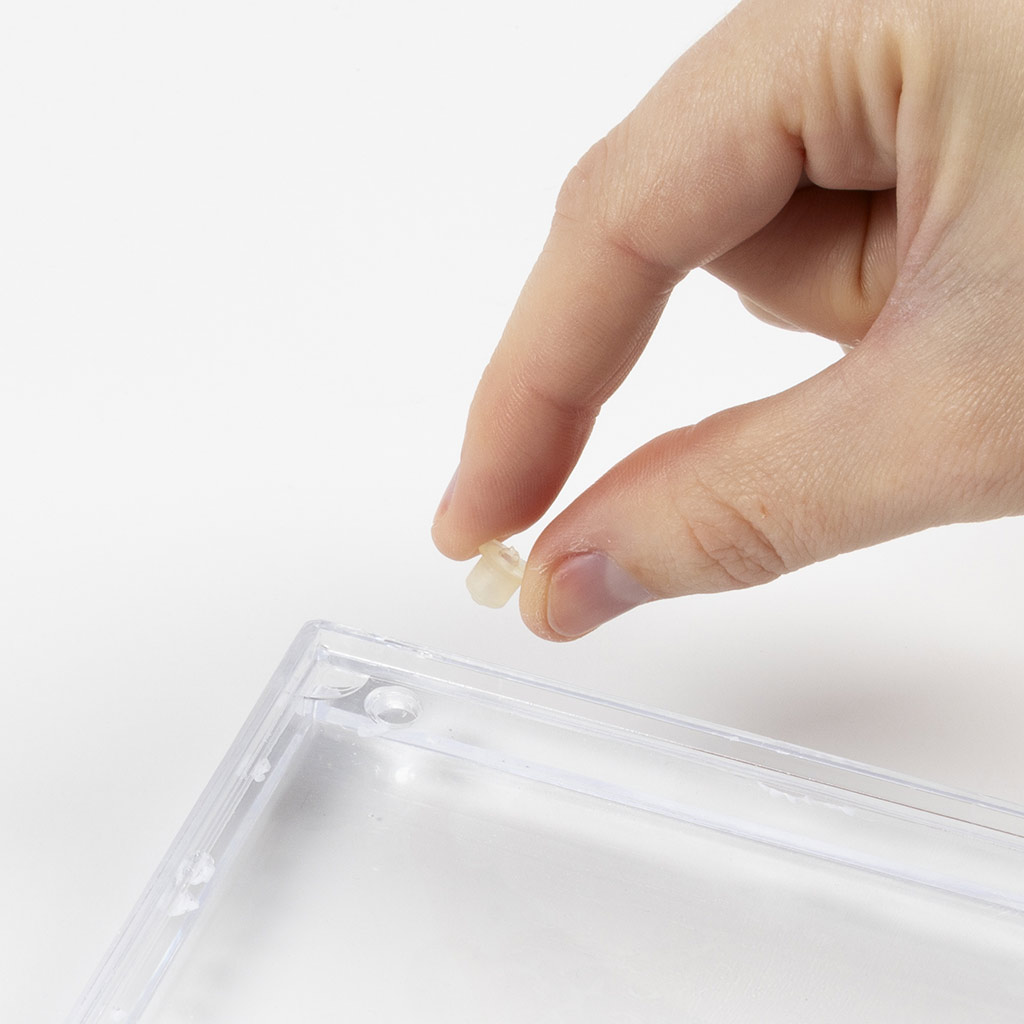 Close the hole with the plug provided.
Close the hole with the plug provided.5  Print a portrait picture and decorate it with markers or make your own Christmas drawing. Use the picture provided as a template to make sure the picture/drawing is the right size.
Print a portrait picture and decorate it with markers or make your own Christmas drawing. Use the picture provided as a template to make sure the picture/drawing is the right size.6 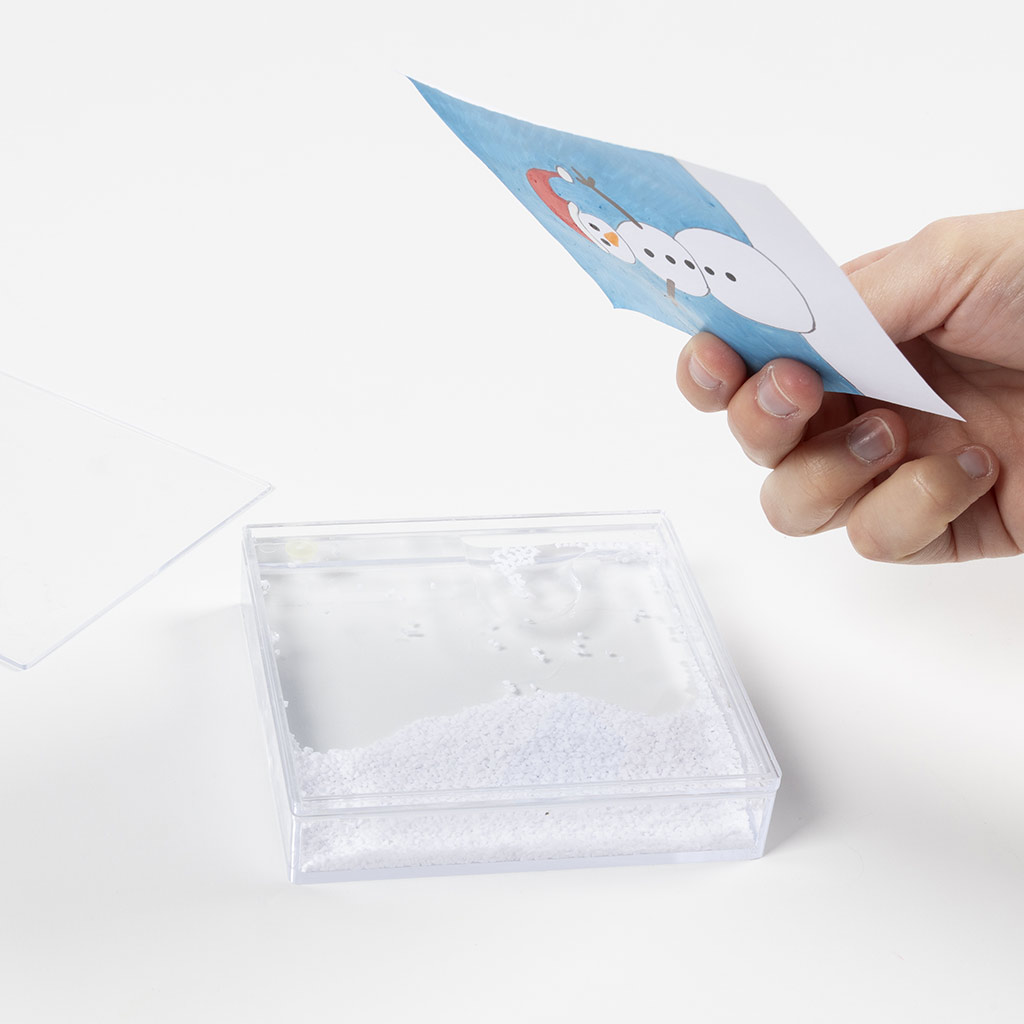 Place the drawing/image in the frame face down.
Place the drawing/image in the frame face down.7 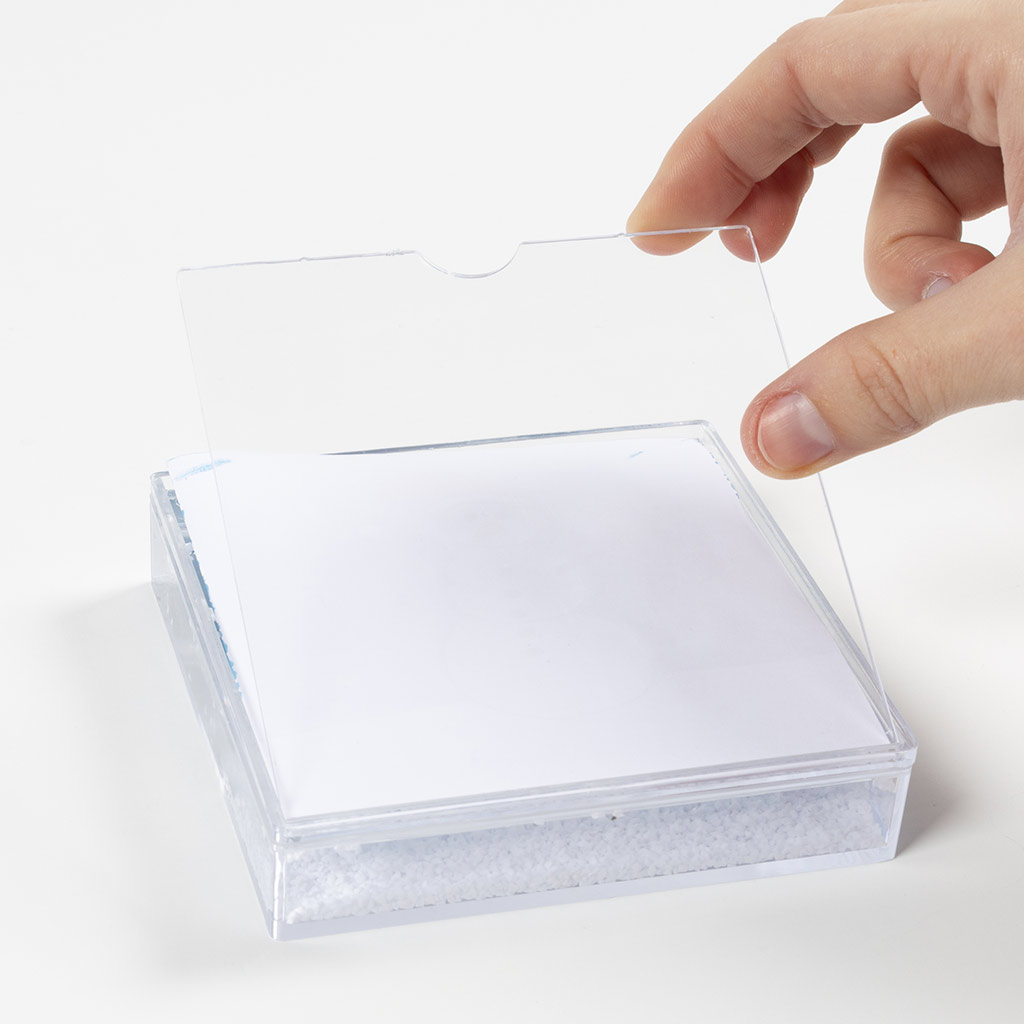 Click the back plate back into the frame on top of the drawing.
Click the back plate back into the frame on top of the drawing.8 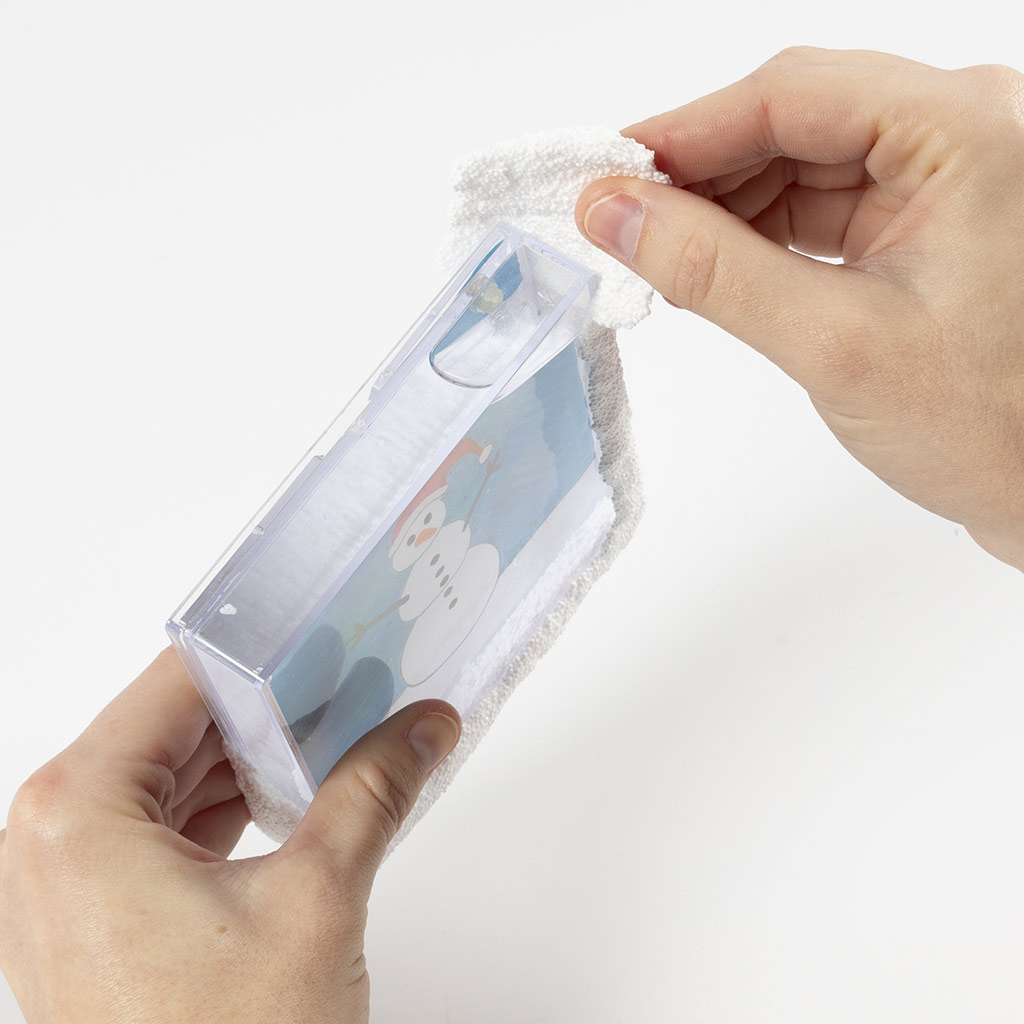 Cover the frame with Foam Clay® all around. Make sure the Foam Clay® covers the edge of both the front and back of the frame to 'wrap' it. This secures the modelling clay, so that it does not loosen after drying. Make sure that the bottom edge has a flat surface, so that the frame can stand without tipping over.
Cover the frame with Foam Clay® all around. Make sure the Foam Clay® covers the edge of both the front and back of the frame to 'wrap' it. This secures the modelling clay, so that it does not loosen after drying. Make sure that the bottom edge has a flat surface, so that the frame can stand without tipping over.9 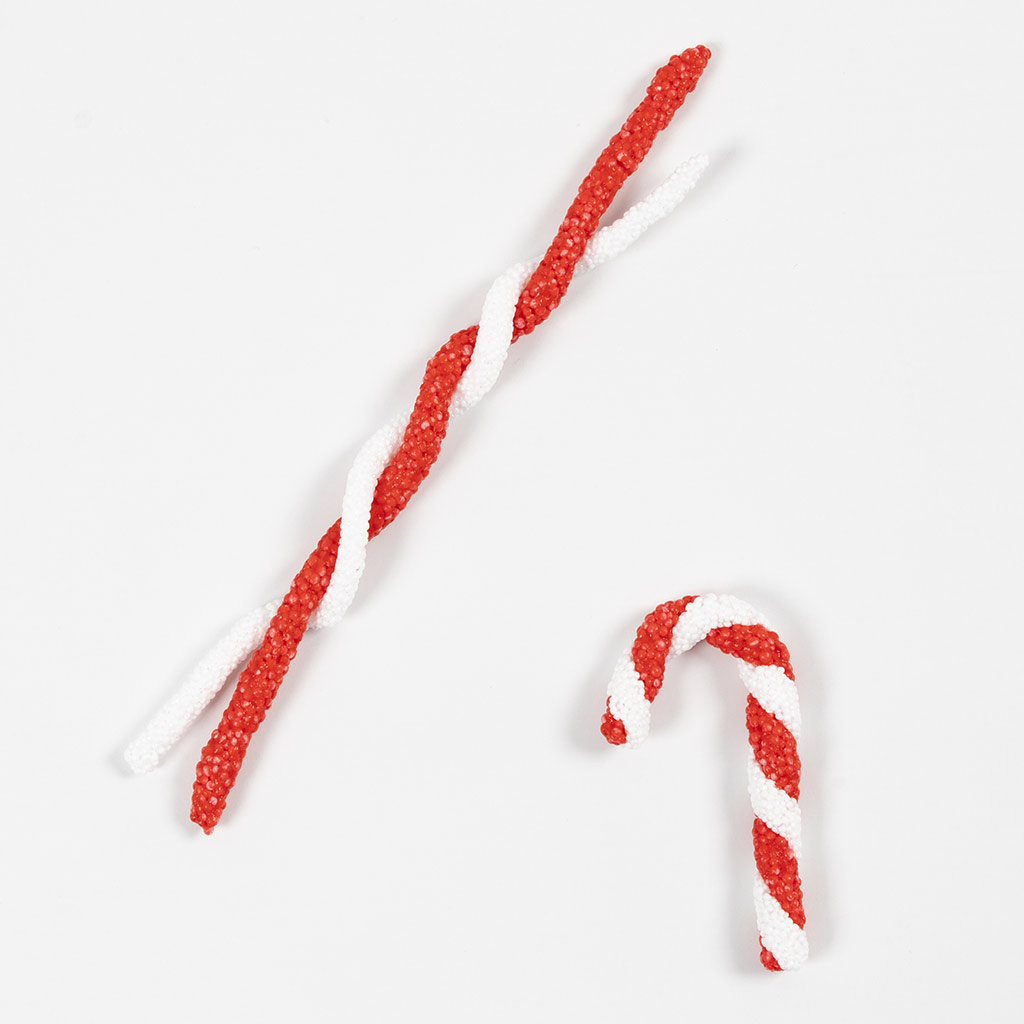 Model a candy cane out of Foam Clay® by twisting a red and white stick of clay together. After twisting, roll the cane so that it has a uniform surface. Cut to the desired length and bend down the top.
Model a candy cane out of Foam Clay® by twisting a red and white stick of clay together. After twisting, roll the cane so that it has a uniform surface. Cut to the desired length and bend down the top.10  Press the candy canes onto the Foam Clay on the frame. It is important that they are attached to the top of the Foam Clay® and not directly to the frame, because otherwise, they will loosen after drying.
Press the candy canes onto the Foam Clay on the frame. It is important that they are attached to the top of the Foam Clay® and not directly to the frame, because otherwise, they will loosen after drying.11 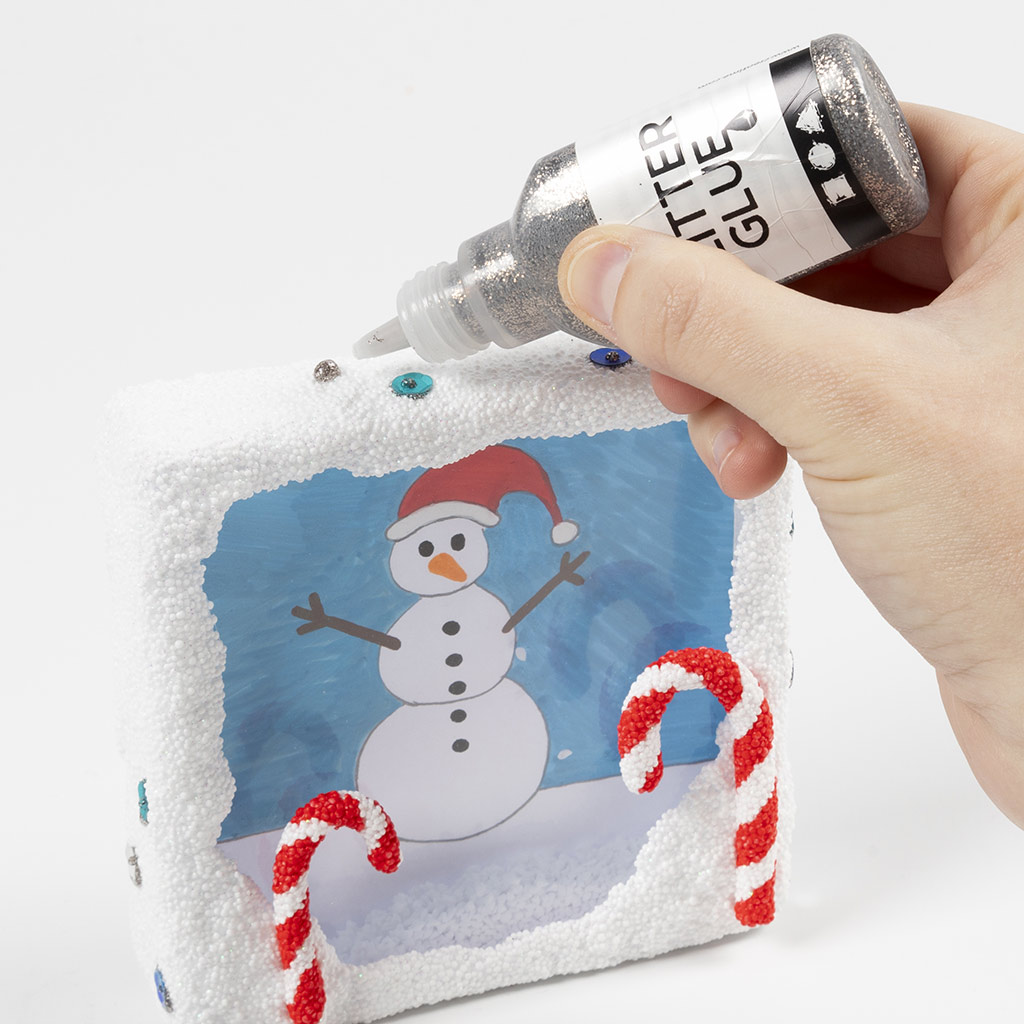 Decorate the frame with sequins by first squeezing out a small dab of glitter glue.
Decorate the frame with sequins by first squeezing out a small dab of glitter glue.12 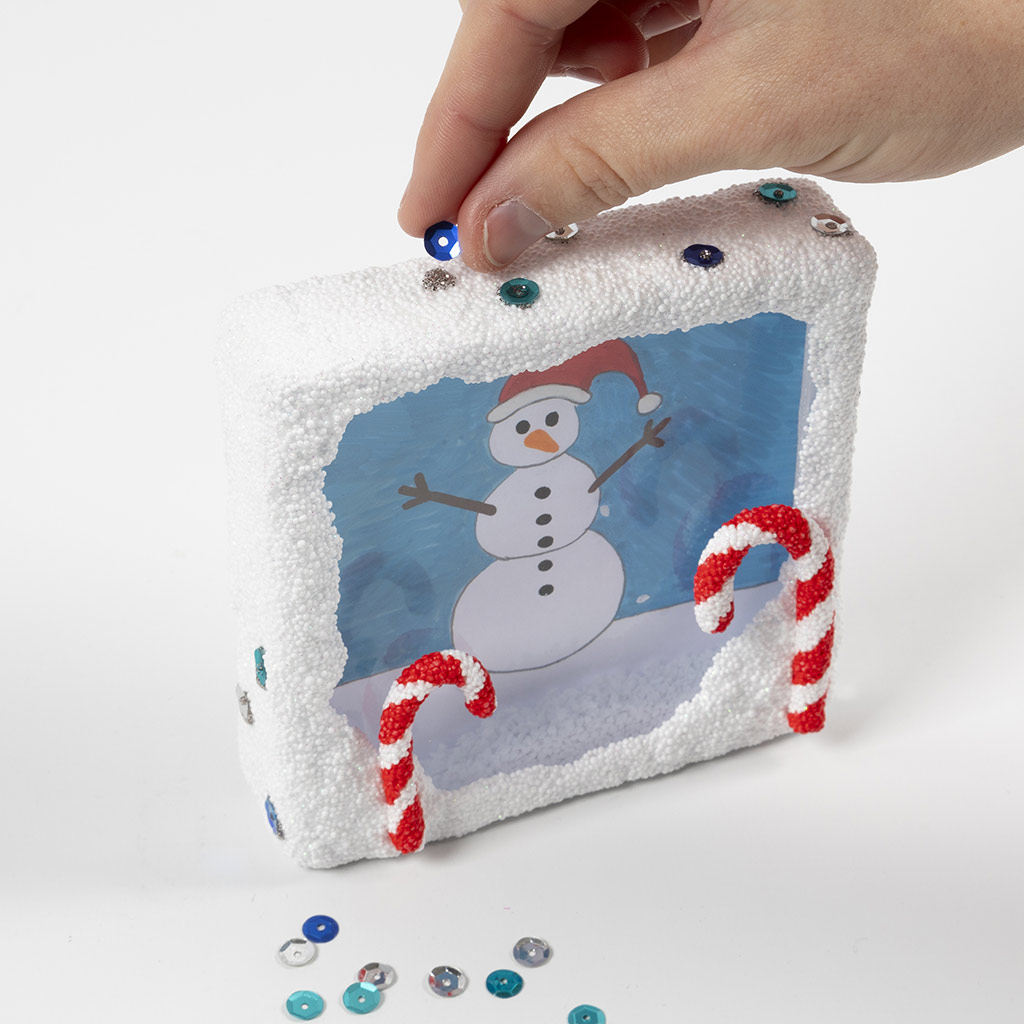 Now press the sequin into the glue.
Now press the sequin into the glue.13 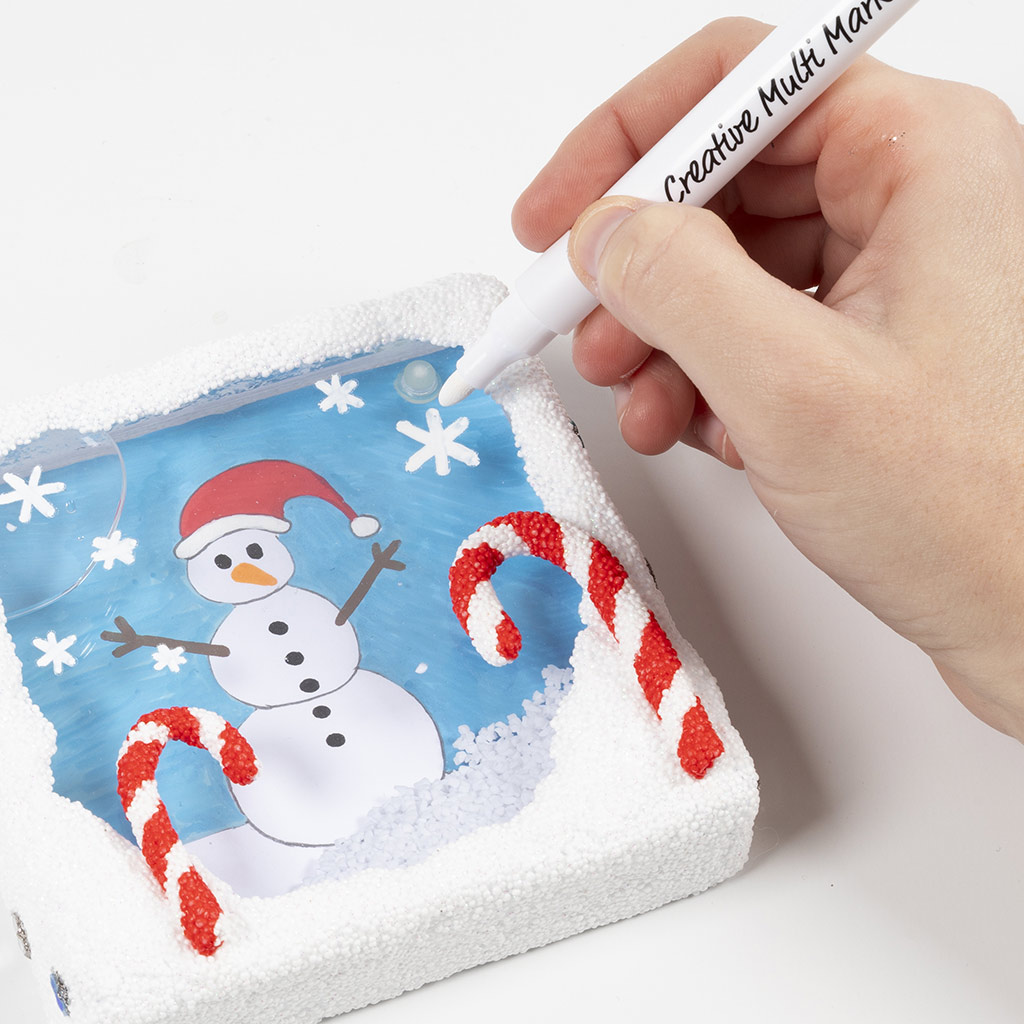 Decorate the frame with multi markers, such as by drawing snowflakes like shown here.
Decorate the frame with multi markers, such as by drawing snowflakes like shown here.14  Allow the frame to dry for 6-12 hours before use. Shake the frame and watch the snow fall over your finished design.
Allow the frame to dry for 6-12 hours before use. Shake the frame and watch the snow fall over your finished design.Variant 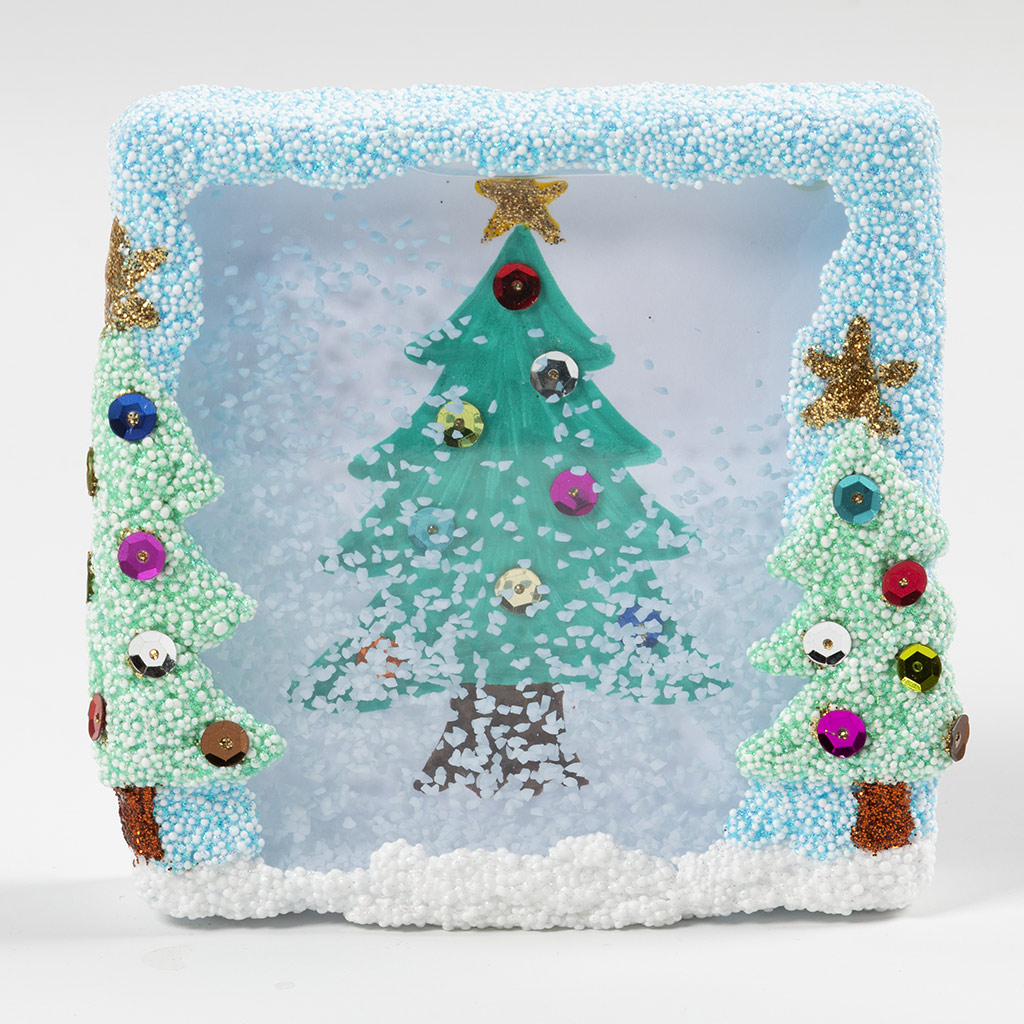 Both the drawing and frame shown here are decorated with glitter glue and sequins.
Both the drawing and frame shown here are decorated with glitter glue and sequins.Variant 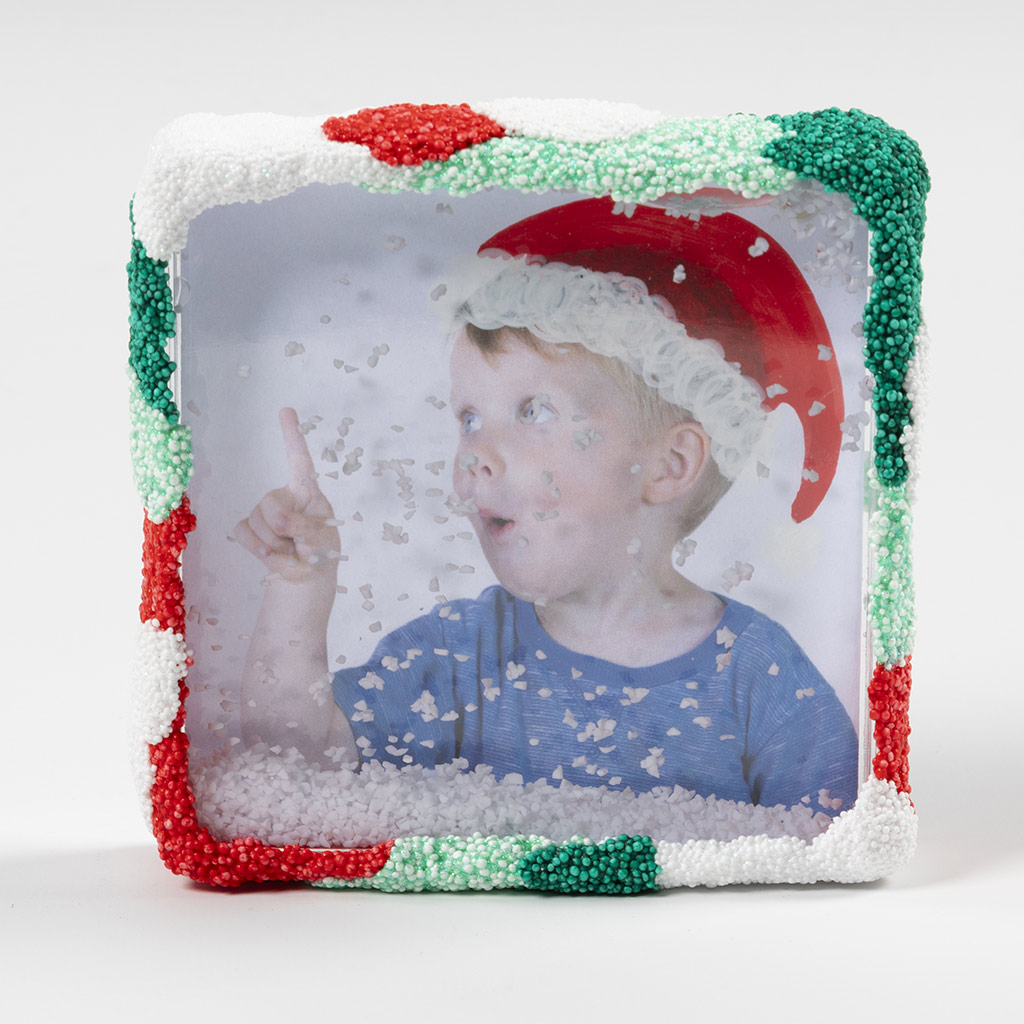 In this version, a stocking hat is drawn on a portrait photo, while the frame is wrapped in Foam Clay® in different colours.
In this version, a stocking hat is drawn on a portrait photo, while the frame is wrapped in Foam Clay® in different colours.Also go exploring in
