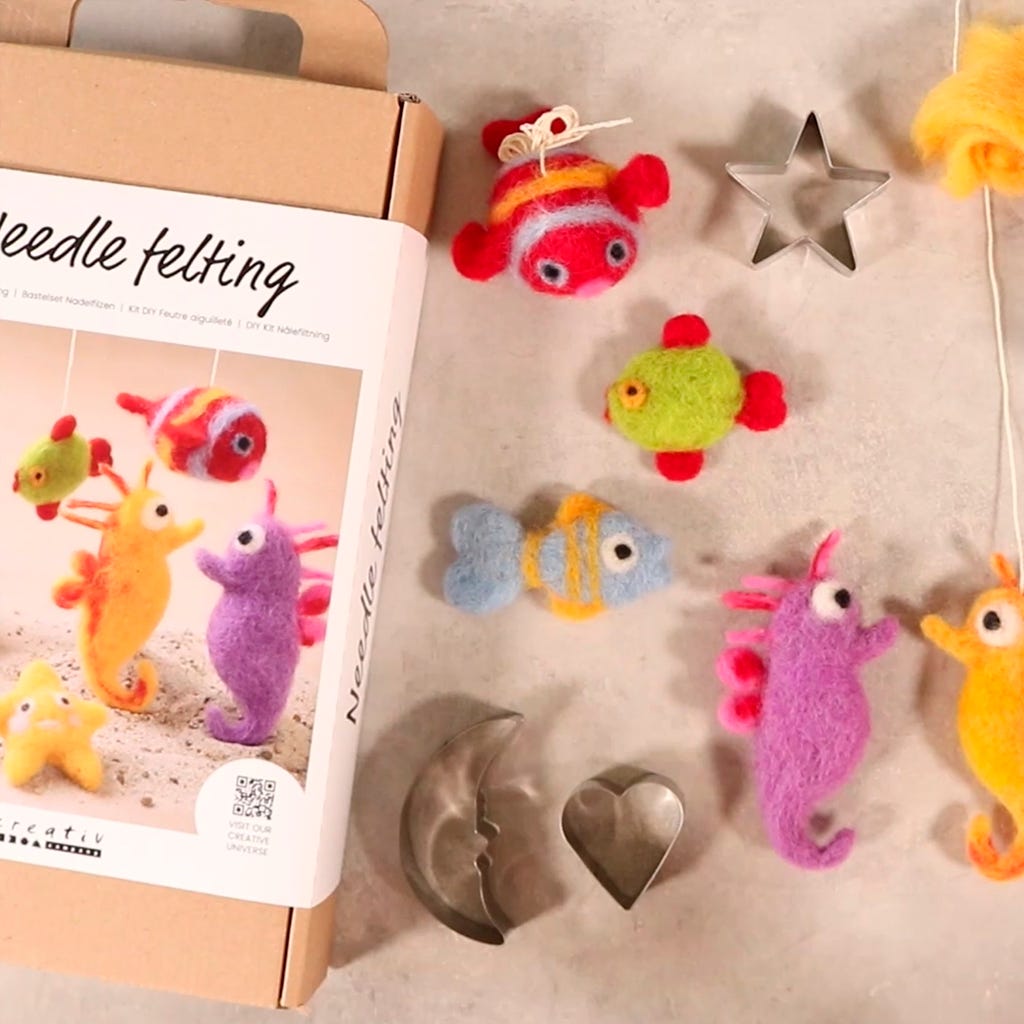
Needle felt figures as hanging decorations
#v16718
As a beginner in needle felt, these figures are a great place to start. Build up the flat figures using layers of carded wool. Slide the felting needle up and down repeatedly, and teach children how to use fingers and hands in conjunction with special tools during the creative process.
How to do it Download the templates/recipes
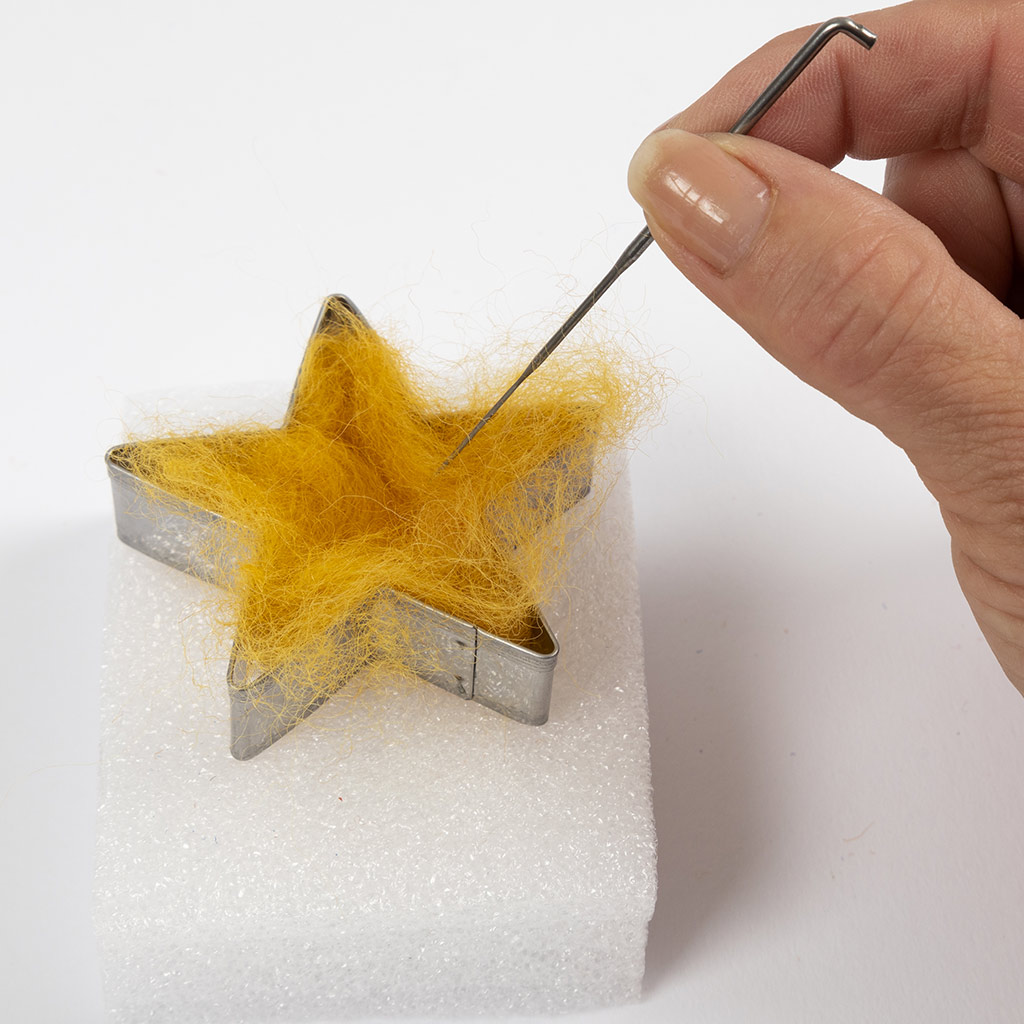
1 Remember that the wool must be pulled apart when felting – not cut.
Use the star shape for the starfish. Pull the wool apart into small pieces and stuff the mould. Press the wool together repeatedly until firm. Add more wool if necessary.
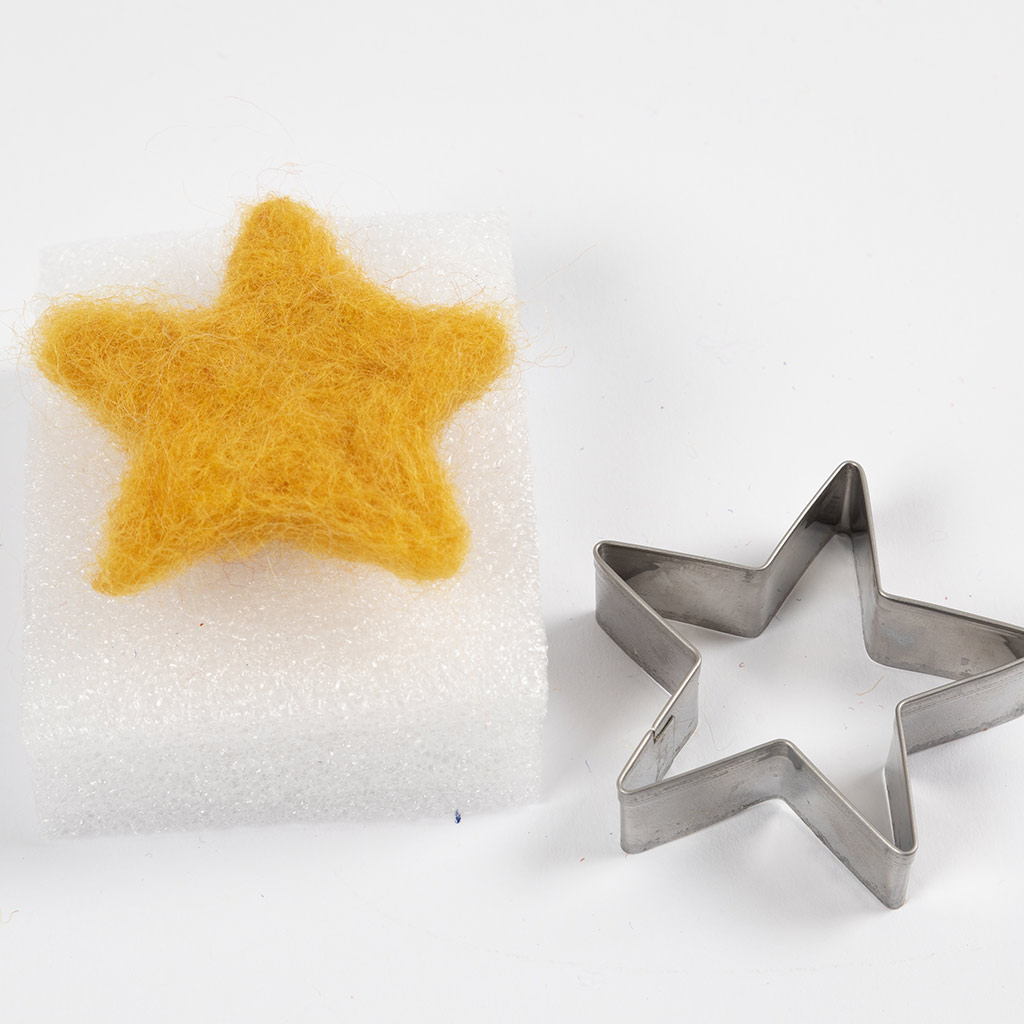
2 Once the star is set, remove it from the mould.
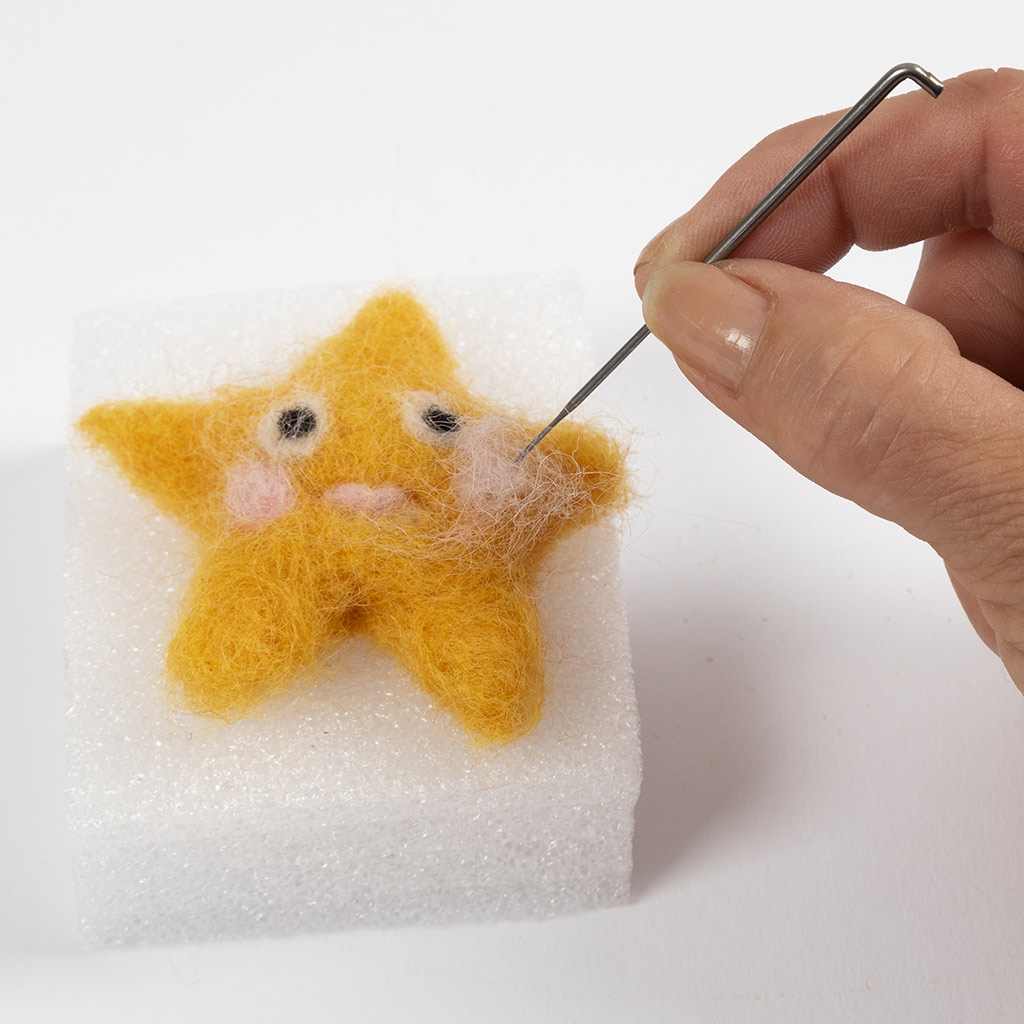
3 Felt small pieces of wool on to act as eyes, mouth, and cheeks.
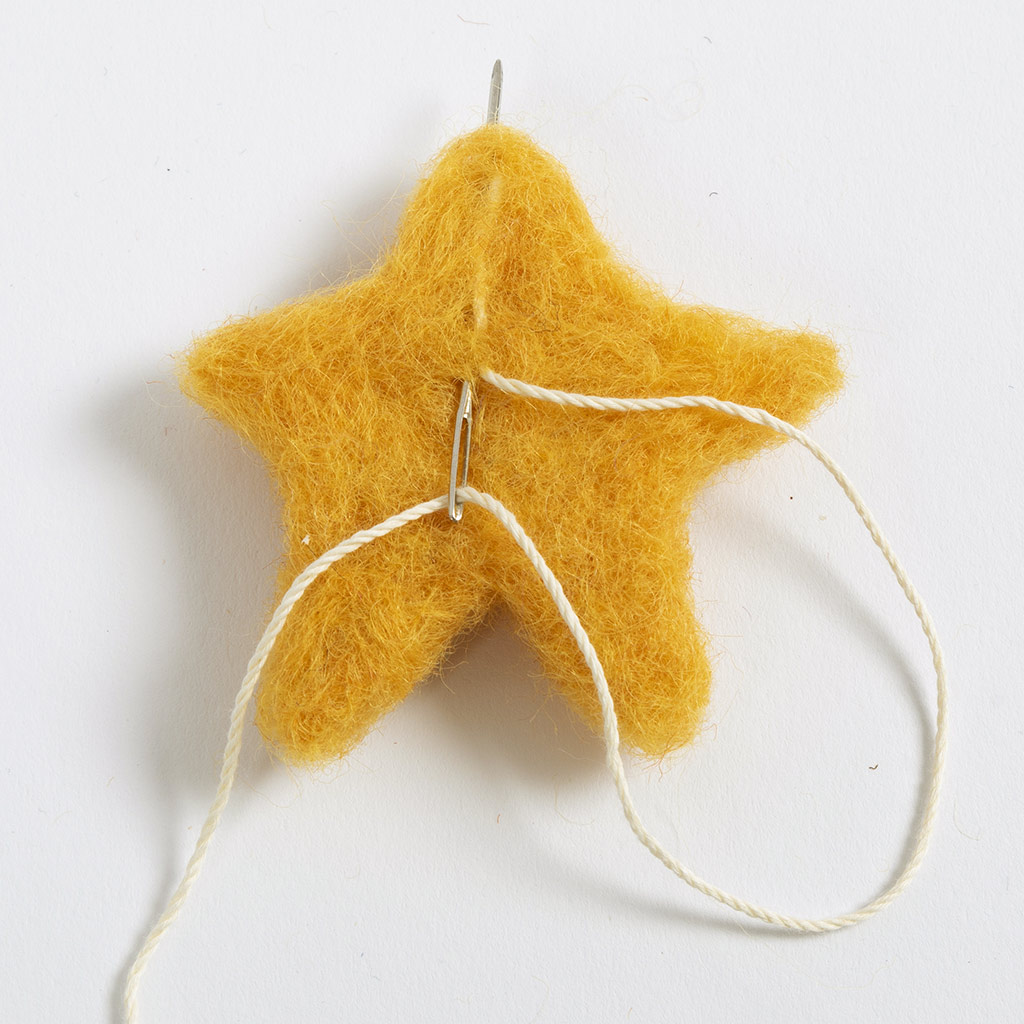
4 See the string for hanging on the back.
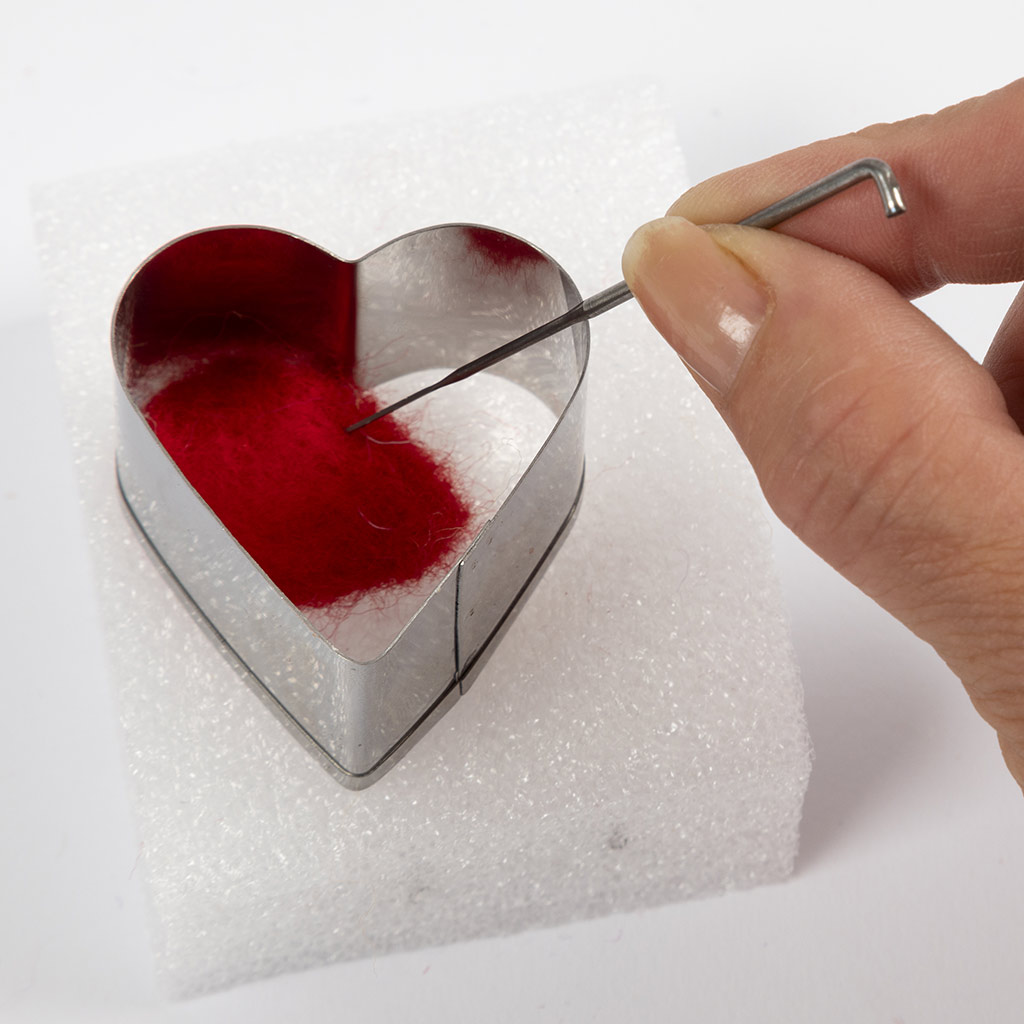
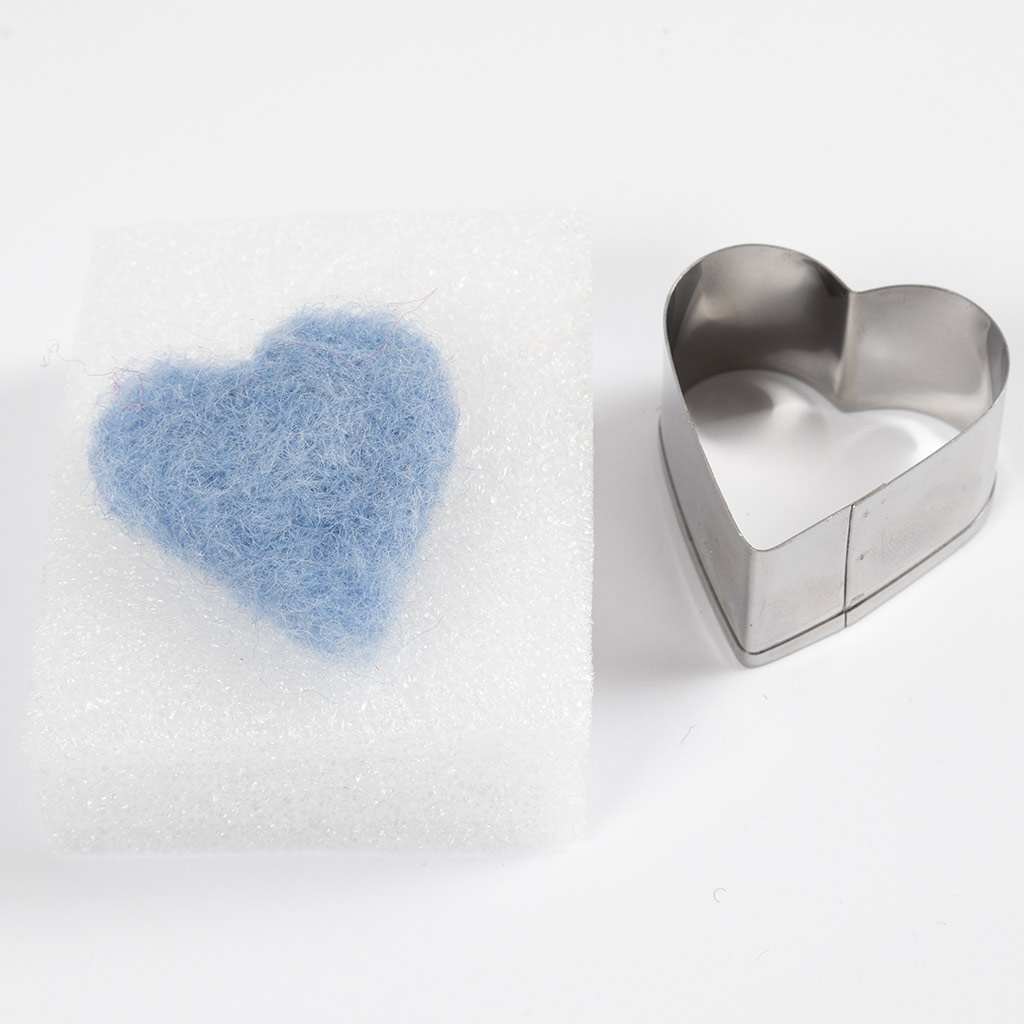
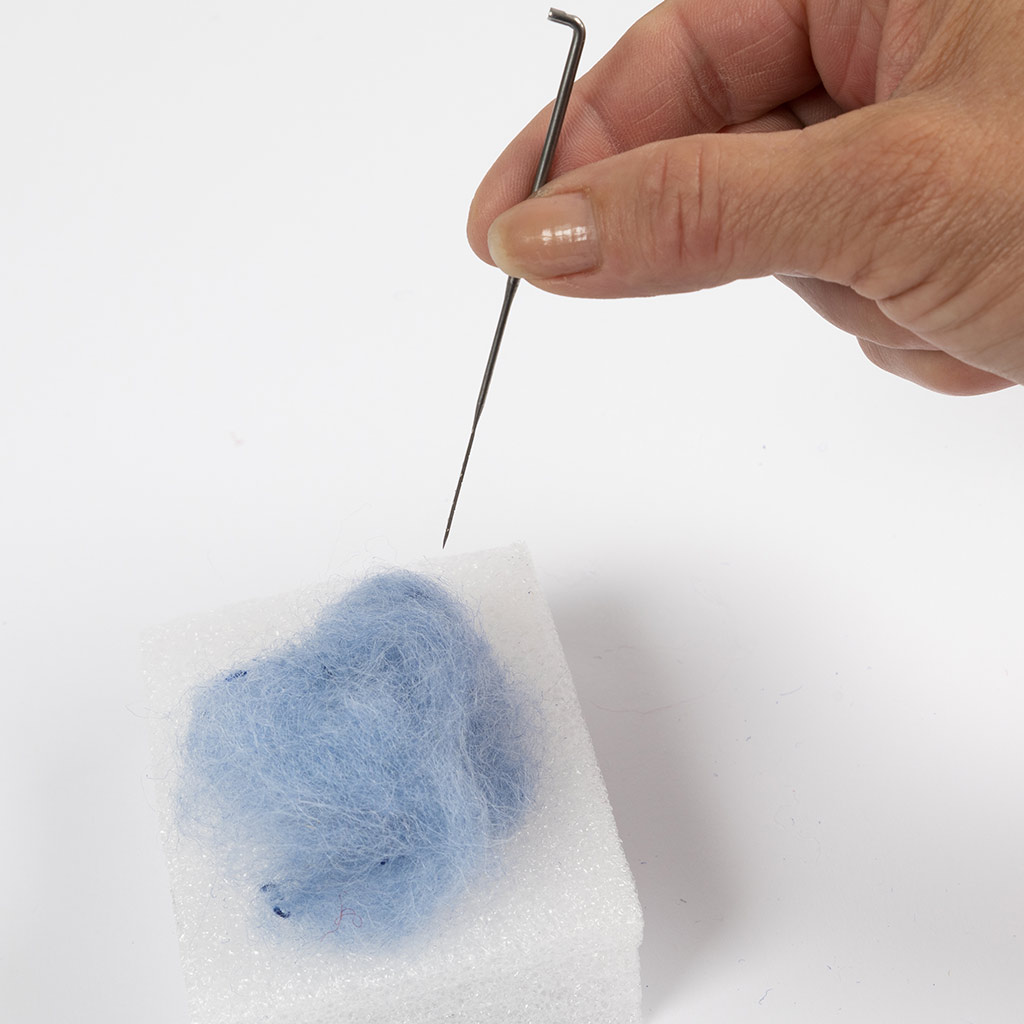
5 Use the heart shape for the striped fish – for both tail and fins. Only felt in the curvature for the fins.
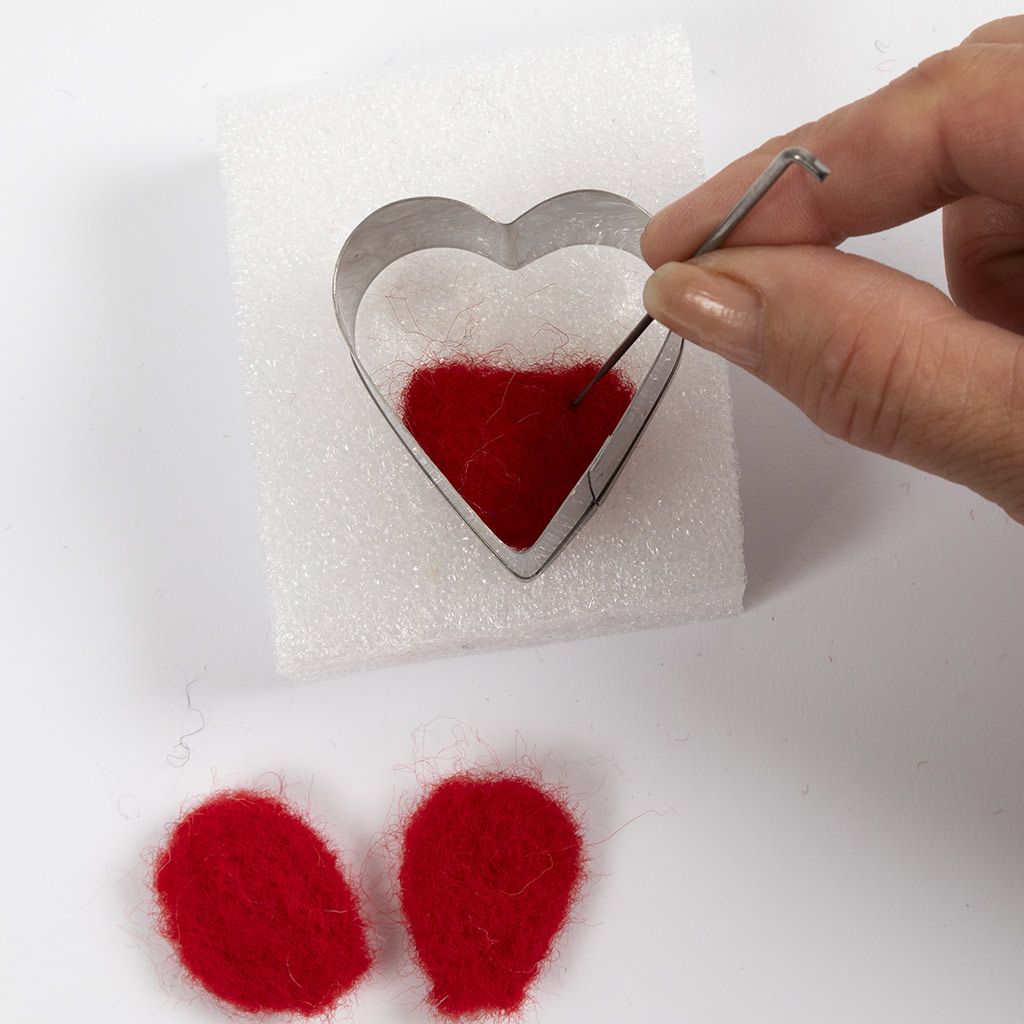
6 Felt the tail at the tip of the heart.
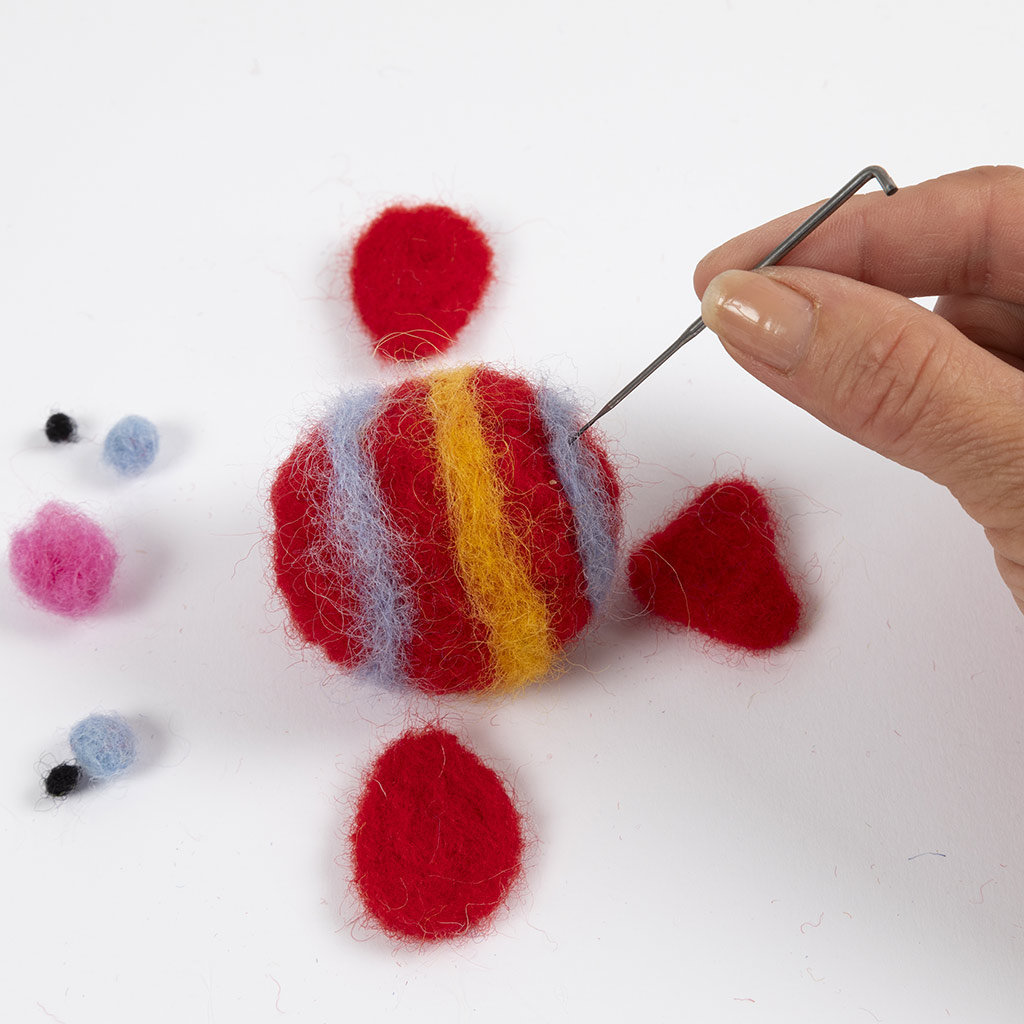
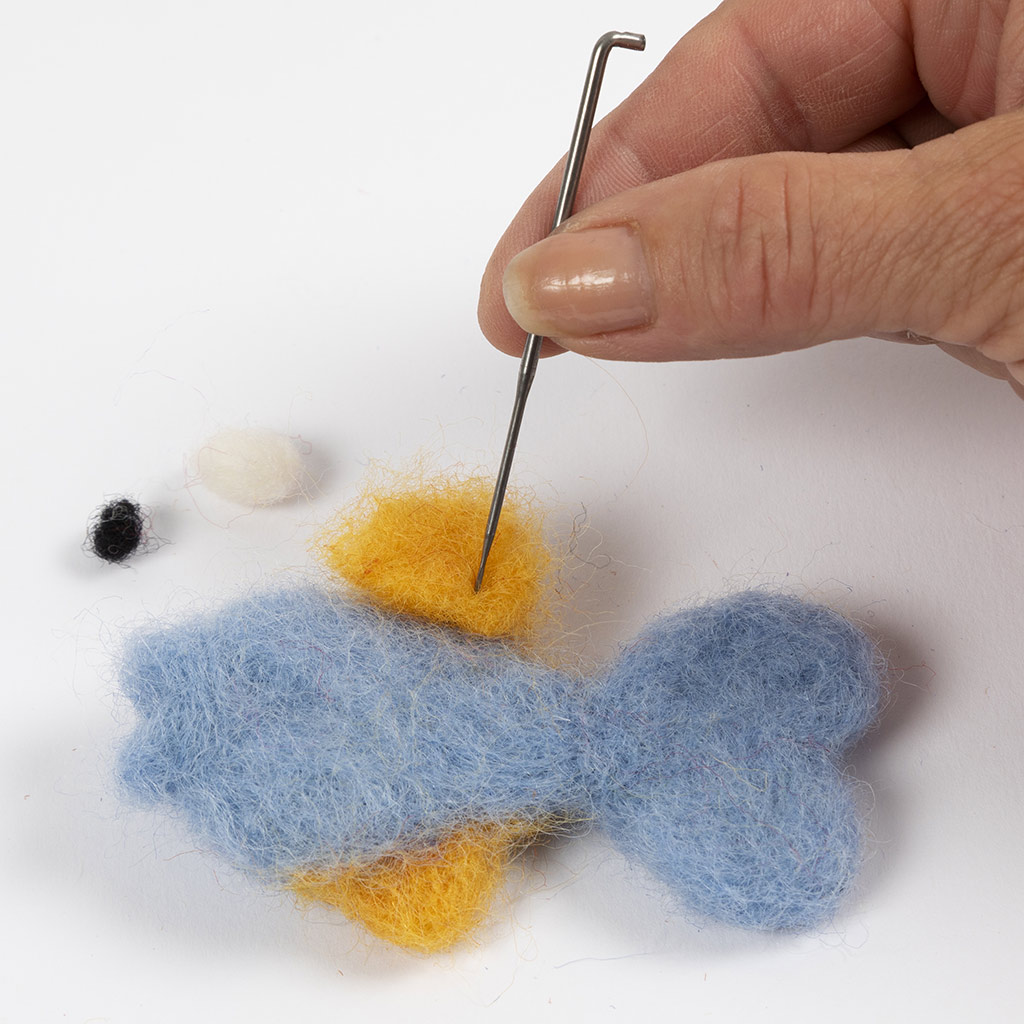
7 Felt a wool ball together for the body. Add some coloured wool for stripes and felt it into the ball. Felt small balls for eyes and mouth.
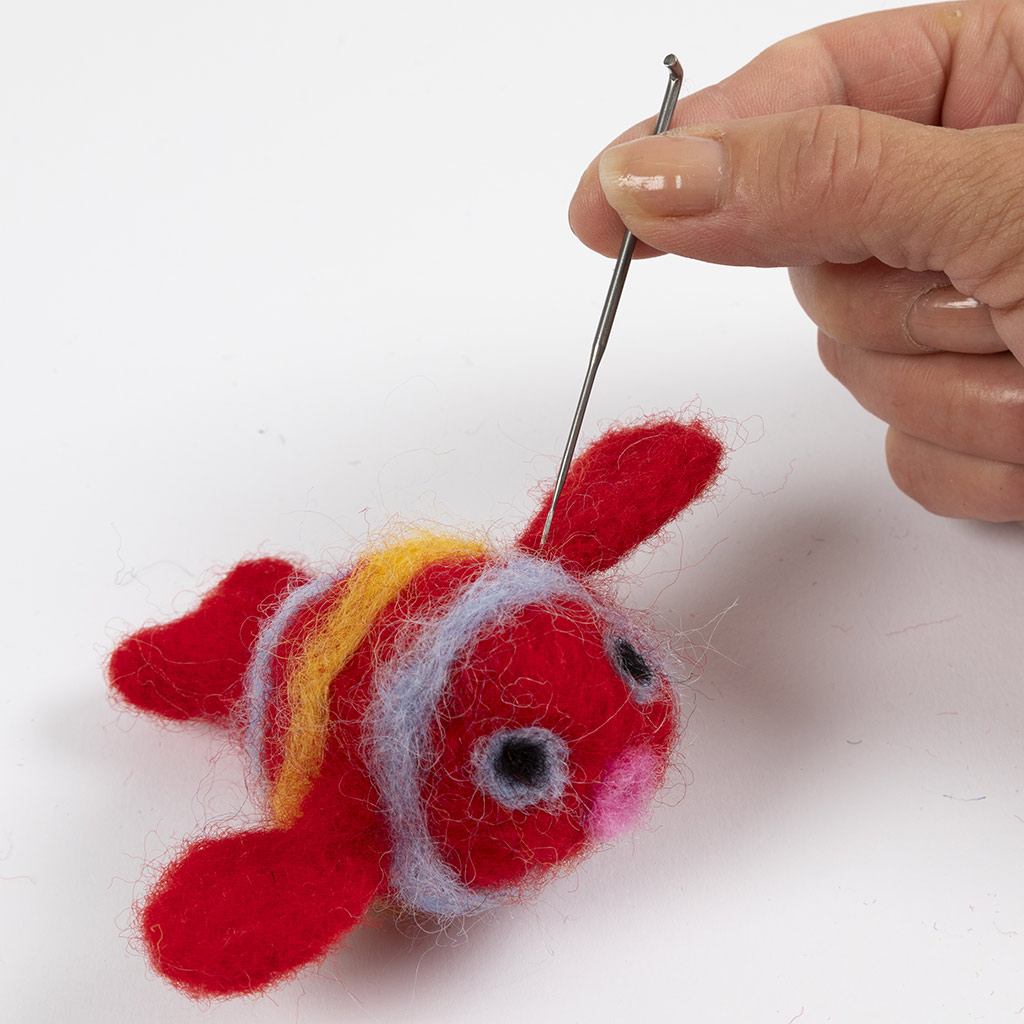
8 Felt tail, fins, eyes, and mouth onto the body.
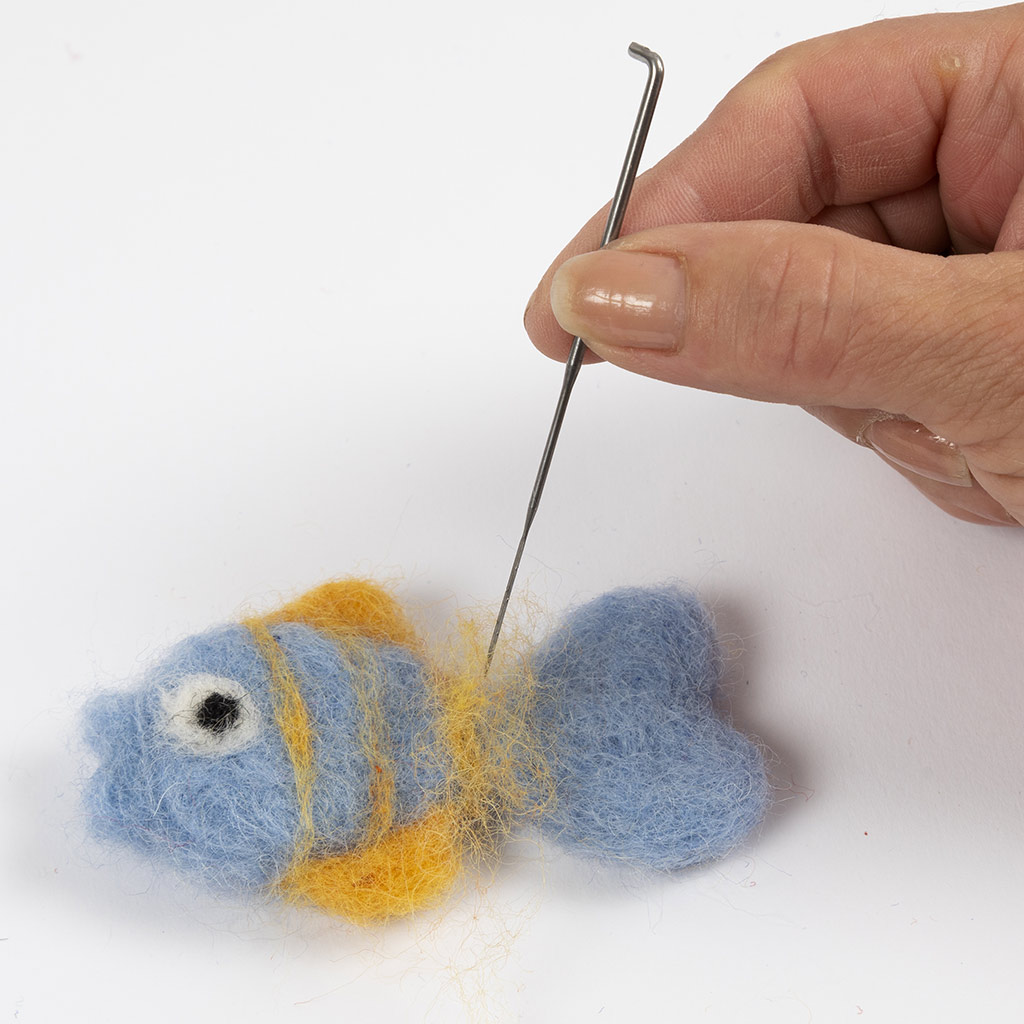
9 Felt the entire tail for the blue fish in the heart shape.
10 Felt a shape for the body, and felt the heart tail on to it.
11 Make fins and eyes as before. Make the mouth by pressing several times into the wool.
12 Felt small pieces of felt in stripes.
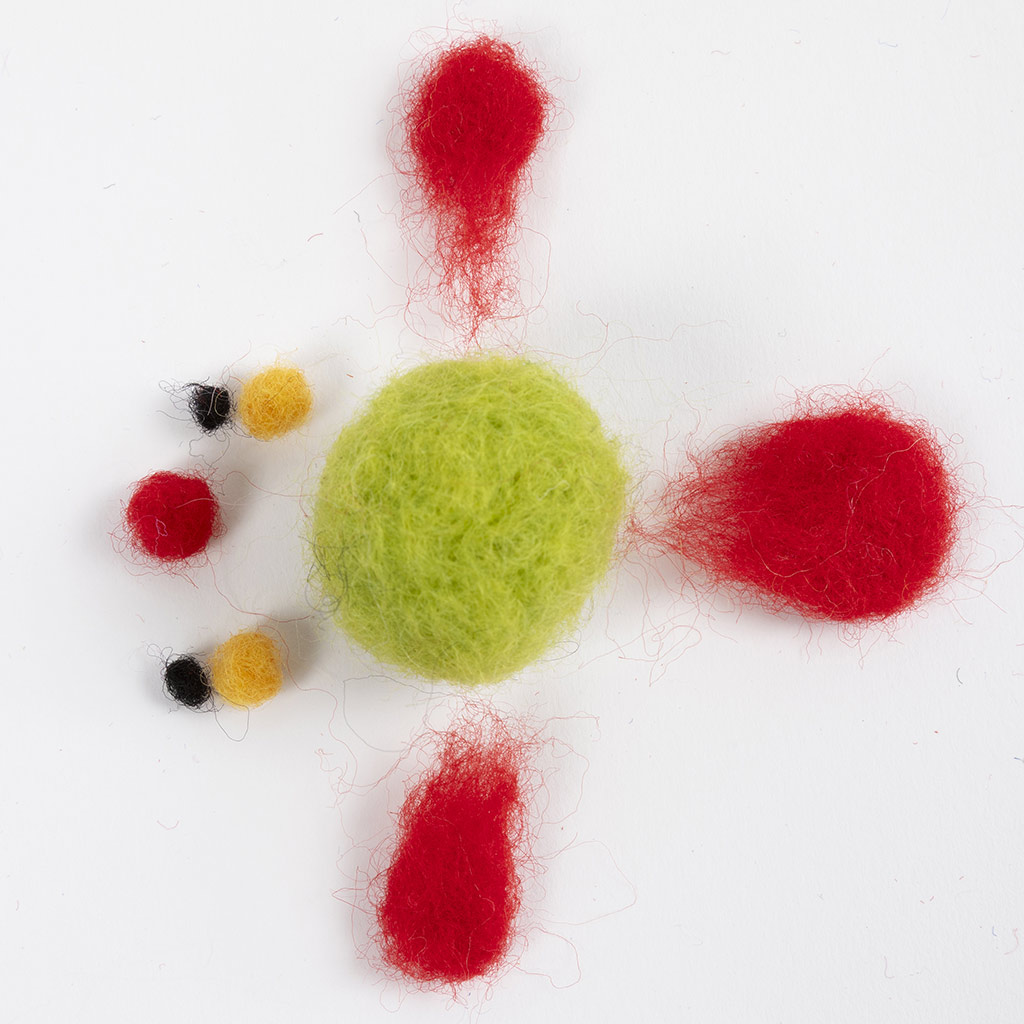
13 Felt parts for the green fish.
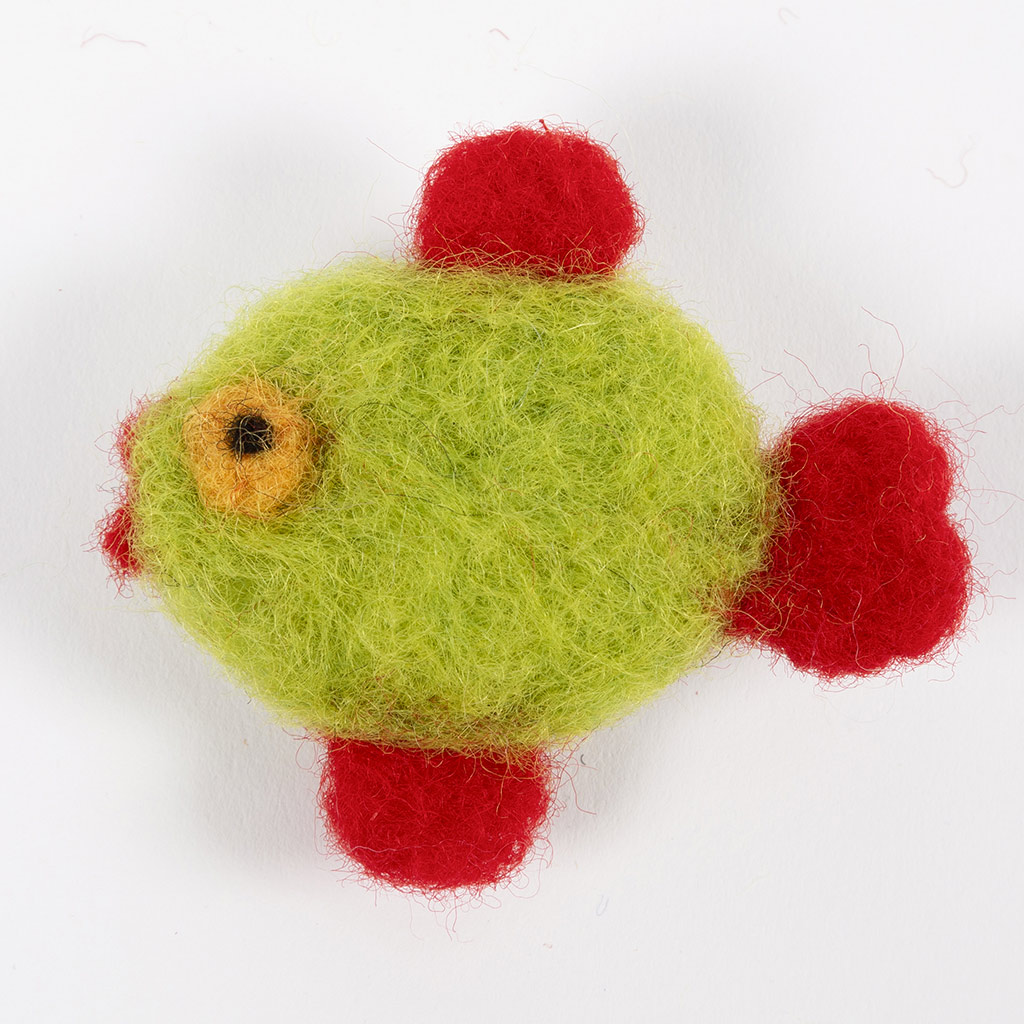
14 Felt the parts together.
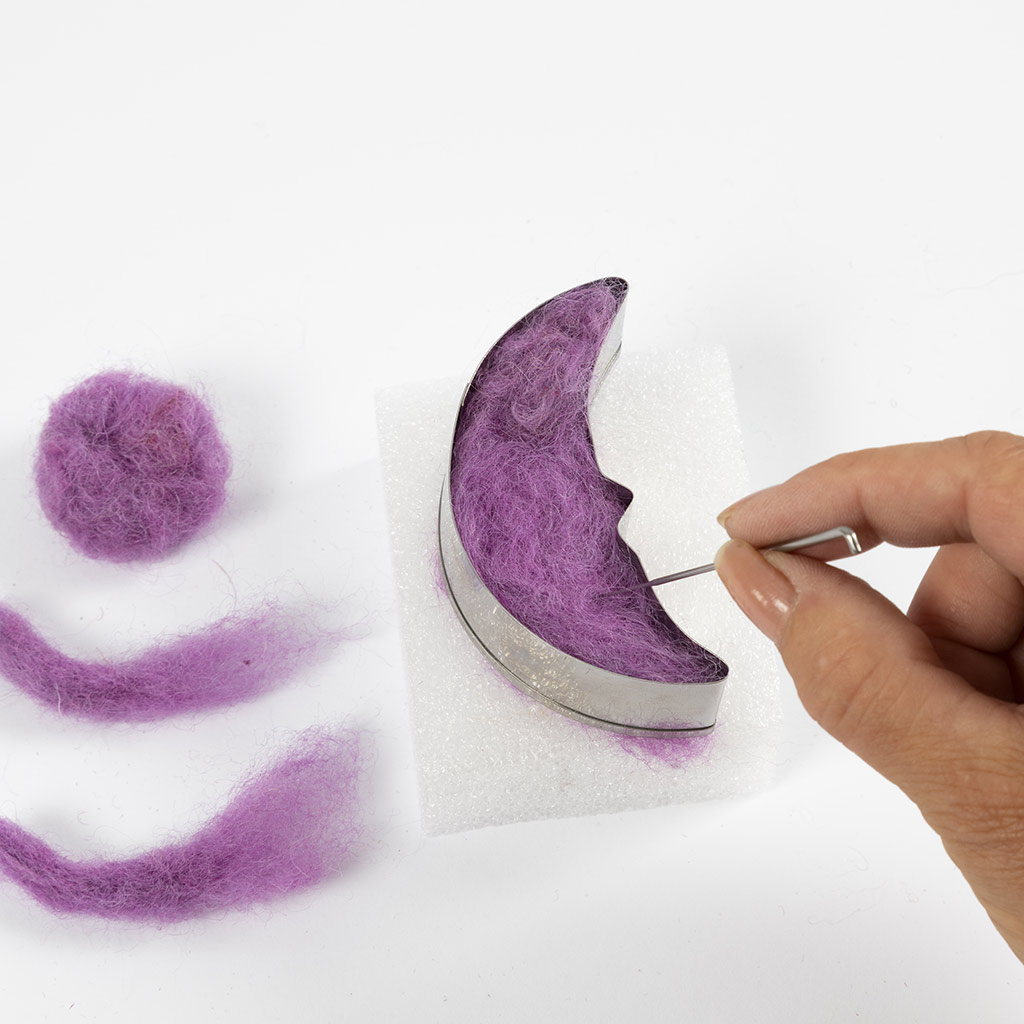
15 Use the moon mould for the seahorse’s body. Stuff the mould completely with wool to make the body thick. Felt a loose ball for the seahorse’s head, and felt a nose and tail in elongated shapes.
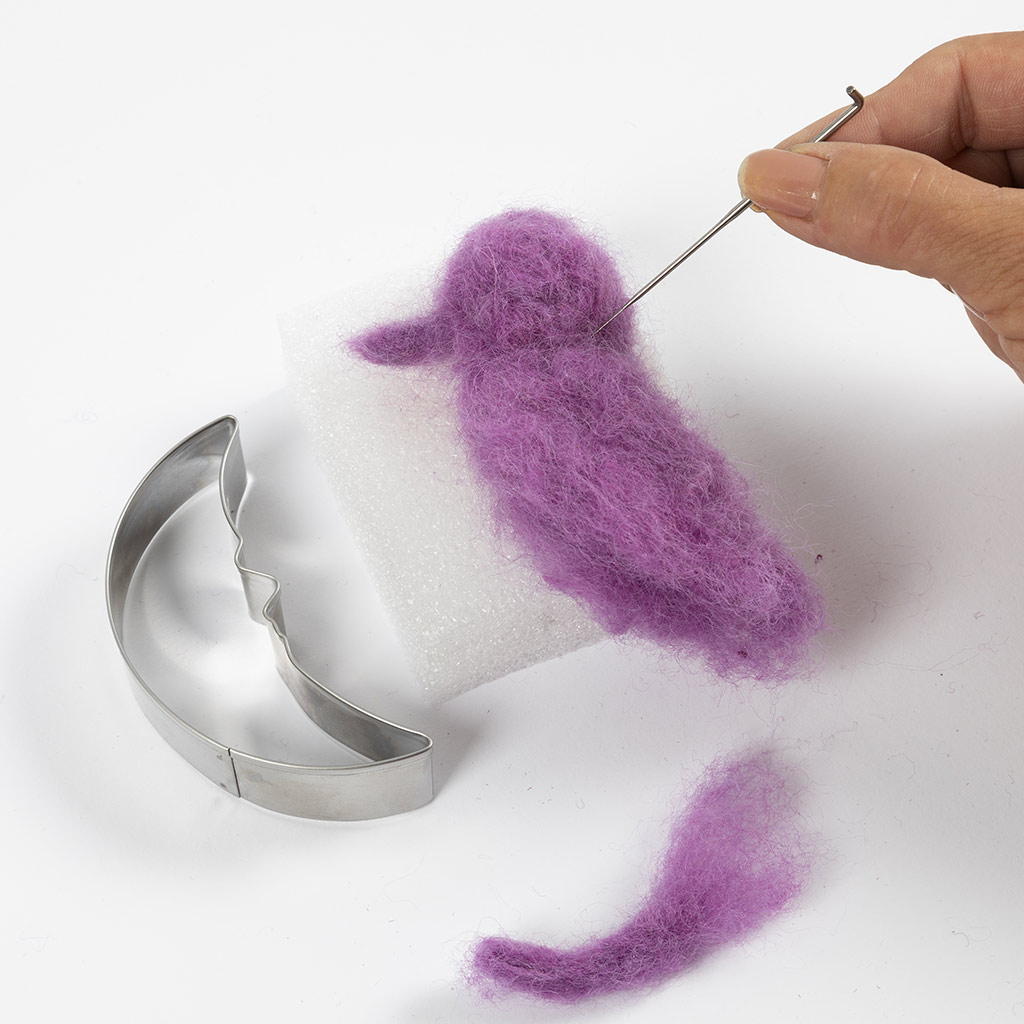
16 Felt the nose on to the head, and felt the head and tail on to the body.
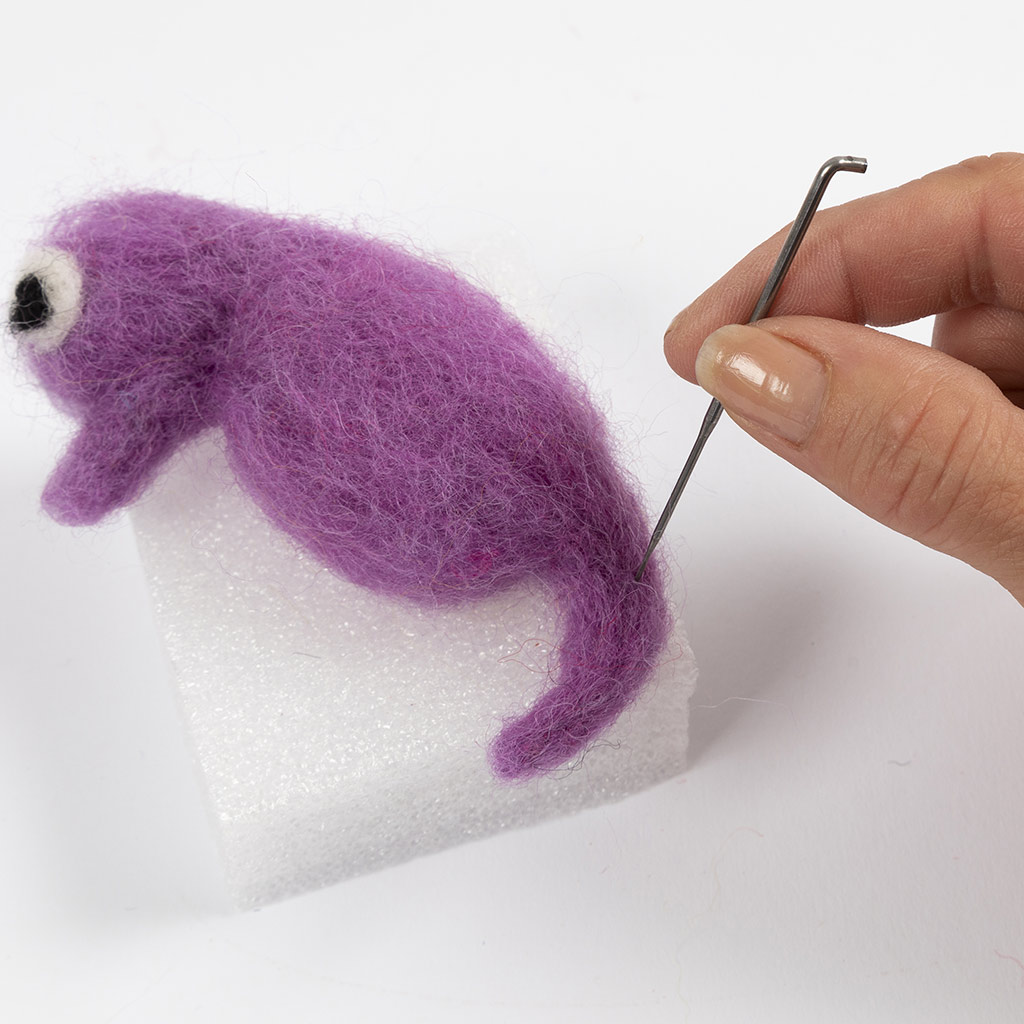
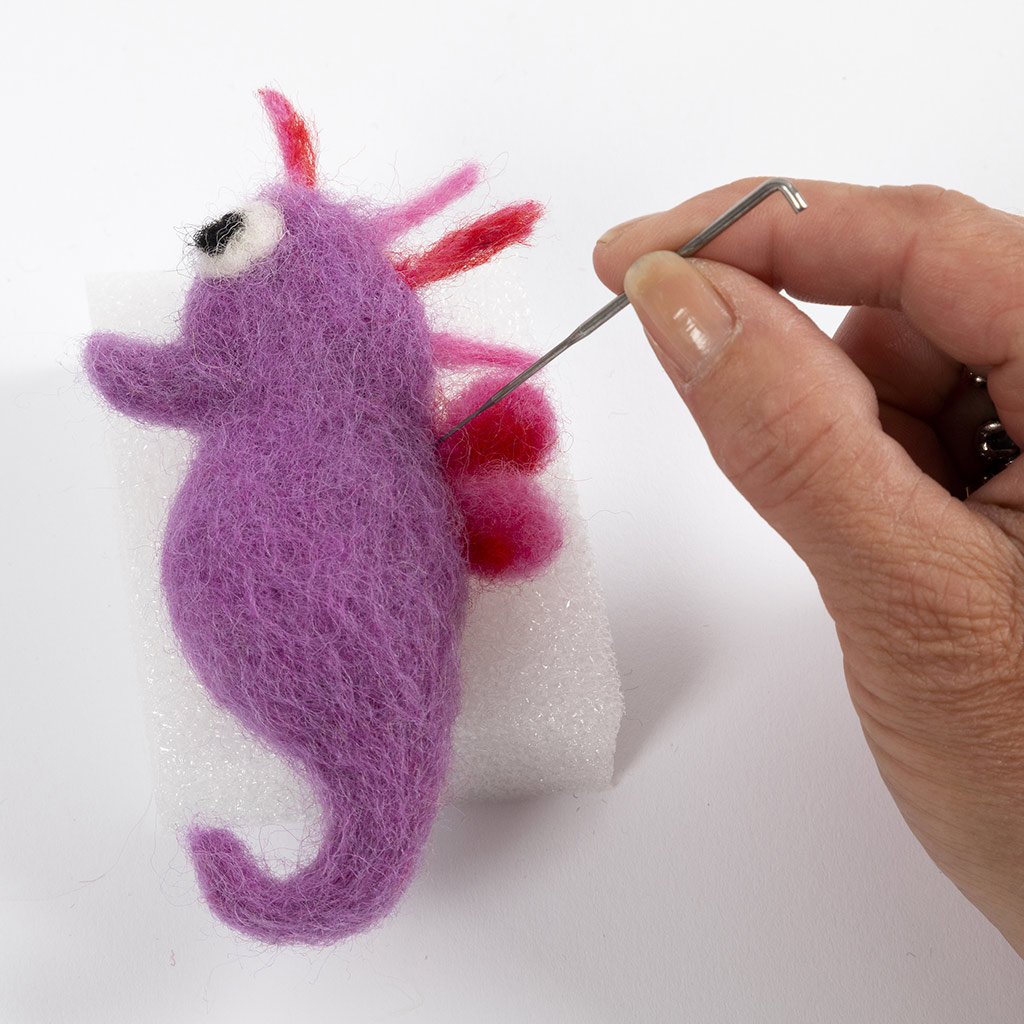
17 Shape the seahorse using the felting needle after all the pieces have been felted on to it. Repeatedly stitch the wool and hold it in the desired shape while doing so. Stuff it with more wool as you go.
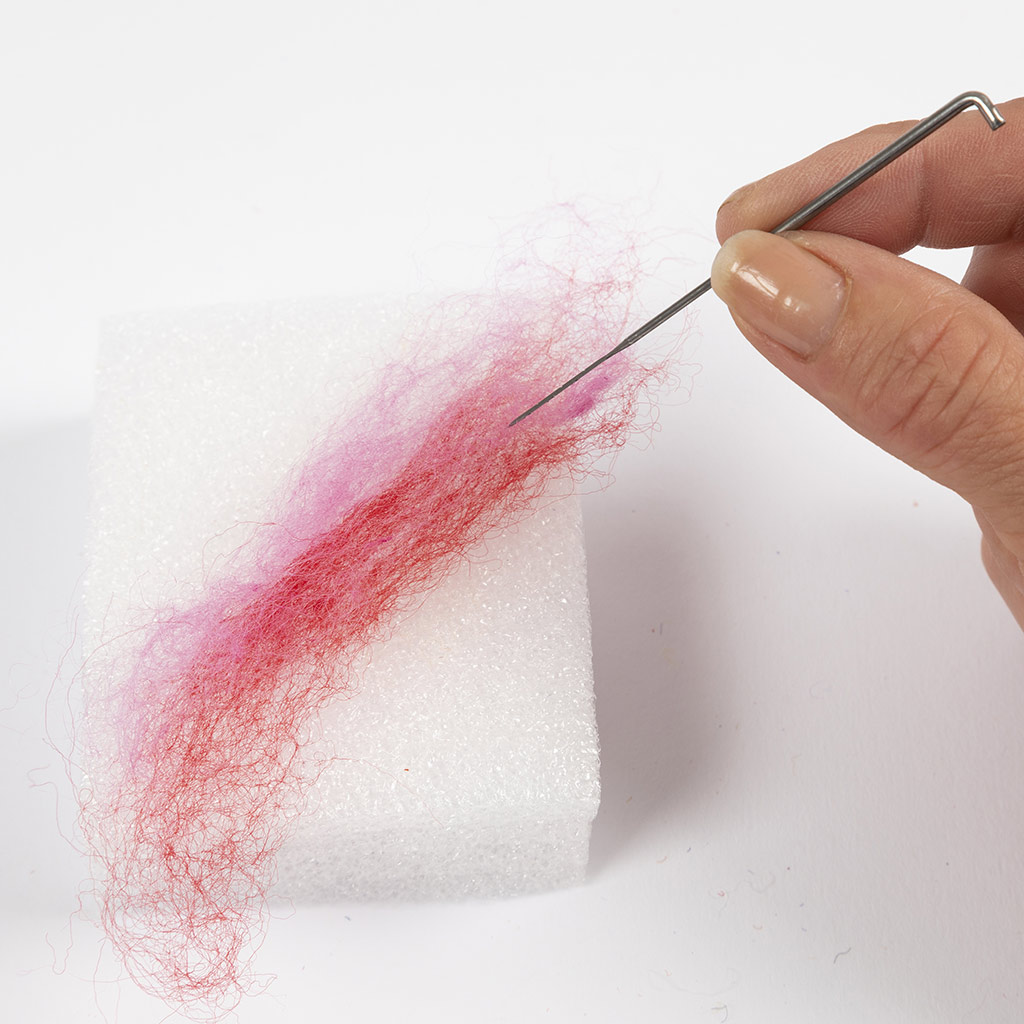
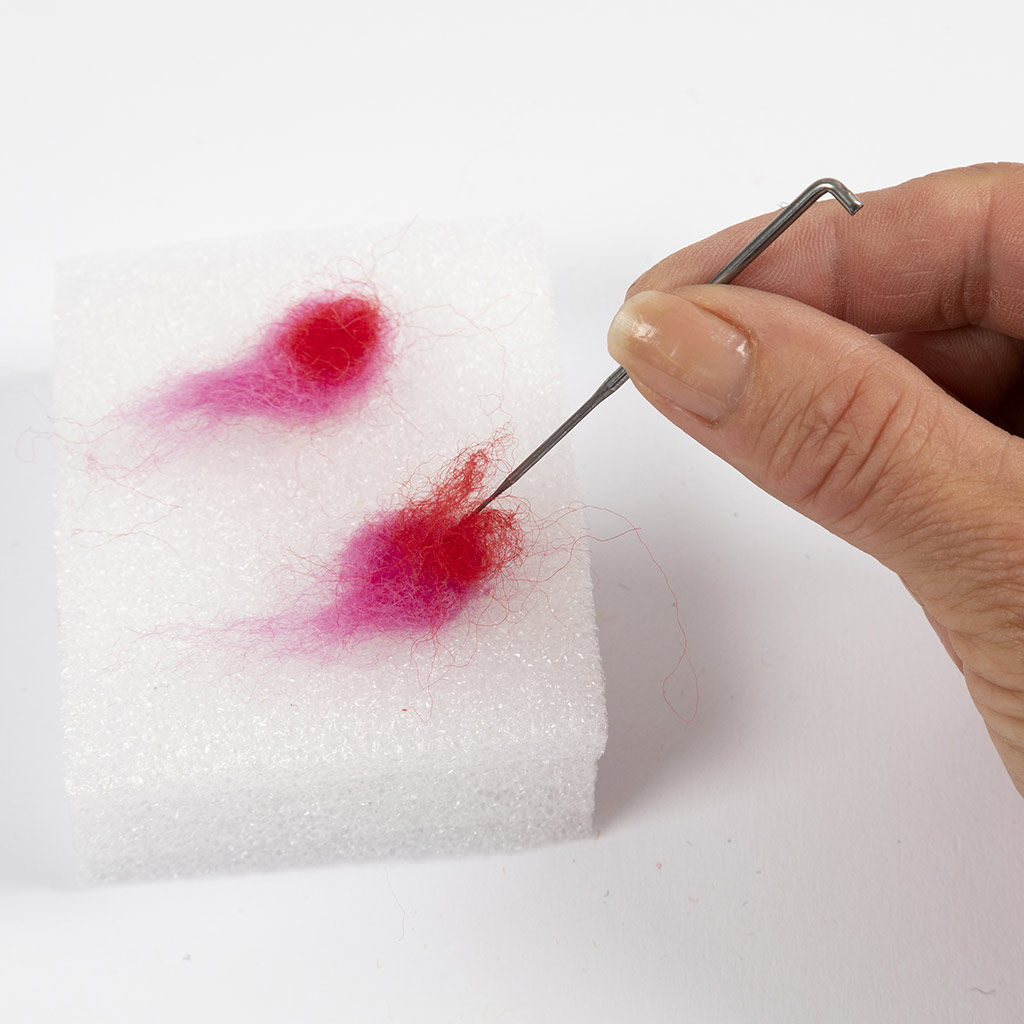
18 Mix two colours of wool for the seahorse's fins. Red and pink are used here.
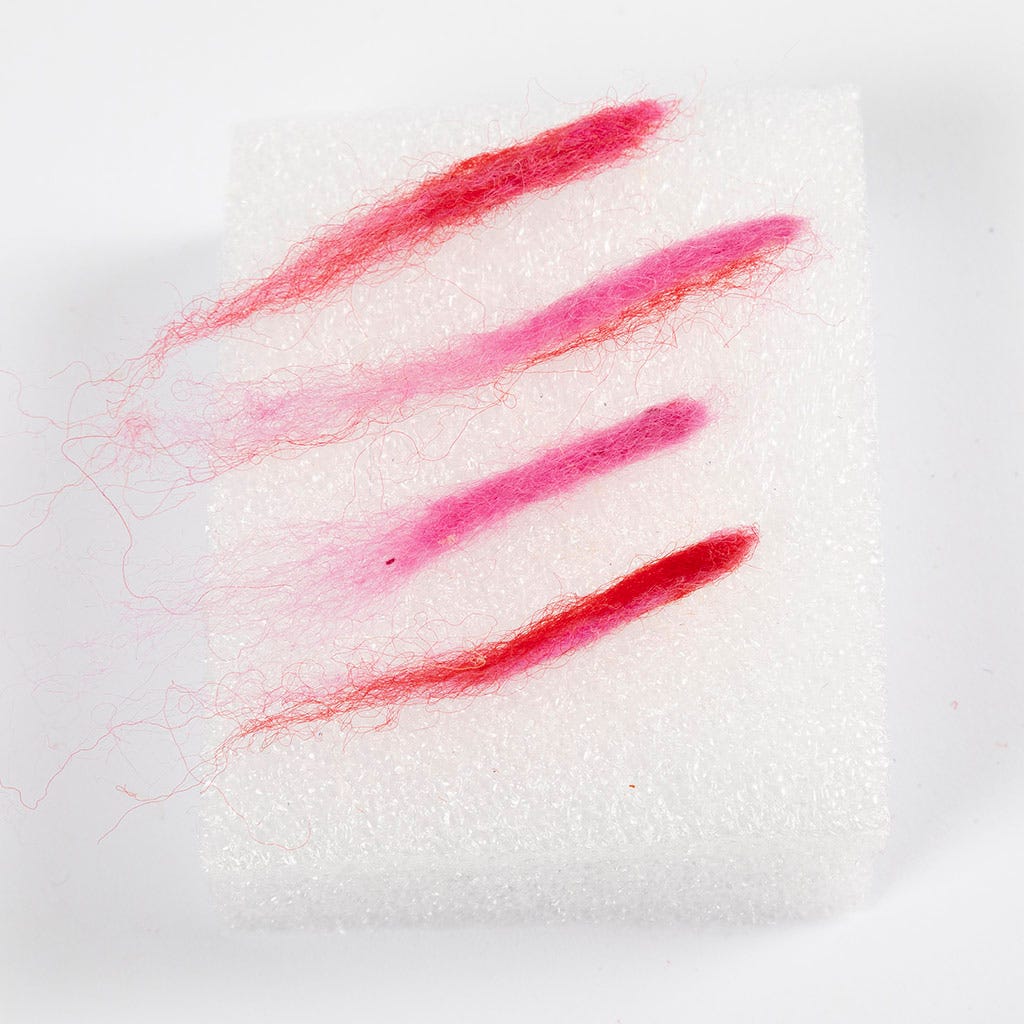
19 Felt four thin pieces, each about 2 cm long. Save some loose wool for felting.
20 Felt small dorsal fins for the seahorse.
21 Felt eyes and fins on to the seahorse’s body.
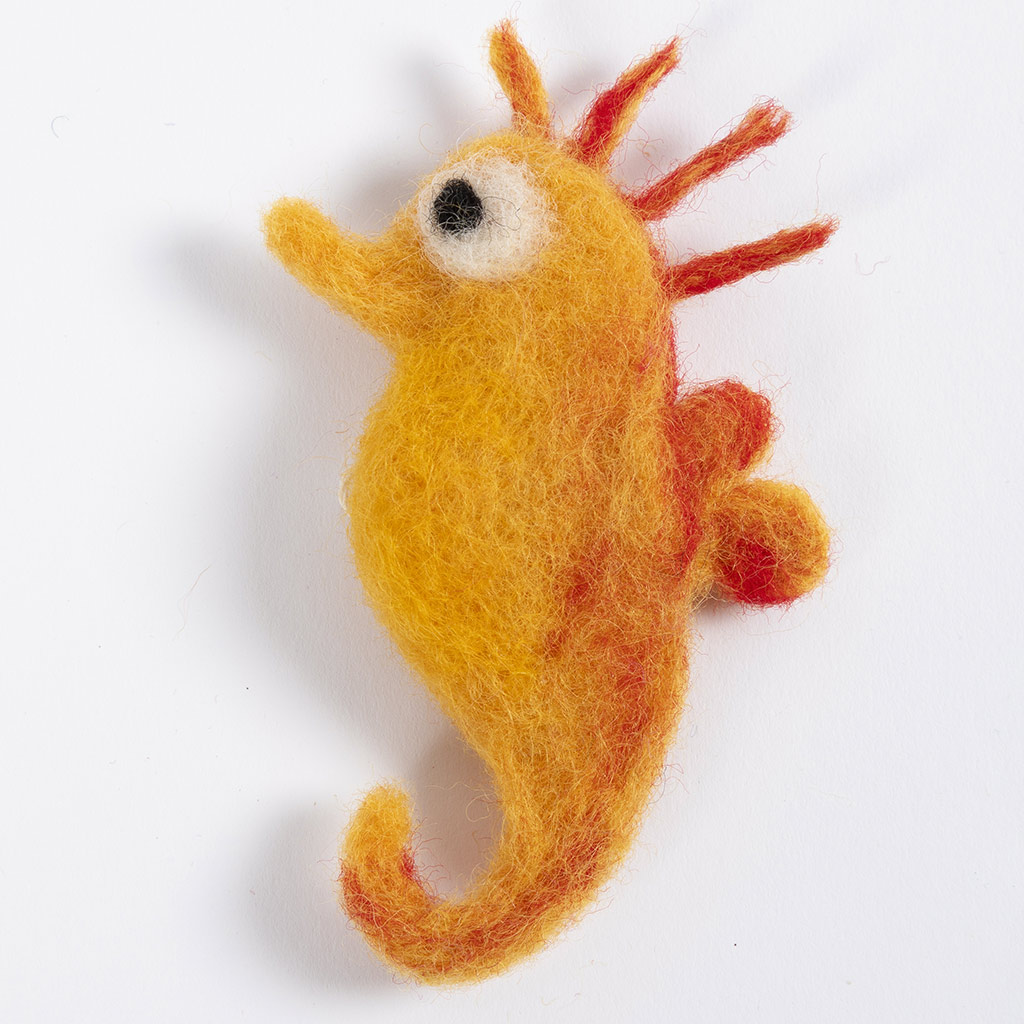
Example Felt a seahorse in mixed yellow and red wool.
Also go exploring in