

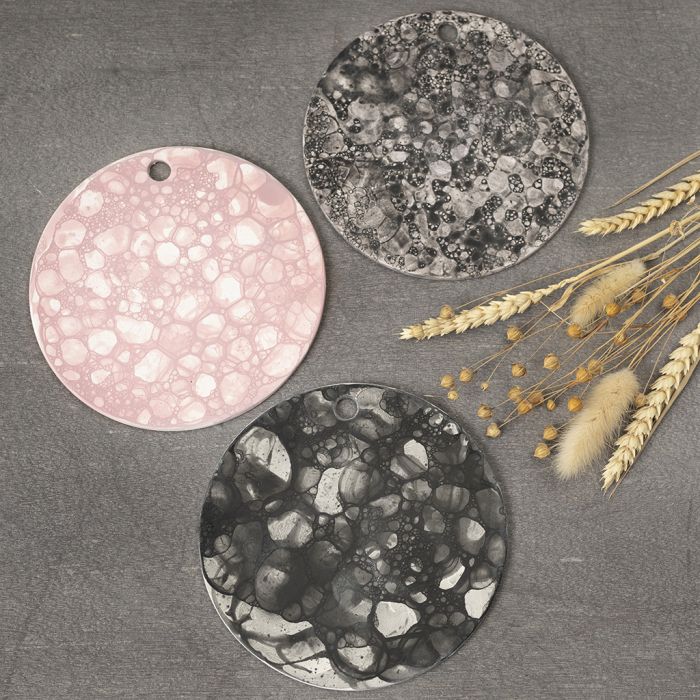
A self-hardening clay plate decorated with the soap bubble technique
#v15958
Make your own plates from white self-hardening clay. Decorate the plate with Plus Color craft paint mixed with water and washing up liquid. Blow the mixture with a straw to make bubbles and blow these over the plate.
#v15958
How to make it
1  Roll out the clay using two 8 mm round wooden sticks to achieve the same thickness of the plate (i.e. 8 mm). The clay must be min. 7 mm thick.
2  Place the attached template on top of the clay and cut out.
3  Remove the excess clay.
4  Dip the modelling tool in water and smooth out the edge.
5  Make a hole for hanging and leave to dry. Turn the plate over a couple of times whilst drying. Drying time is approx. 48 hours depending on the room temperature. You may place it near a radiator for drying.
A tip: If small cracks appear in the clay once dry, you can repair these by mixing a small amount of clay with a bit of water to form a creamy consistency. Fill the cracks with the mixture, preferably with a brush. Leave to dry. Any uneven areas on the plate can be sanded smooth with a sanding sponge or with fine sandpaper.
Make a hole for hanging and leave to dry. Turn the plate over a couple of times whilst drying. Drying time is approx. 48 hours depending on the room temperature. You may place it near a radiator for drying.
A tip: If small cracks appear in the clay once dry, you can repair these by mixing a small amount of clay with a bit of water to form a creamy consistency. Fill the cracks with the mixture, preferably with a brush. Leave to dry. Any uneven areas on the plate can be sanded smooth with a sanding sponge or with fine sandpaper.6  Bubble technique:
Mix 1 part washing up liquid with 2 parts water and a couple of drops of Plus Color craft paint.
Bubble technique:
Mix 1 part washing up liquid with 2 parts water and a couple of drops of Plus Color craft paint.7  Mix well.
8  Blow into the mixture with a straw. The mixture needs to bubble a lot. Practice the technique and check if the mixture bubbles sufficiently. Too much paint in the mixture may reduce the amount of bubbles. Make a couple of bubble tests with the straw, for example onto a piece of card, before blowing the mixture onto the plate. You may blow more bubbles onto the plate when the first layer is dry.
9  Raise the plate, for example on a glass. Blow lots and lots of bubbles onto the plate. Avoid tipping the glass when blowing bubbles. It is important that only bubbles fall onto the plate.
10  Let the bubbles burst by themselves.
11  Leave to dry and the plate is finished.
12  Here is the mixture made with black Plus Color craft paint.
13  Here we have used two colours for the bubbles. First blow with Dusty Rose Plus Color craft paint. Leave to dry and then blow bubbles with black Plus Color craft paint.
Template  -
-Free Step-by-Step Guide
Sign up to our newsletter and get access to this creative idea – plus plenty of inspiration, news and great offers delivered straight to your inbox. You can unsubscribe at any time.
Already subscribed? View the guide
Read our Privacy Policy
Also go exploring in
